Since buying the Porsche Boxster S, I had not done a coolant flush. After driving it for about 1200 miles in the last 2 years, one day I saw the engine overheating light blink on the dash. Turns out there was a major coolant leak and it was causing the engine to overheat. The Boxster has 142,000 miles on it and the leak meant several possible things &emdash; damaged hoses, failing water pump or cracked coolant tank.
To determine the correct cause of the coolant leak, I needed to conduct a coolant pressure test. This post demonstrates how easy this test is and how to go about doing it.
Source of Coolant Leaks
There are many sources of a coolant leak in a 986 Boxster, but the most common are:
- Coolant pump or water pump failure
- Thermostat failure
- Hoses have cracks or are loosely attached
- Coolant overflow tank has cracked
To check for these you need to conduct a coolant pressure test without running the engine.
Tools and Materials Needed
Here are the tools and materials you need to perform a pressure test in your coolant.
Radiator Pressure Test Kit - Amazon link, HarborFreight link
I purchased a radiator pressure kit from HarborFreight (Figure 1) since it is close to where I live, but Amazon may have better deals for you and allows easier returns once you have completed the test !
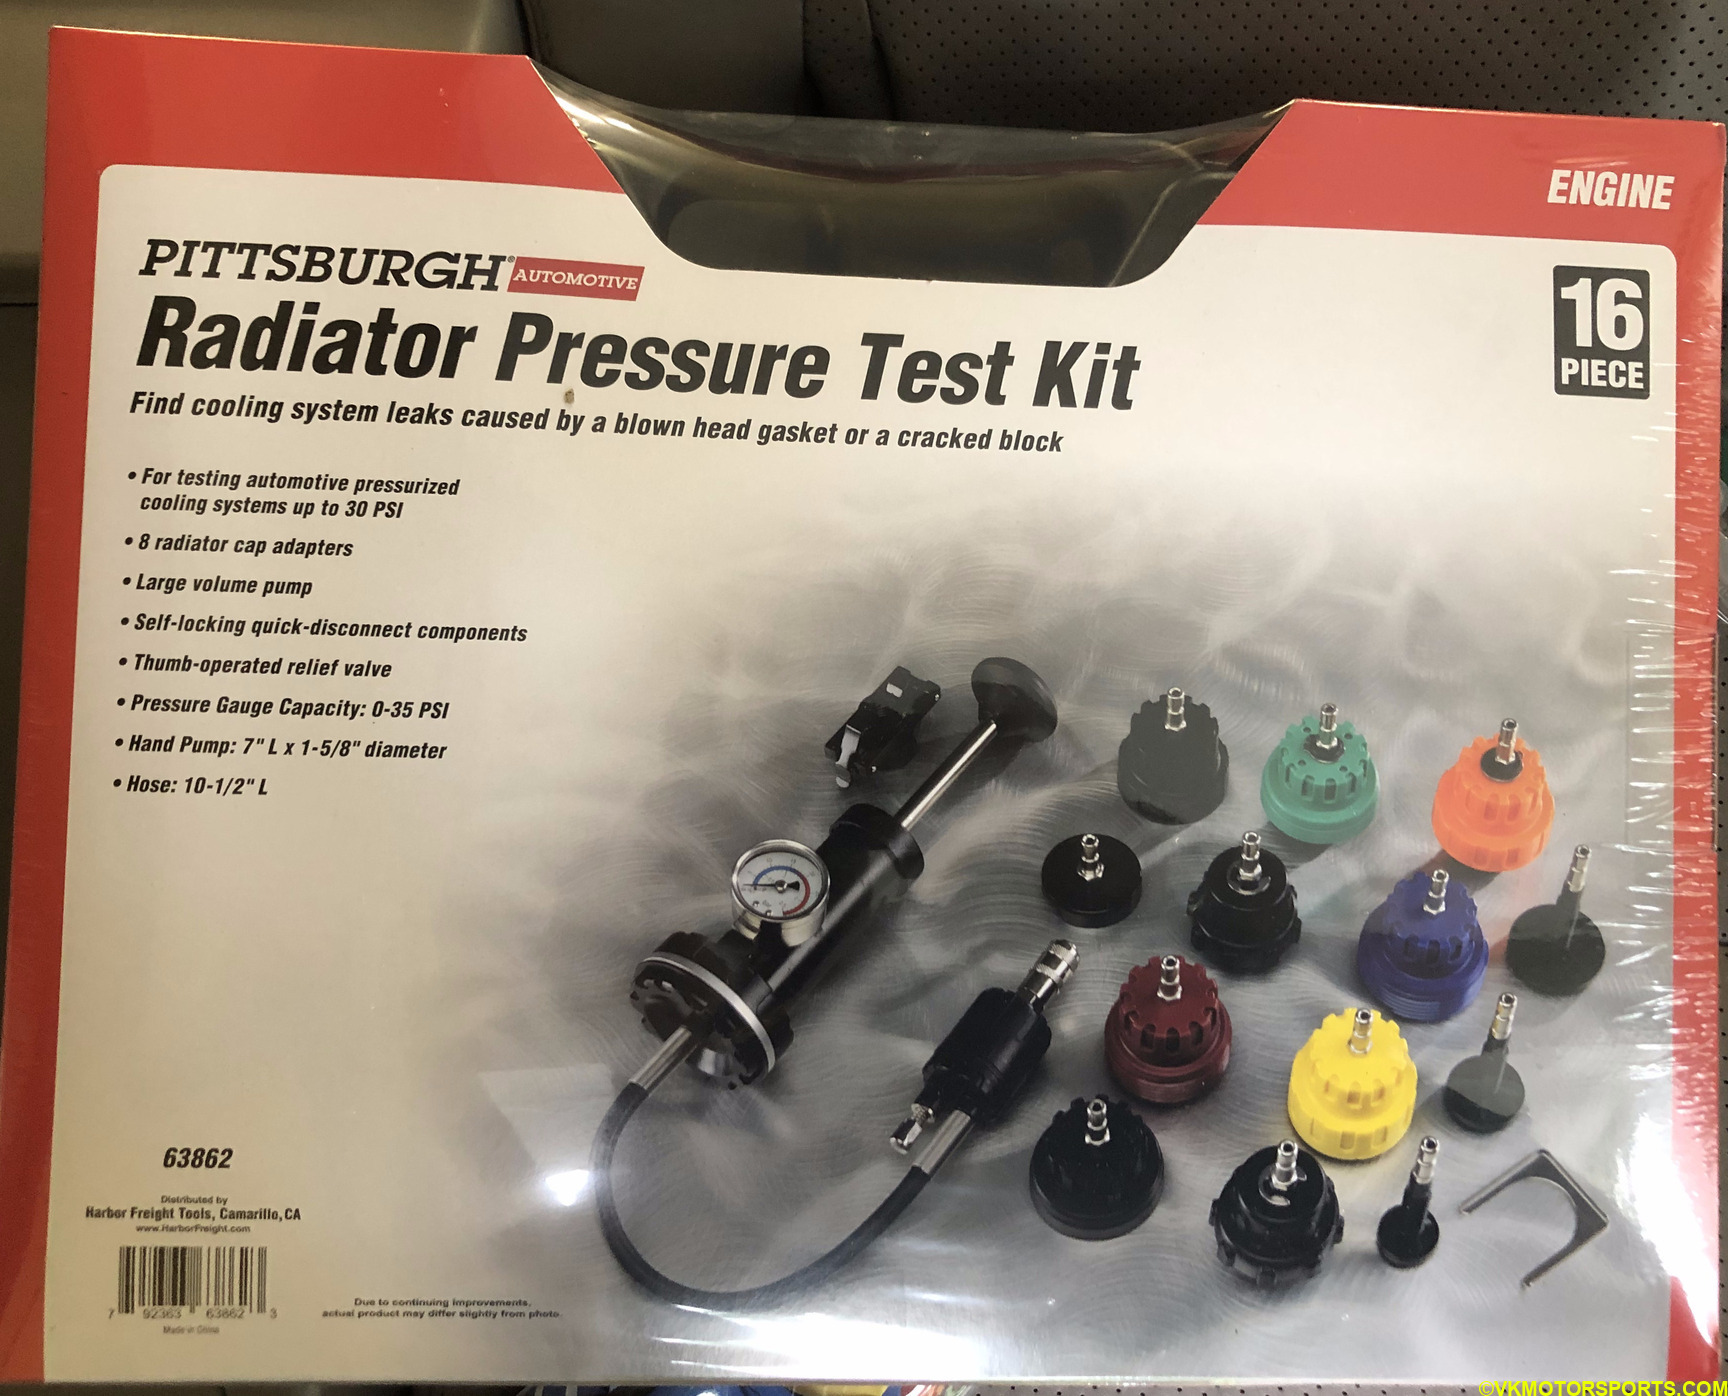 Figure 1. Radiator Pressure Test Kit
The pressure test kit carries several sized caps for the coolant or radiator tanks in a car so that the kit is compatible with several cars. For the Boxster 986, you need to select the correct fitting cap which is number 7 in Figure 2.
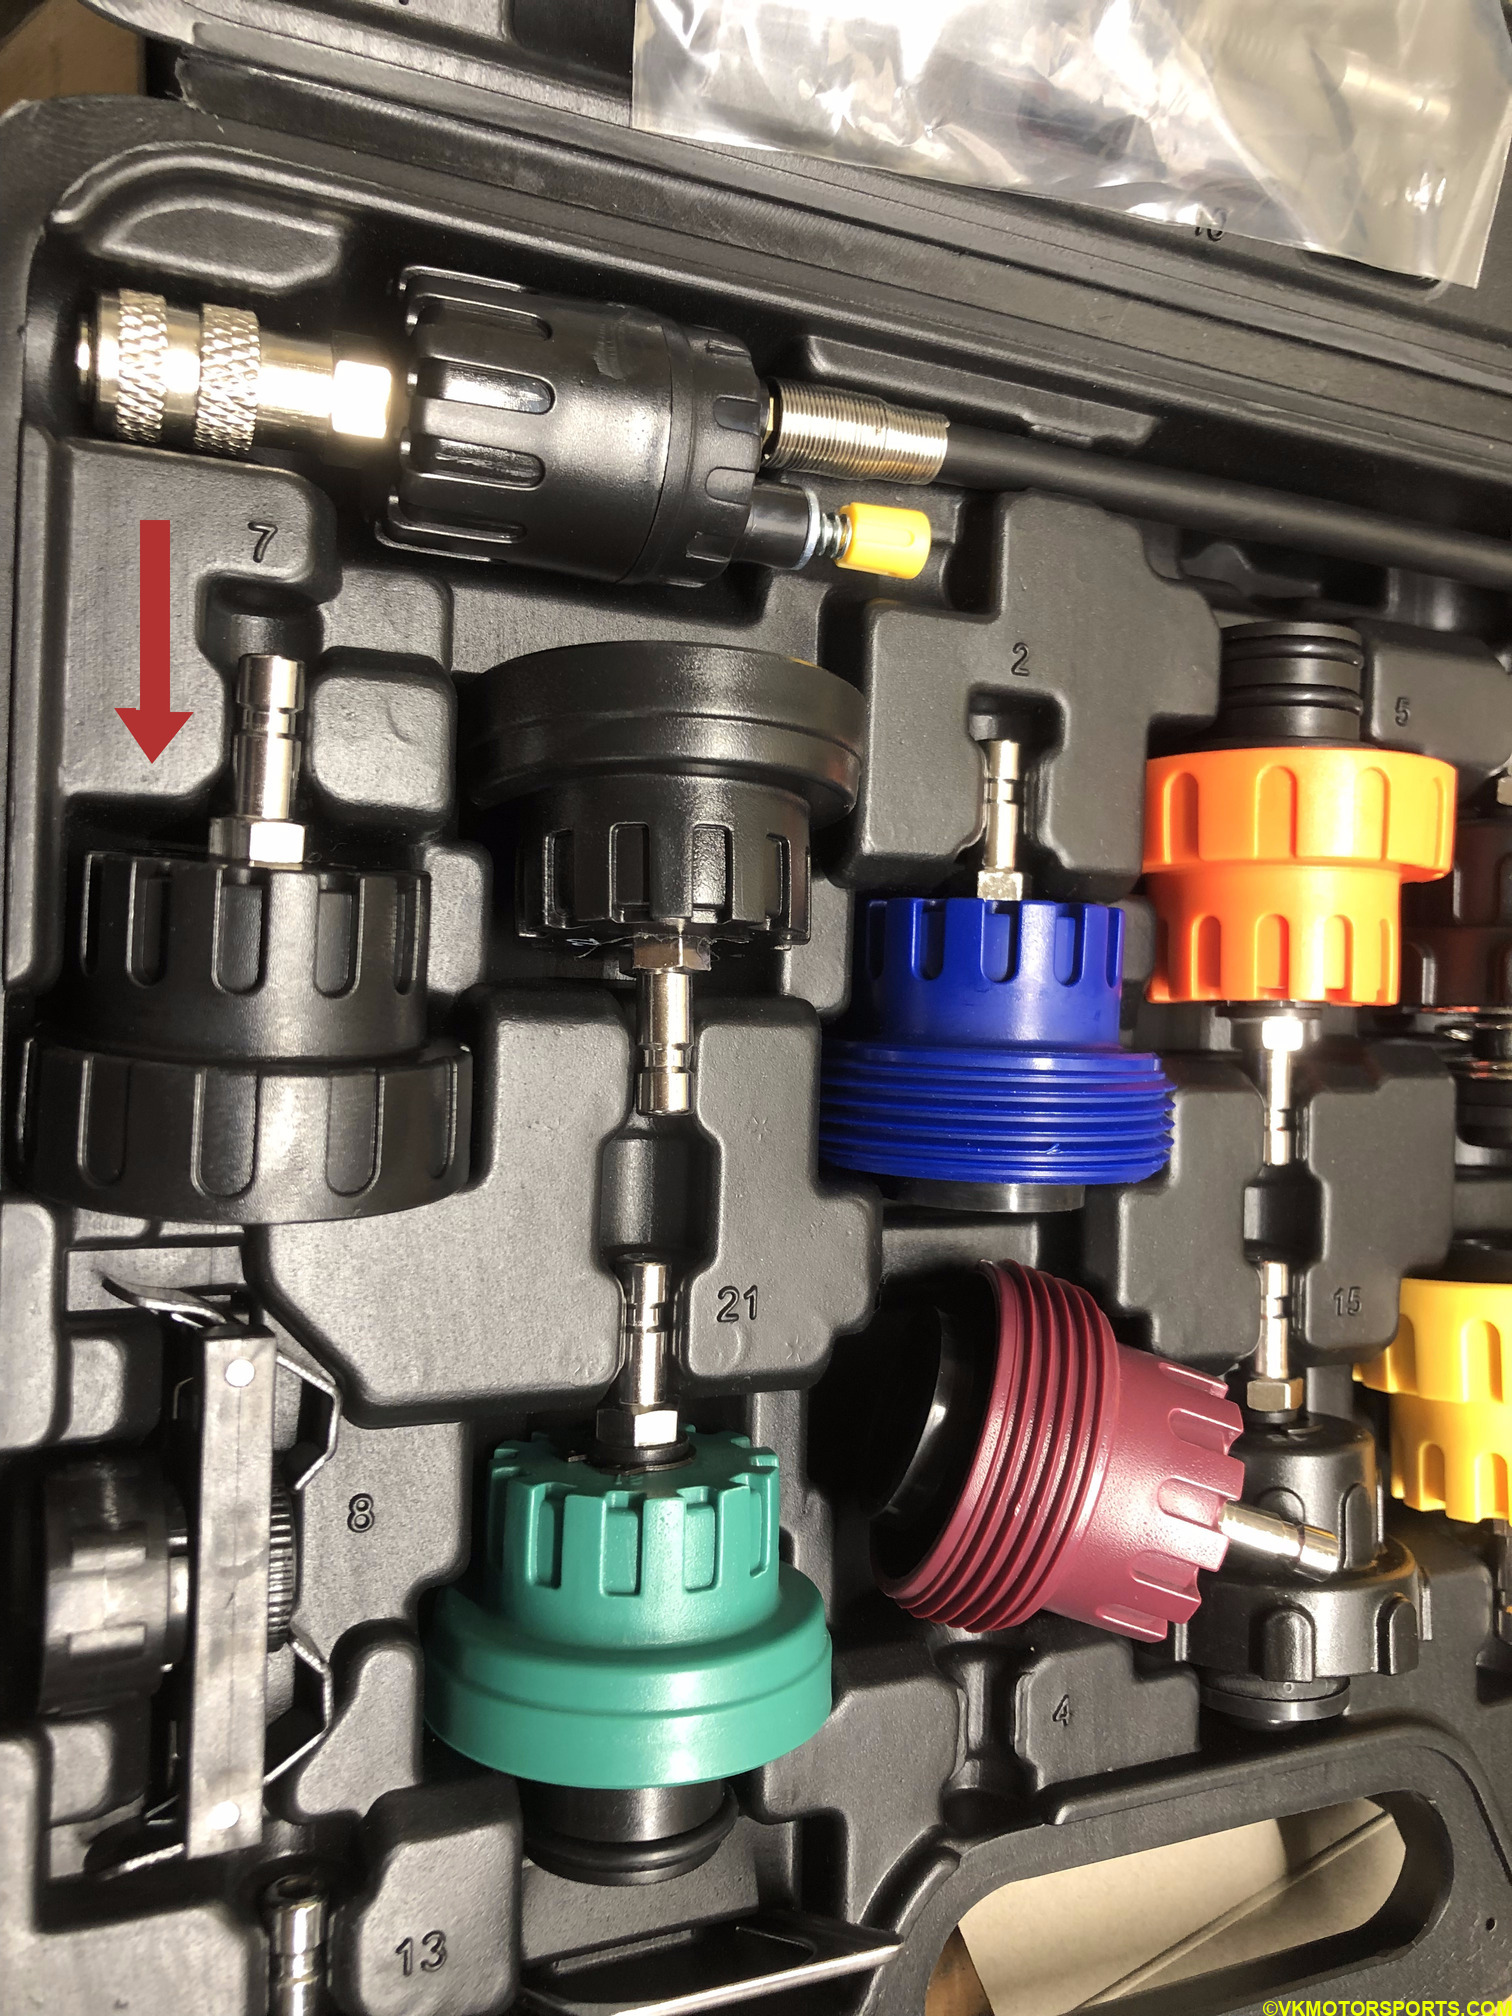 Figure 2. Pressure Cap to use for Boxster
The other main item in the radiator pressure test kit is the hand pump (Figure 3) that attaches one end to the cap and can create pressure in the coolant system as though an engine was running warm.
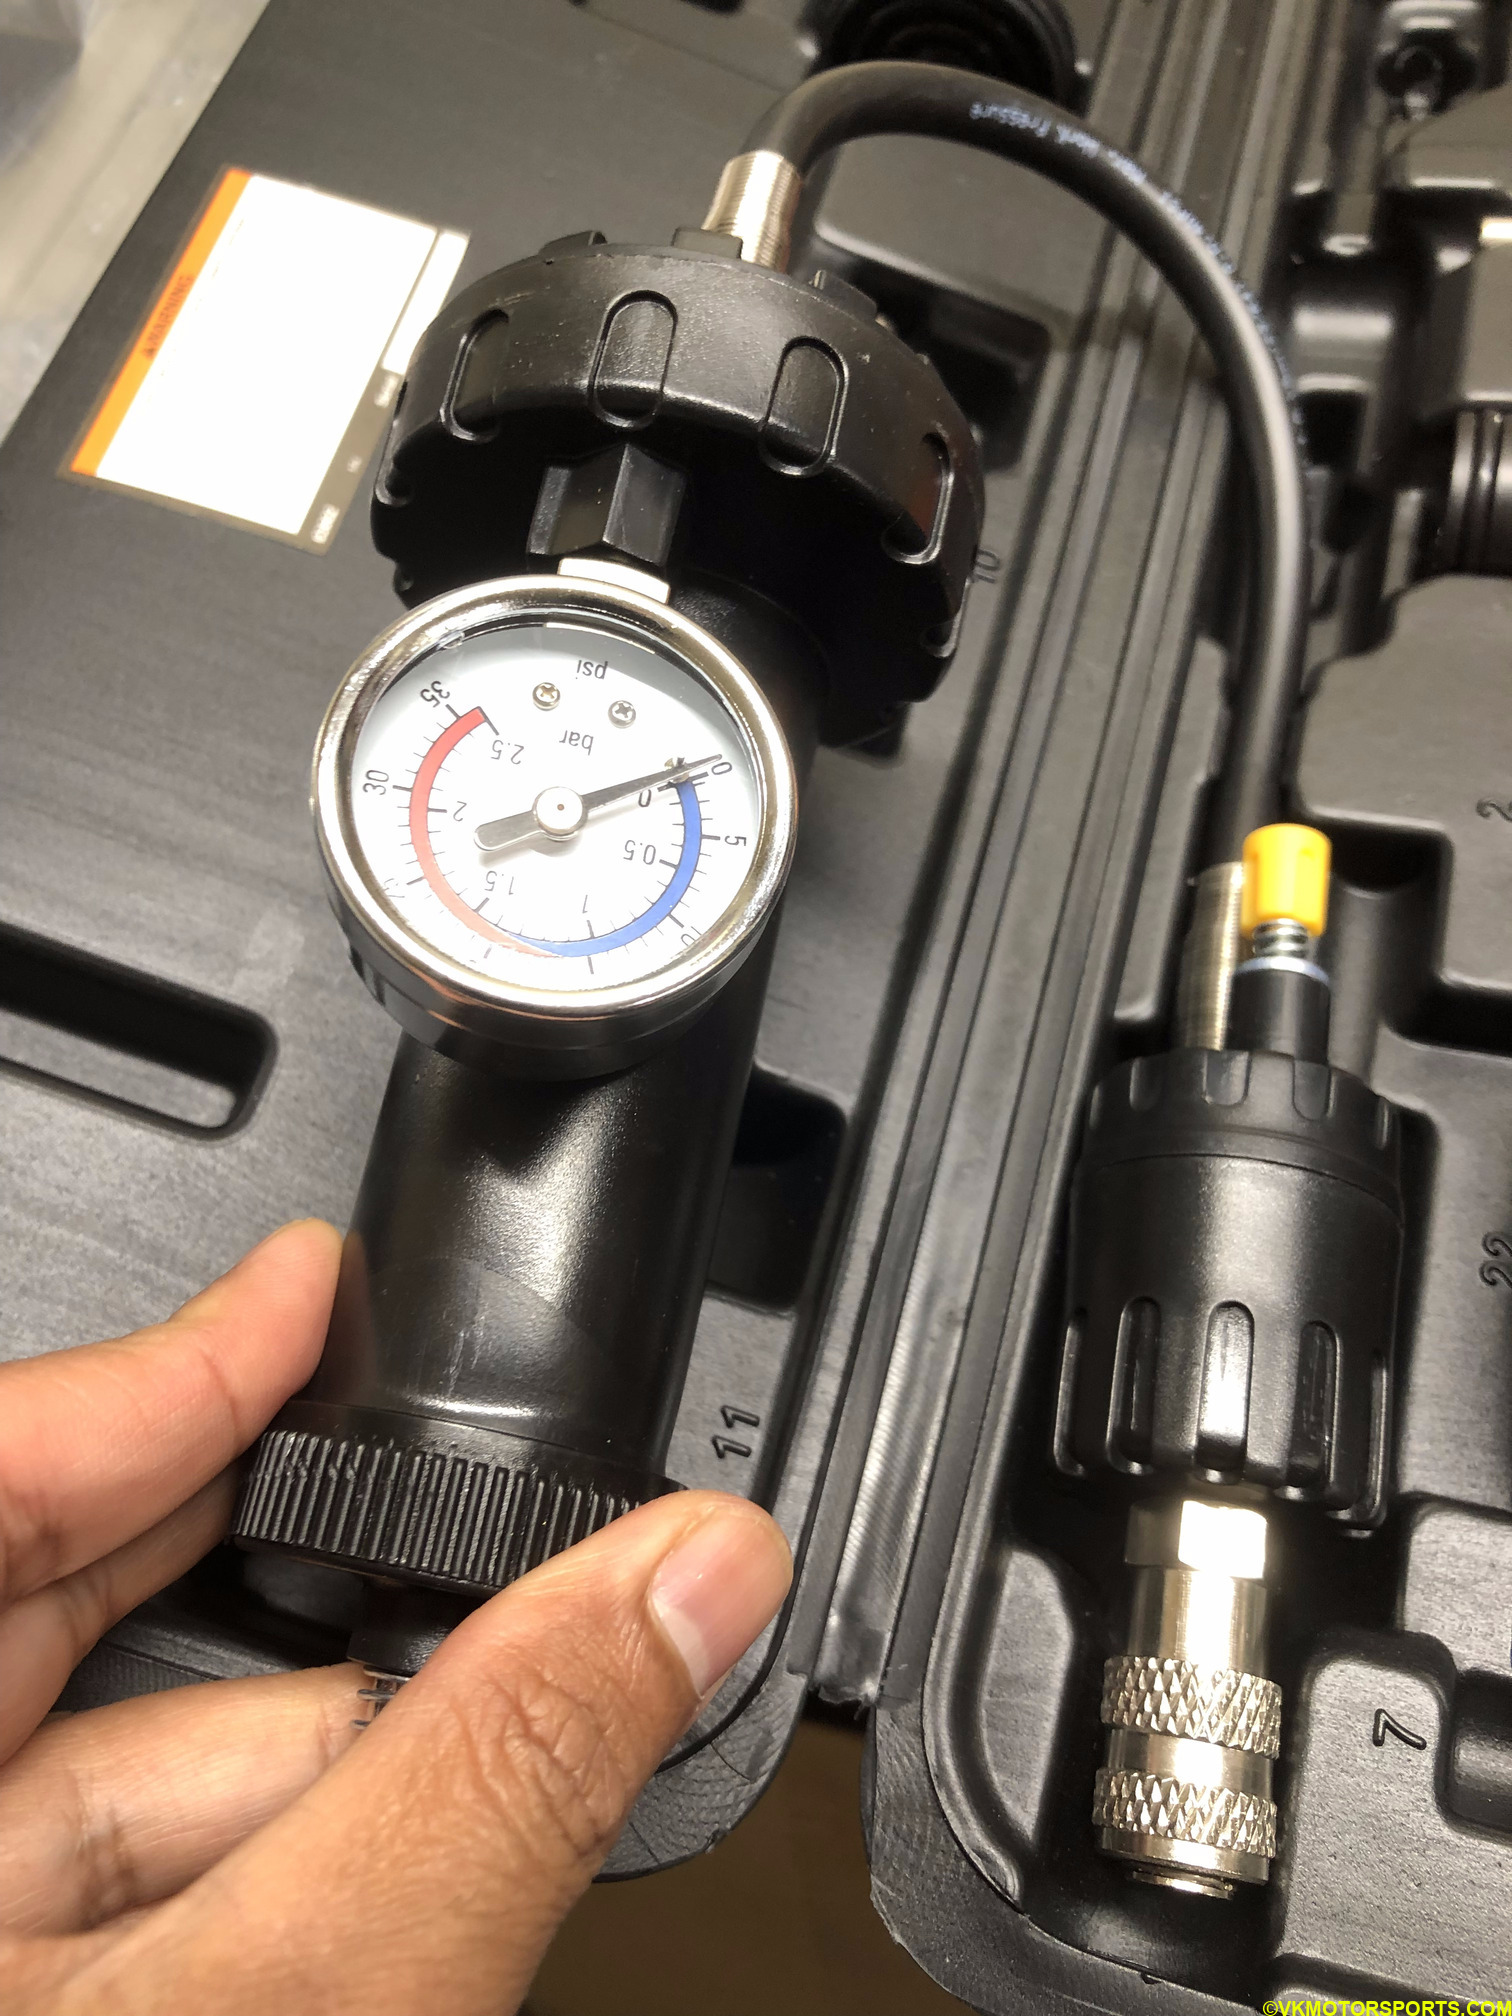 Figure 3. Hand Pump in the kit
Distilled Water 1-3 Gallon jugs - Amazon link or from your local automotive or grocery store
While performing the leak test, if a few gallons of your coolant has already leaked out like mine did, you can use cheap distilled water instead to perform the test. In the 986 Boxster, the pink G40 coolant is very expensive, anything between 40$ per gallon to 68$ per gallon depending on where you purchase it from and whether you use the original Porsche brand or some after-market brand. You also need to mix the Porsche coolant in a 50/50 ratio with distilled water before using it in your Boxster. To avoid such monetary loss, using just plain distilled water is a perfect substitute for performing the test.
Performing the Pressure Test
Make sure you perform this test when your engine is cold.
Step 1: Remove the carpeting and padding materials around the coolant overflow tank (Figure 4) in the trunk. Fill up the coolant overflow tank with distilled water till the MAX level indicator is reached.
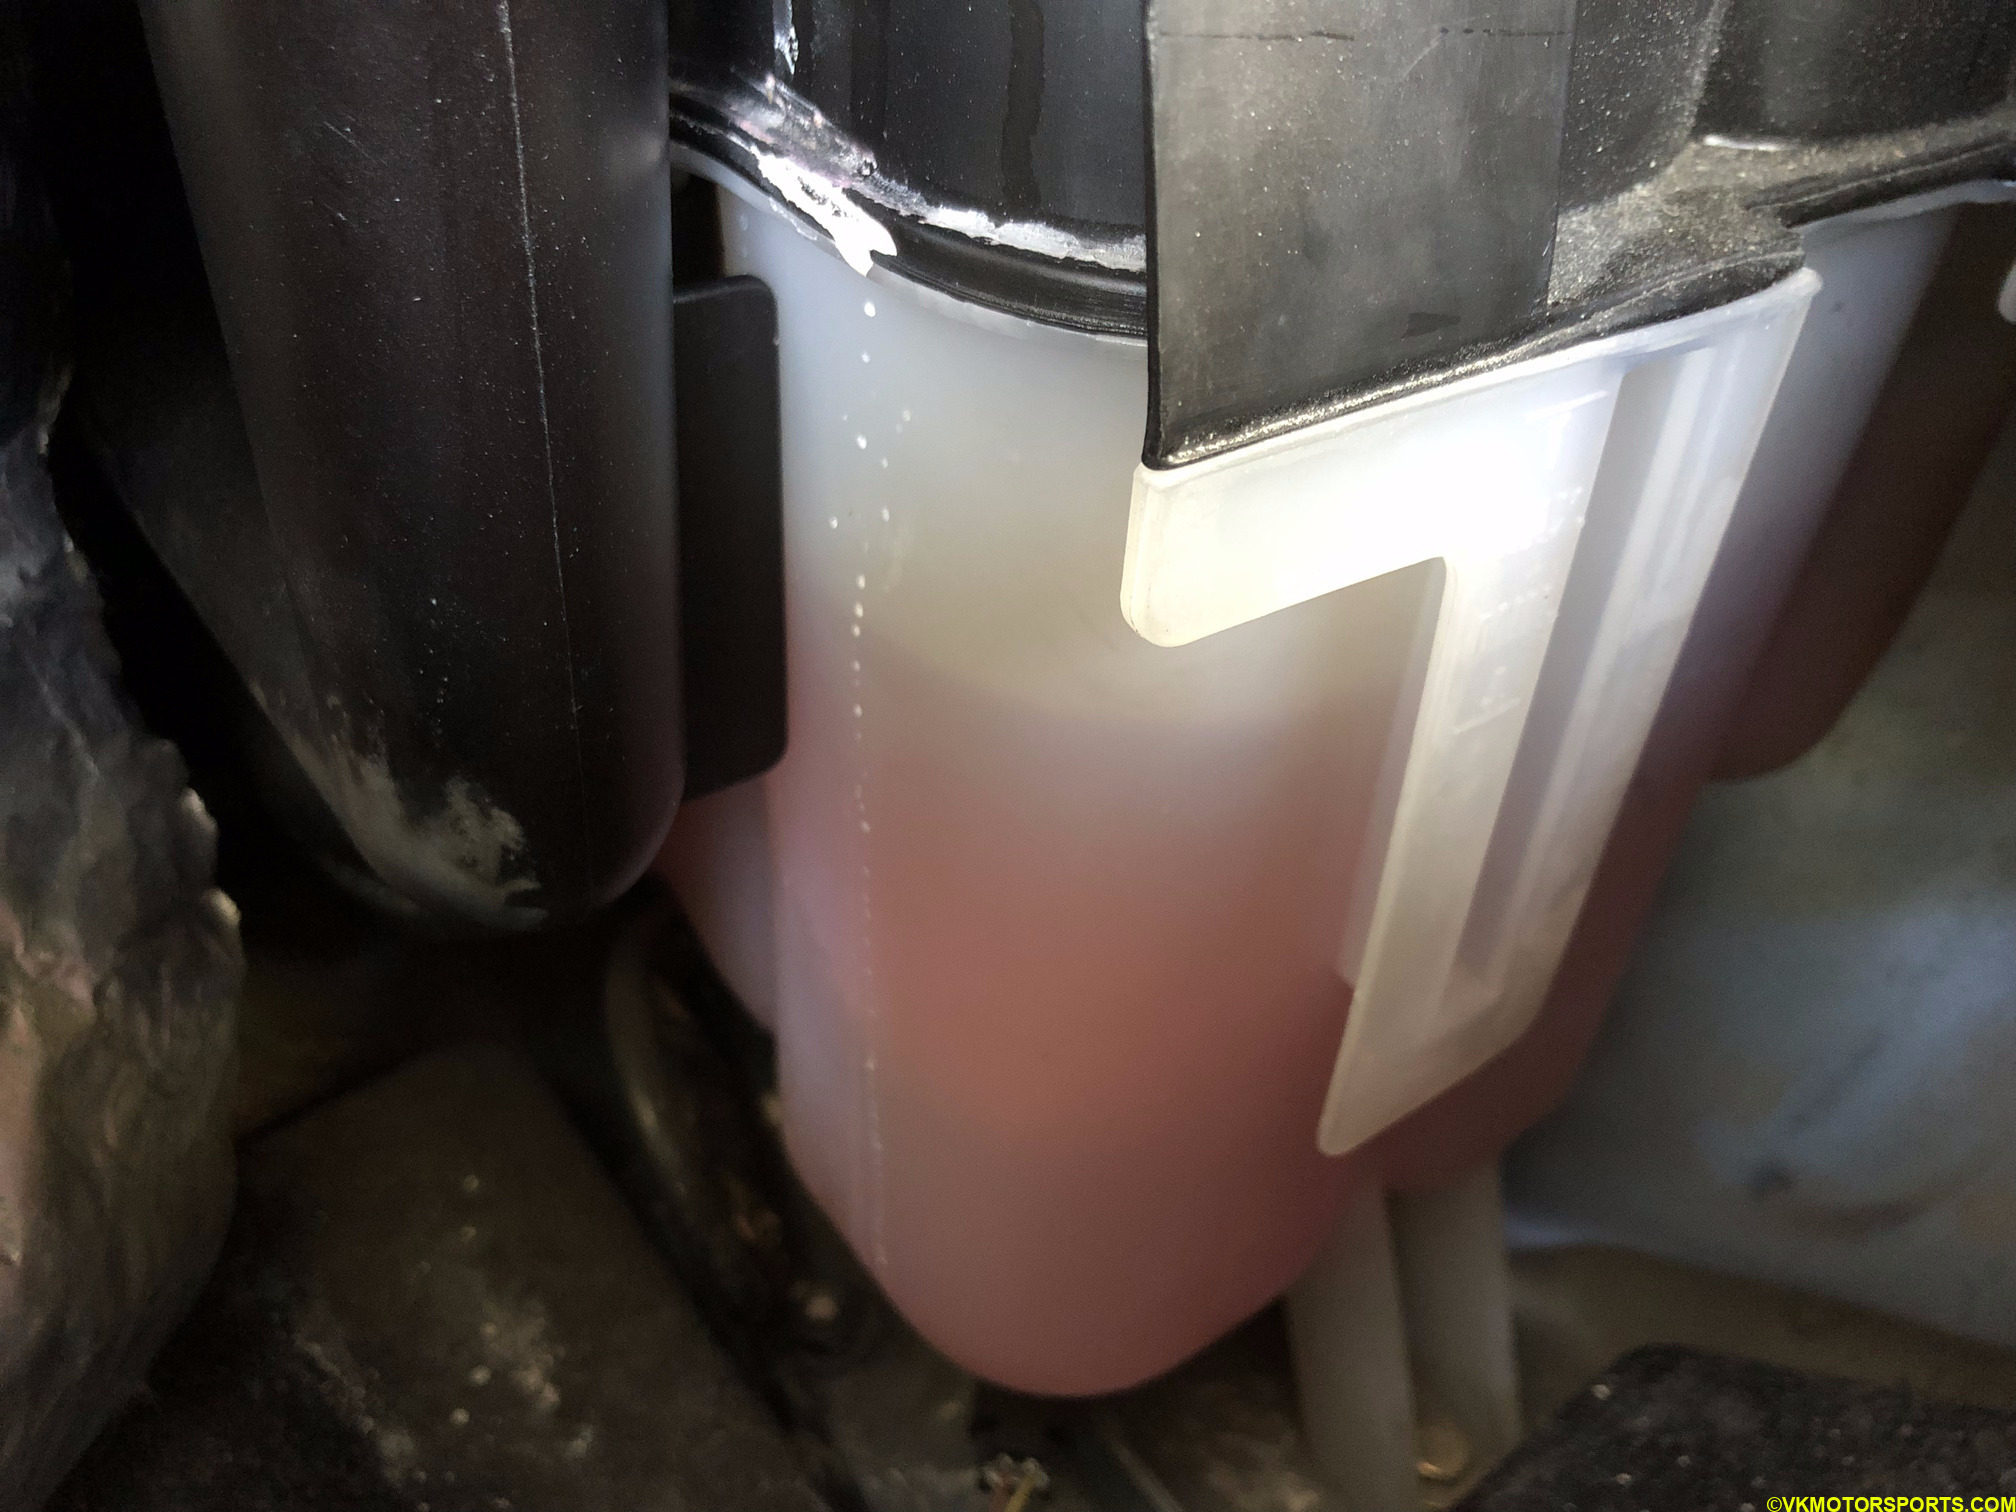 Figure 4. Coolant Overflow Tank in the trunk
Step 2: Open the coolant cap which may be blue or black and relieve the pressure in the system. If the coolant cap is too tight or does not open easily, your engine may still be warm and try later until it is cold.
Step 3: Now close the overflow tank with the cap number 7 (Figure 2) from the radiator pressure test kit as shown in Figure 5. Make sure the cap is tightened by hand.
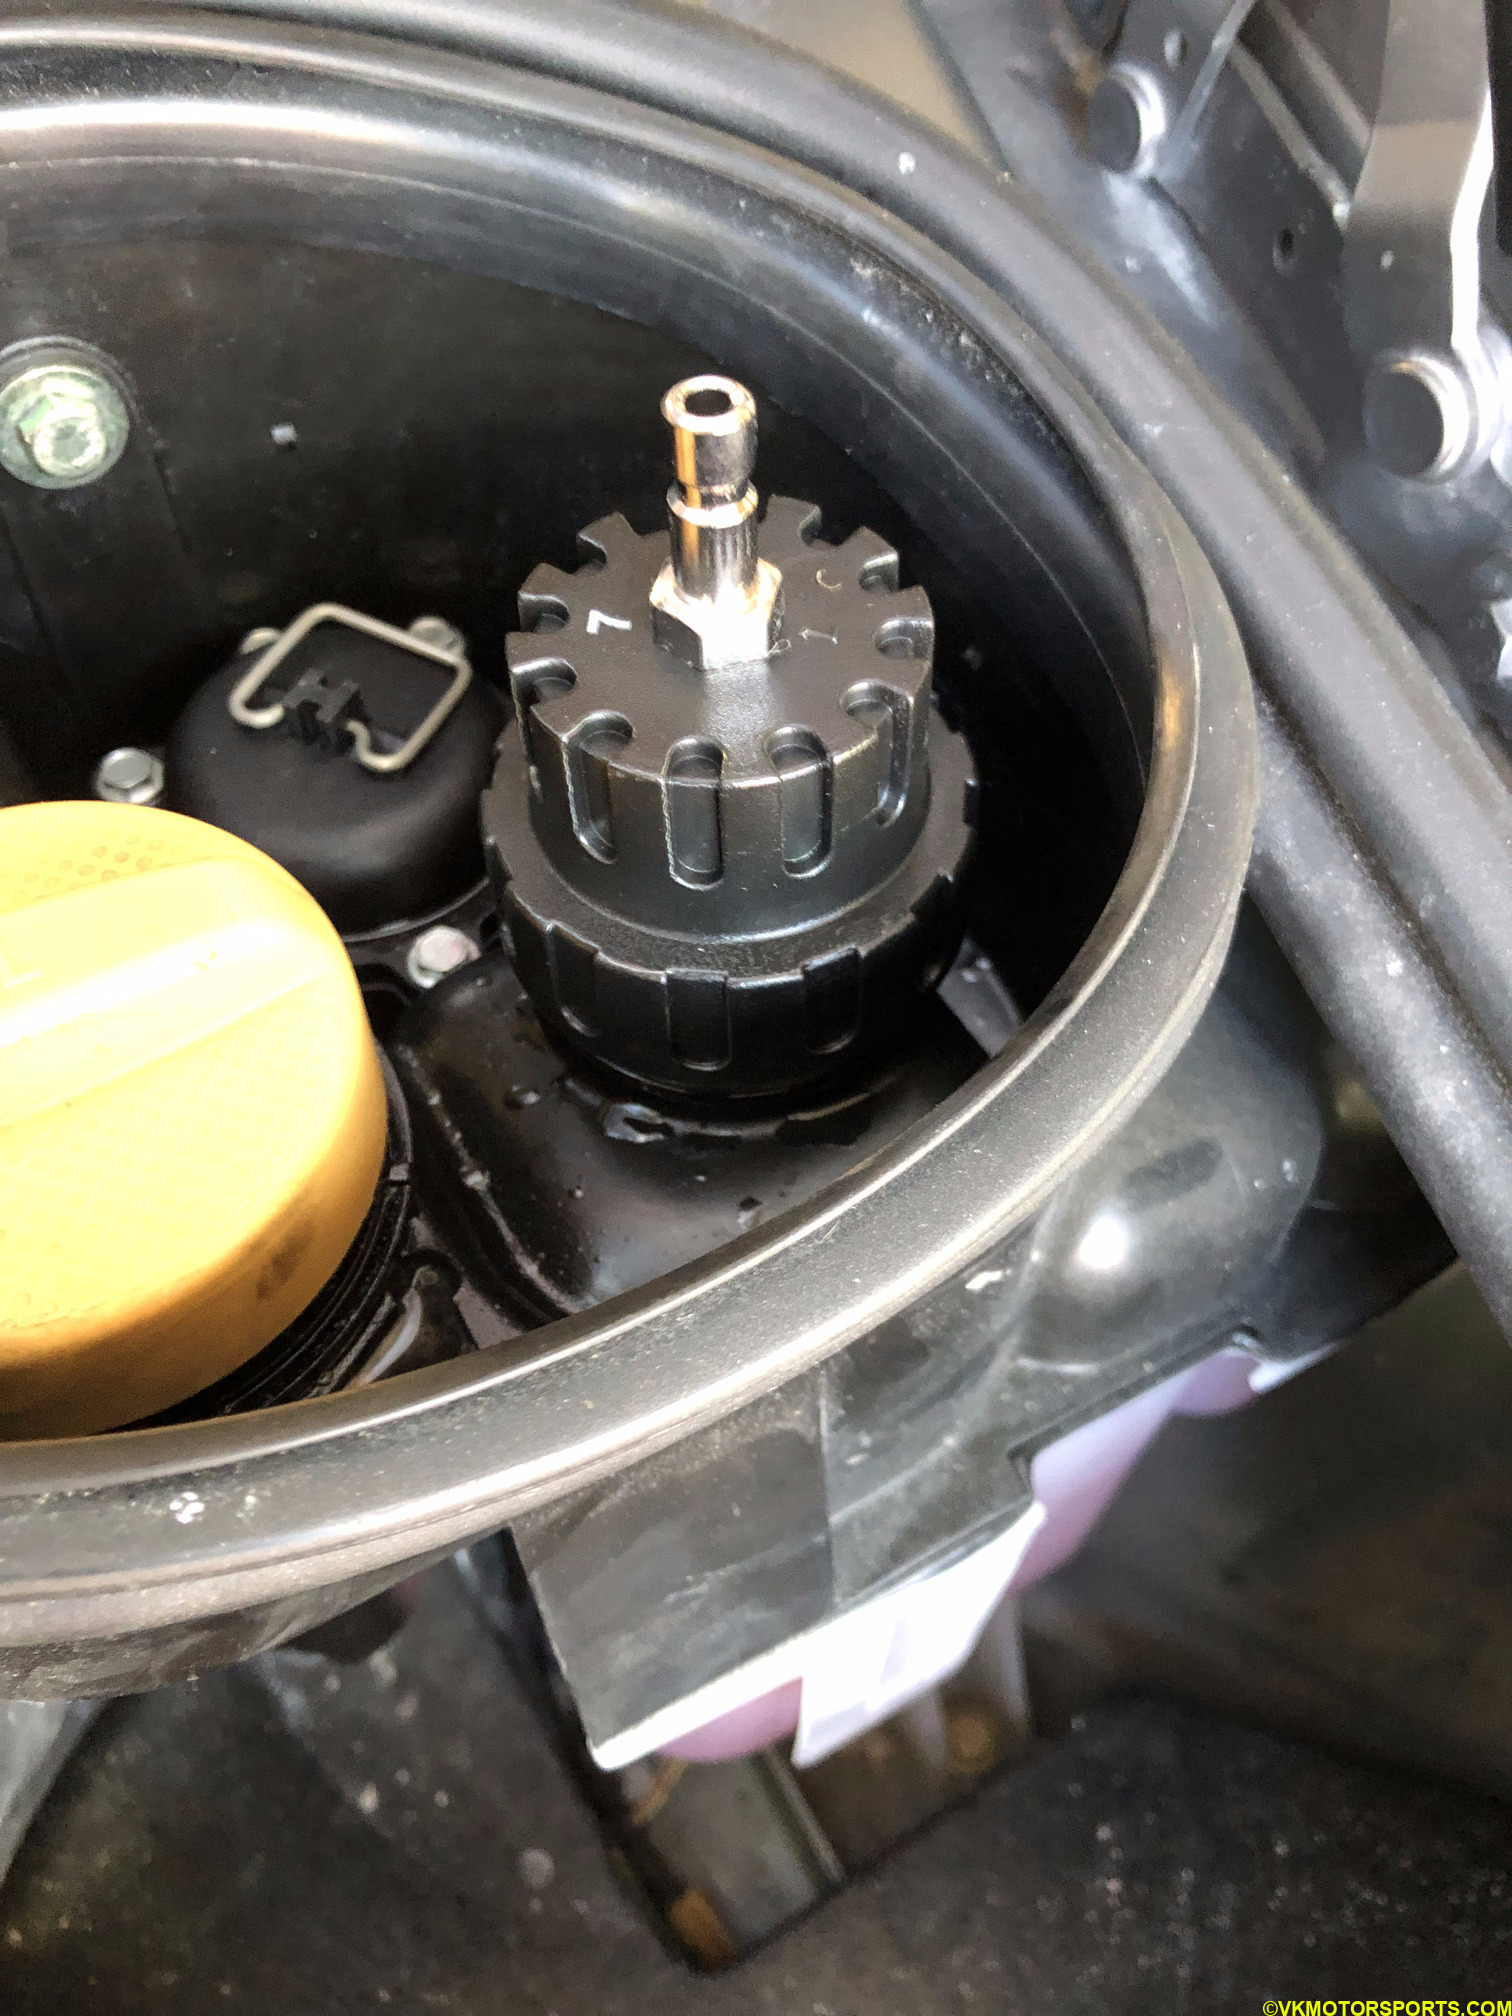 Figure 5. Using the radiator pressure test cap number 7
Step 4: Next attach the tube in the hand pump (Figure 3) to the cap as shown in Figure 6. The pressure in the gauge should be 0 psi.
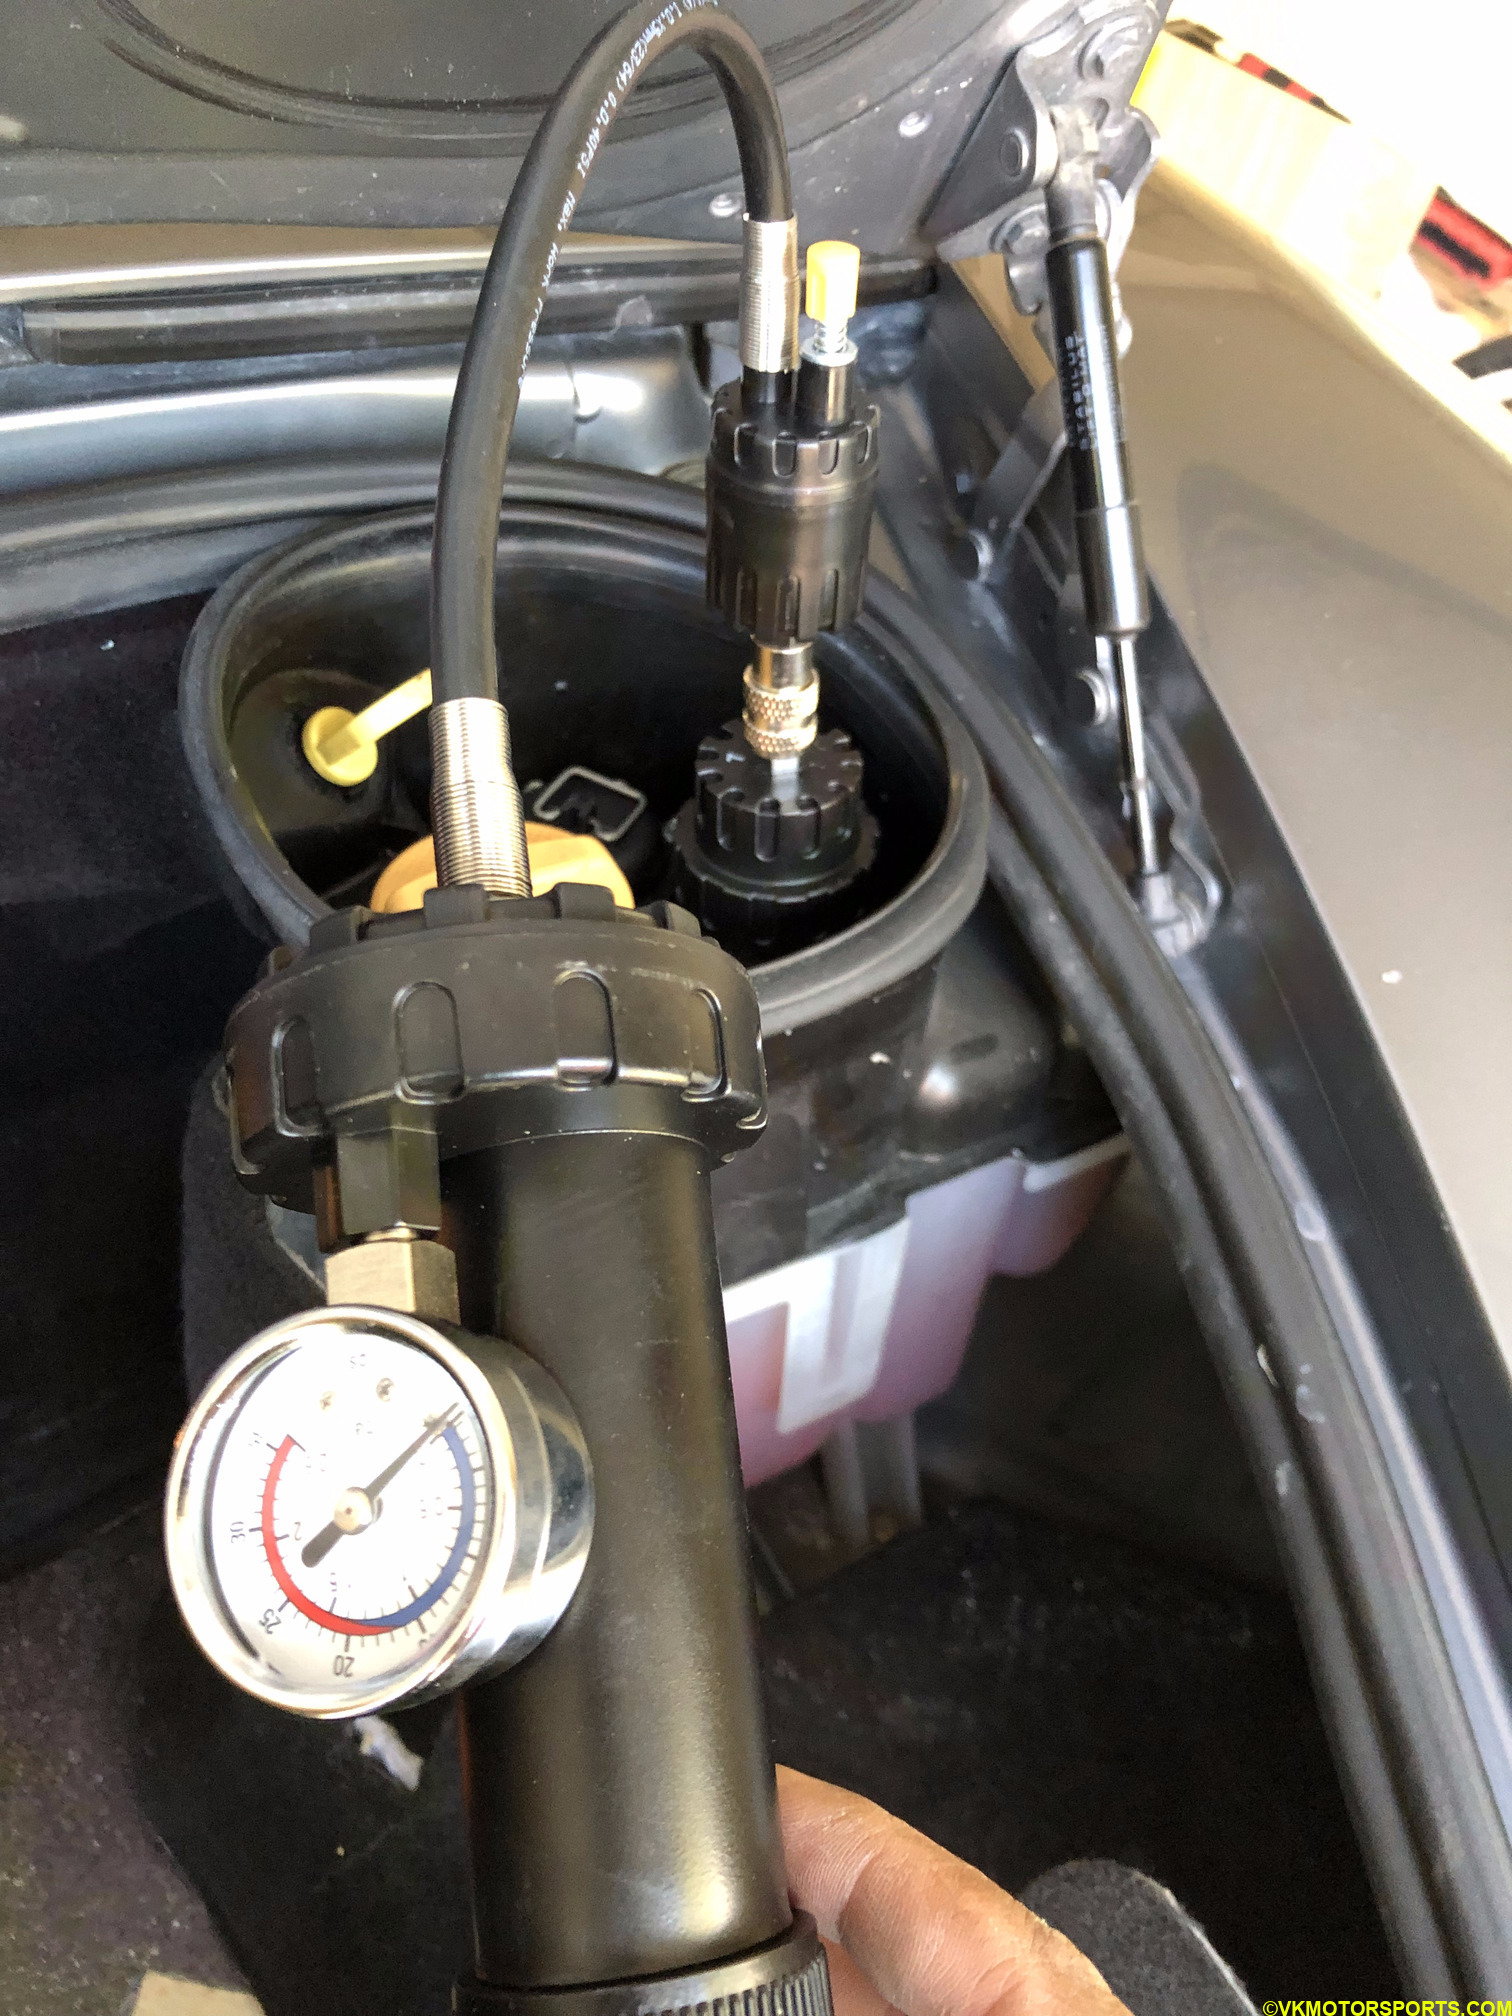 Figure 6. Attach the hand pump to the cap
Step 5: Start pumping the pressure up as shown in Figure 7 and look for leaks in the trunk near the coolant tank or below the car. In my case, the coolant tank had no leaks and the undercarriage of the car started dripping at 15psi.
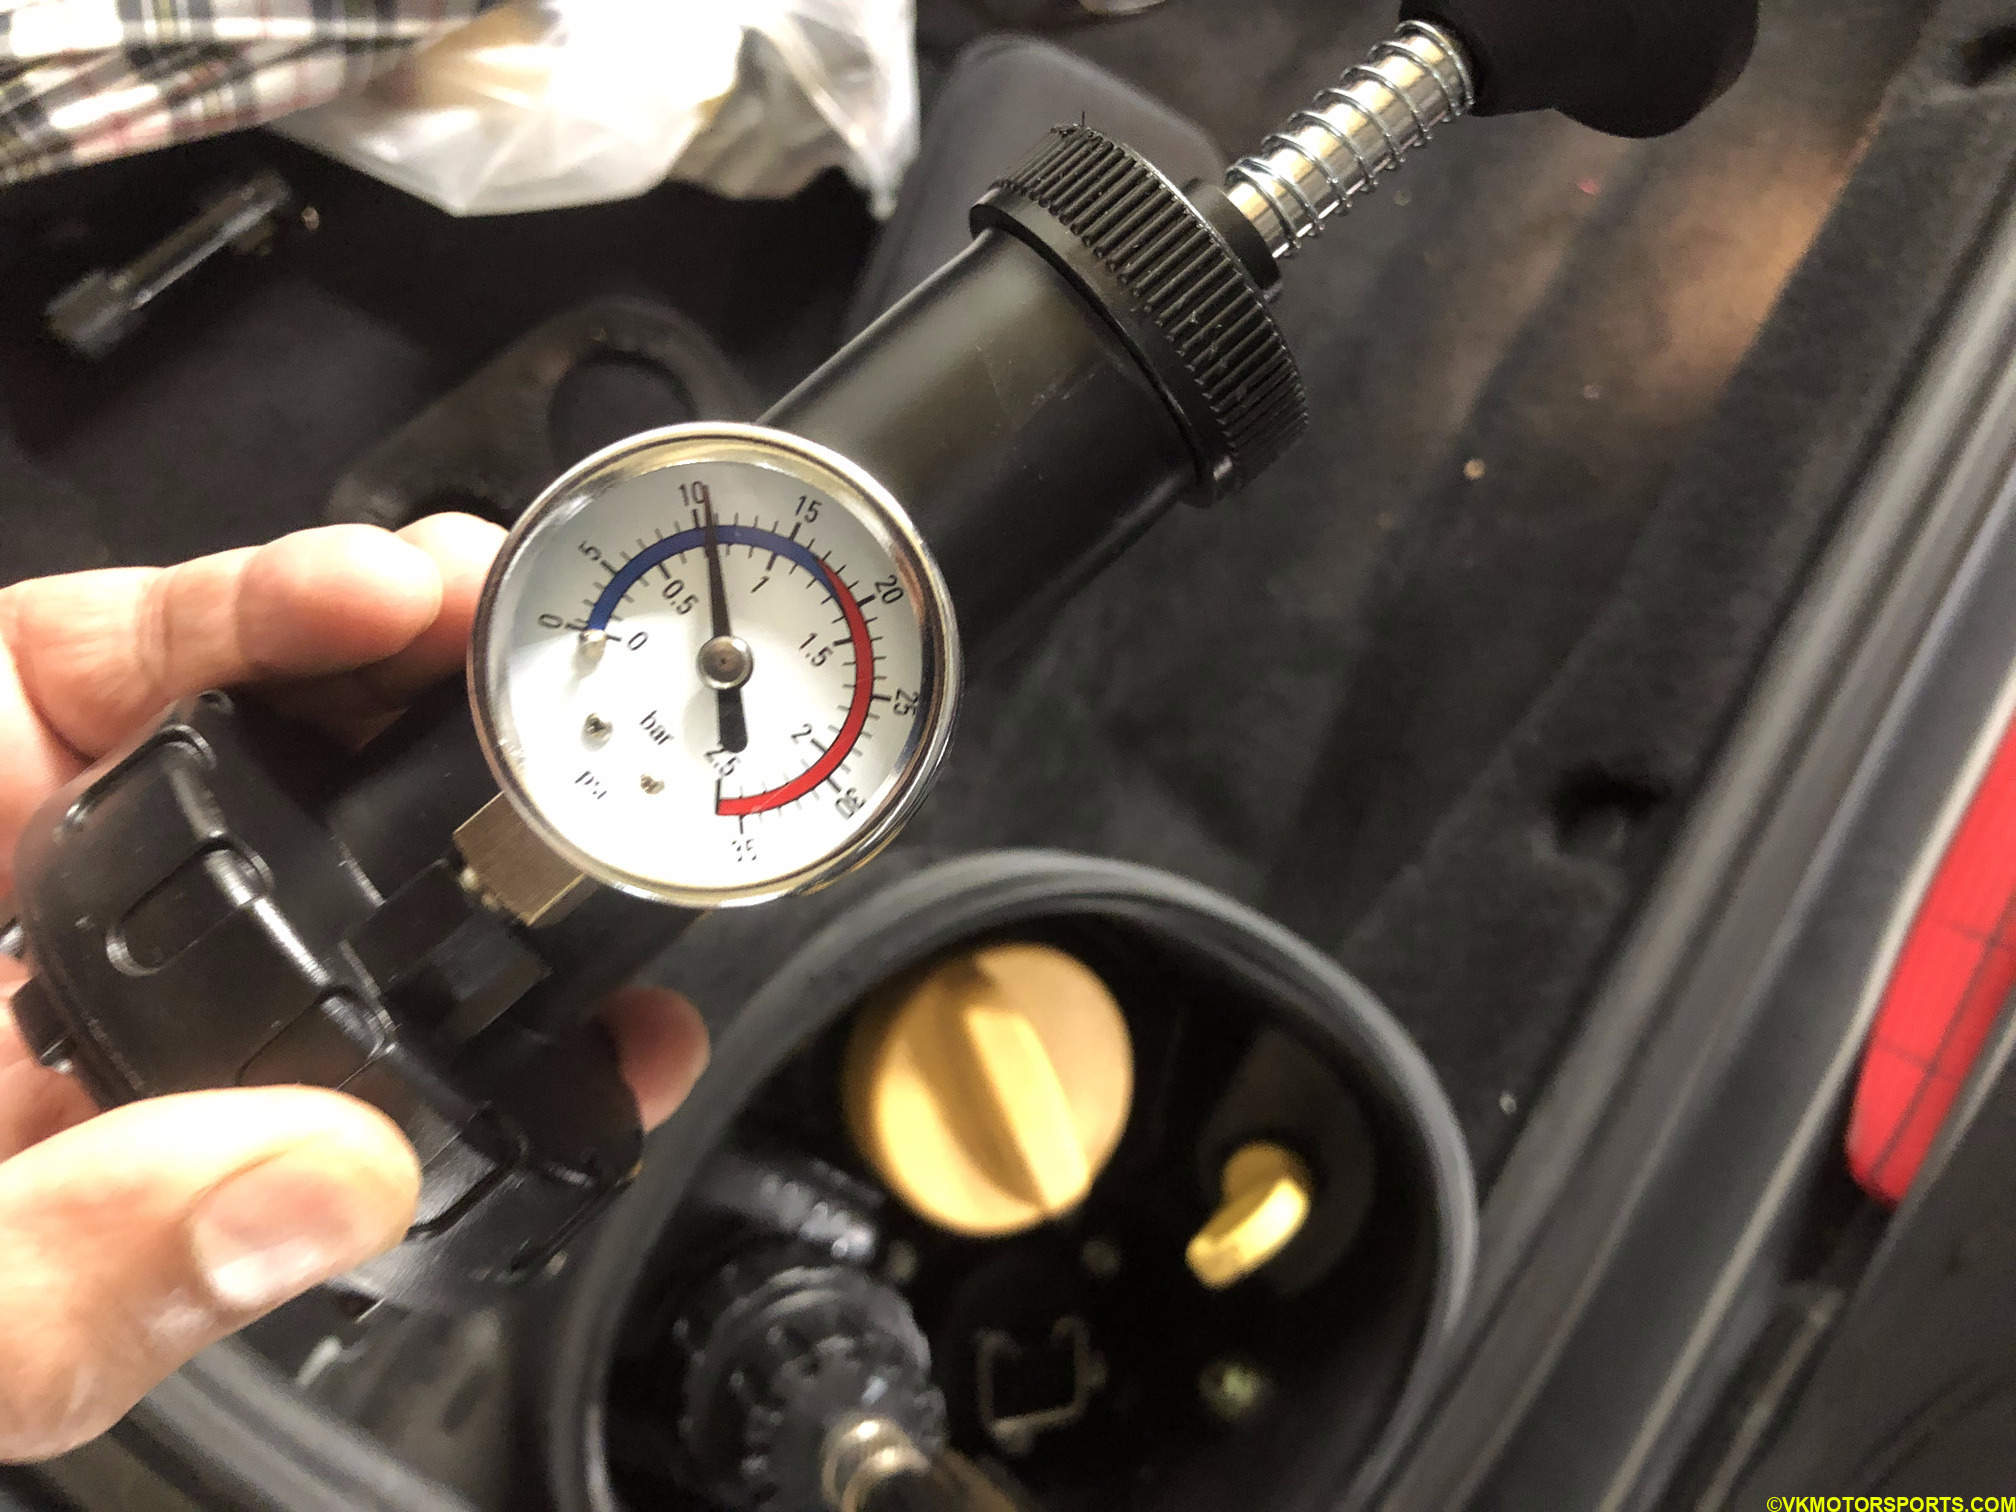 Figure 7. Start pumping the pressure up
Step 6: The Boxster manual states the pressure should be at 19 psi in a warm engine, so pump the pressure up to 19 psi as shown in Figure 8. Now look for leaks again in the tank or under the car in the middle or near the radiator in the front. You should be able to locate the leak.
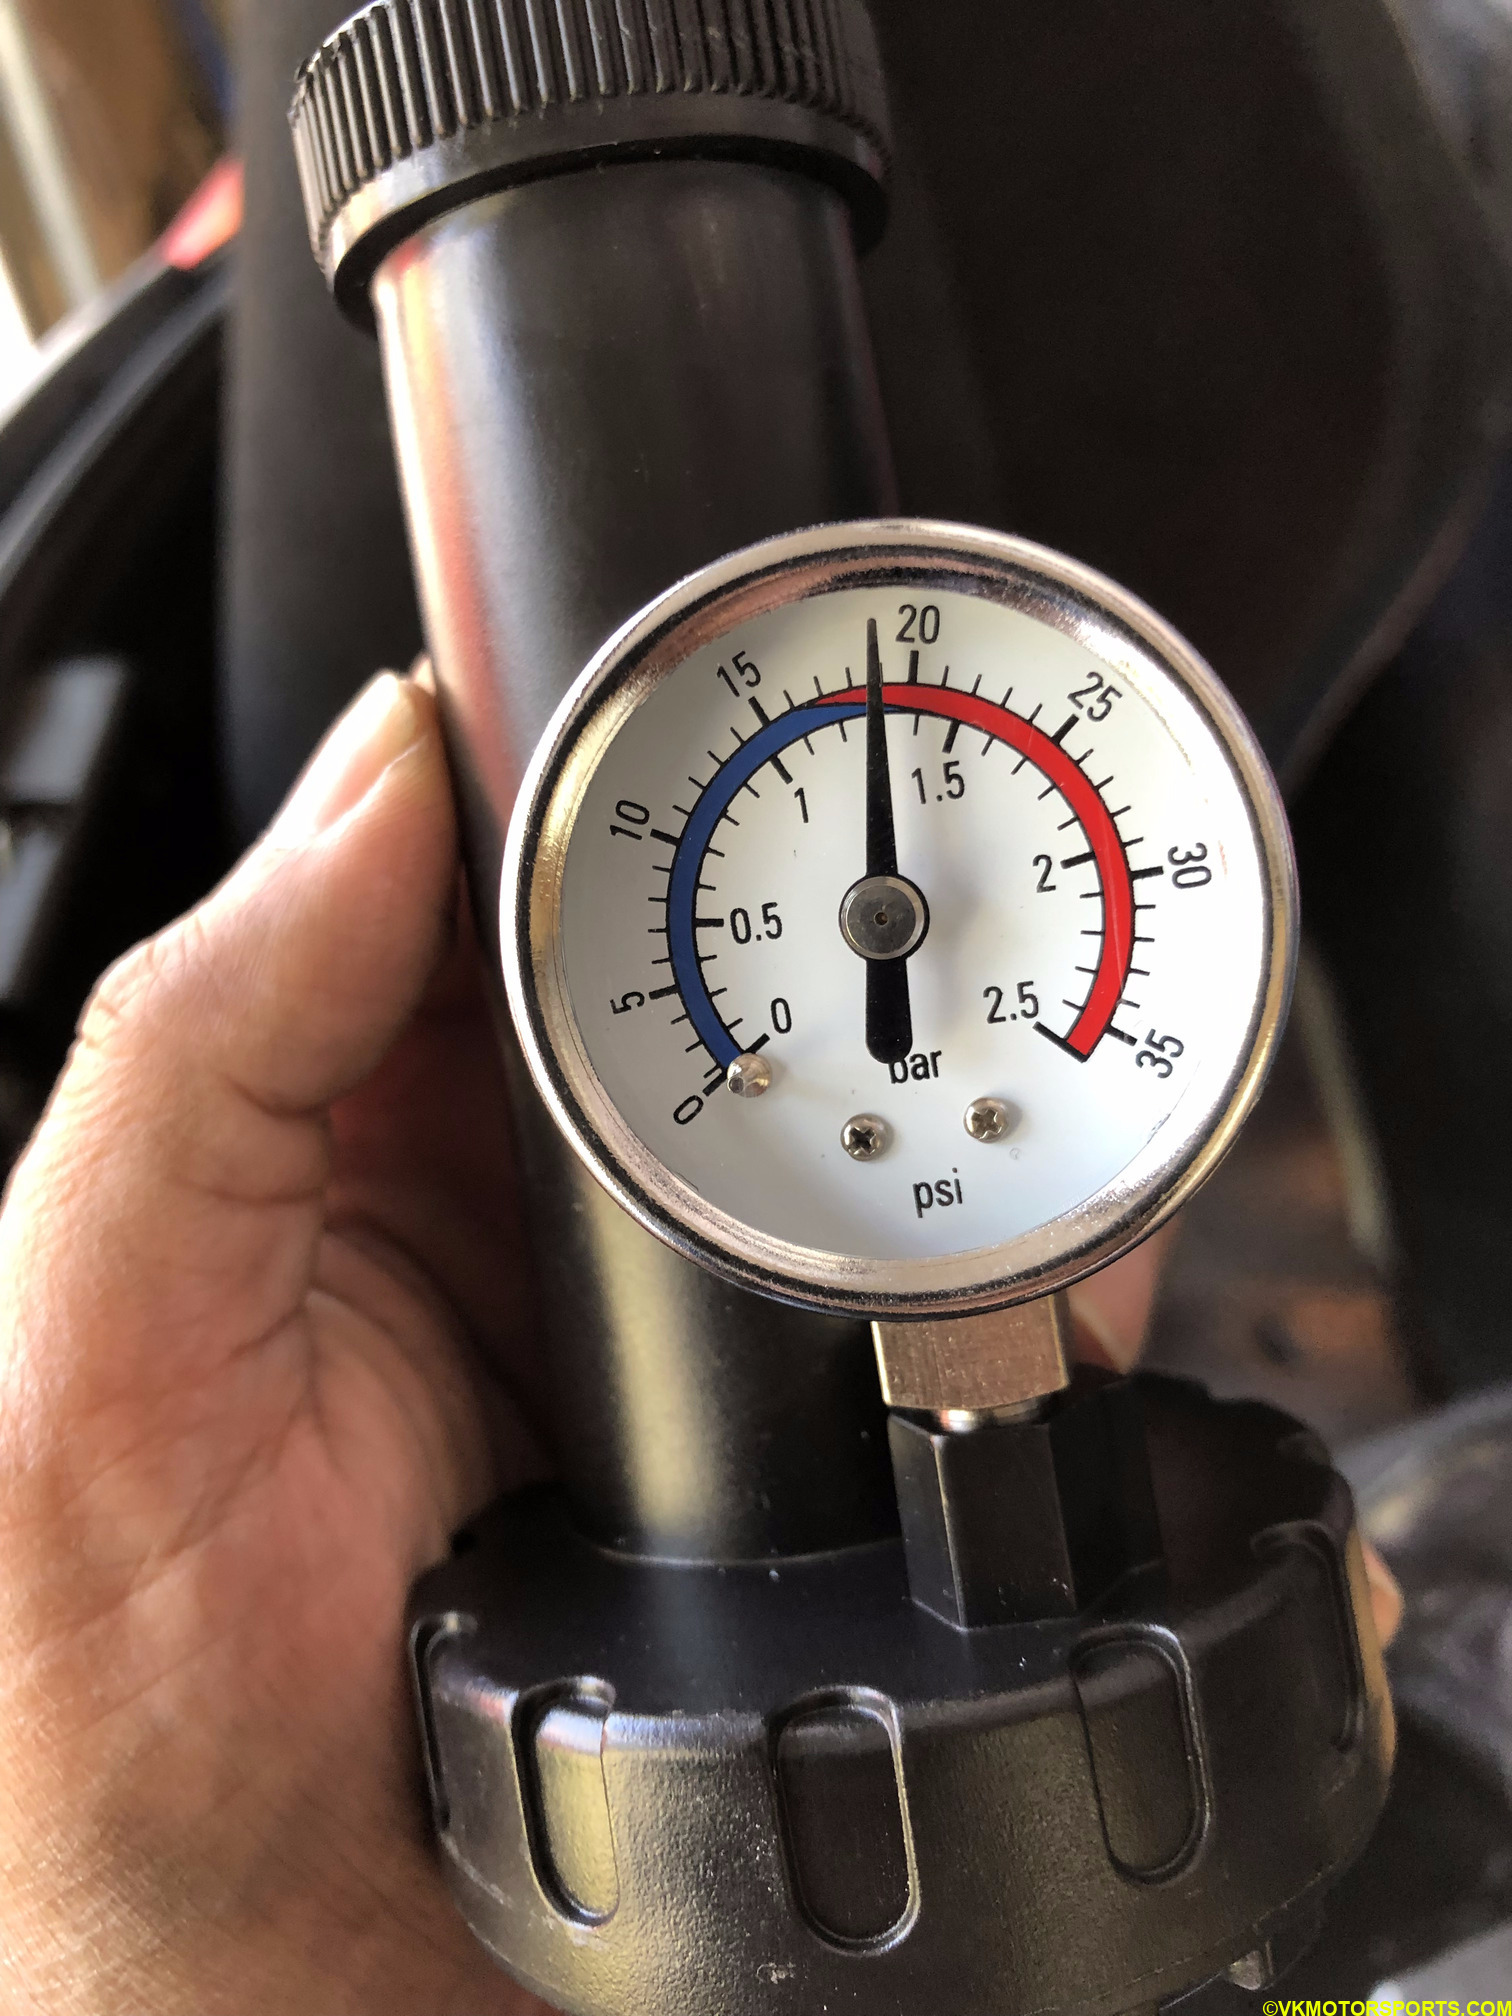 Figure 8. 19 psi set in the hand pump
While you are locating the leak you can leave the pump hanging as shown in Figure 9 and maintaining the pressure to 19psi for a few minutes. As you can see in the image, there are no coolant tank leaks visible.
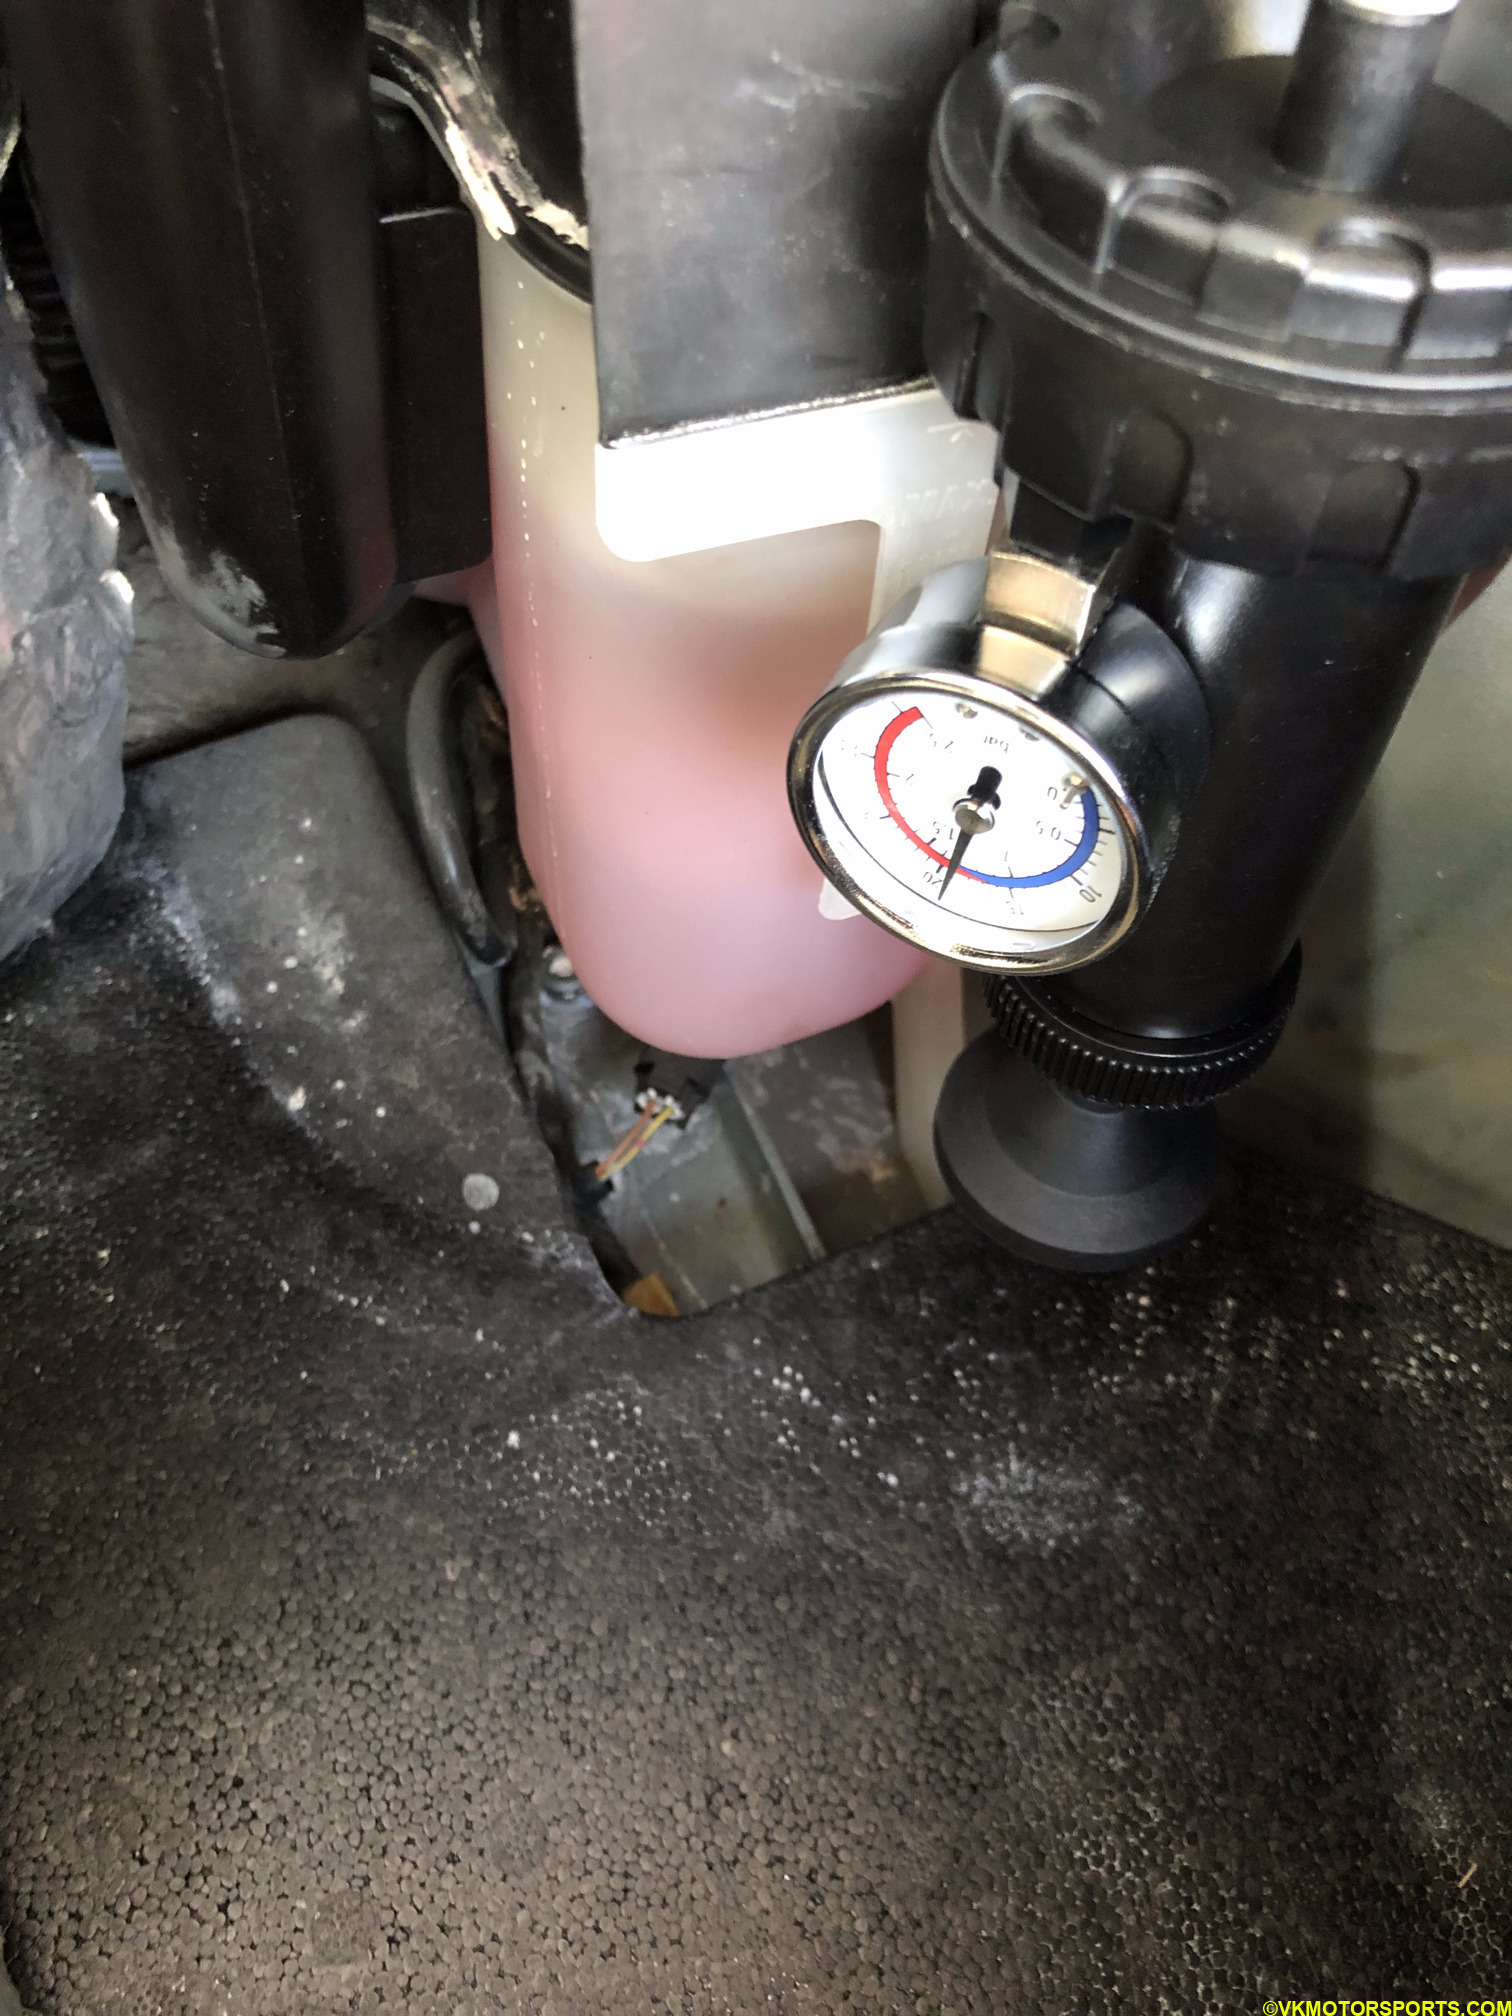 Figure 9. Let the pump hang at 19psi while you locate the leak
Once you have located the leak, figure out how to fix it. In my case, as seen in Figures 10 and 11, it was a coolant hose leak. Eventually I inspected the hoses and realized that the water pump was failing to rotate and that was causing the leak. I will explain how to replace the water pump in the next post.
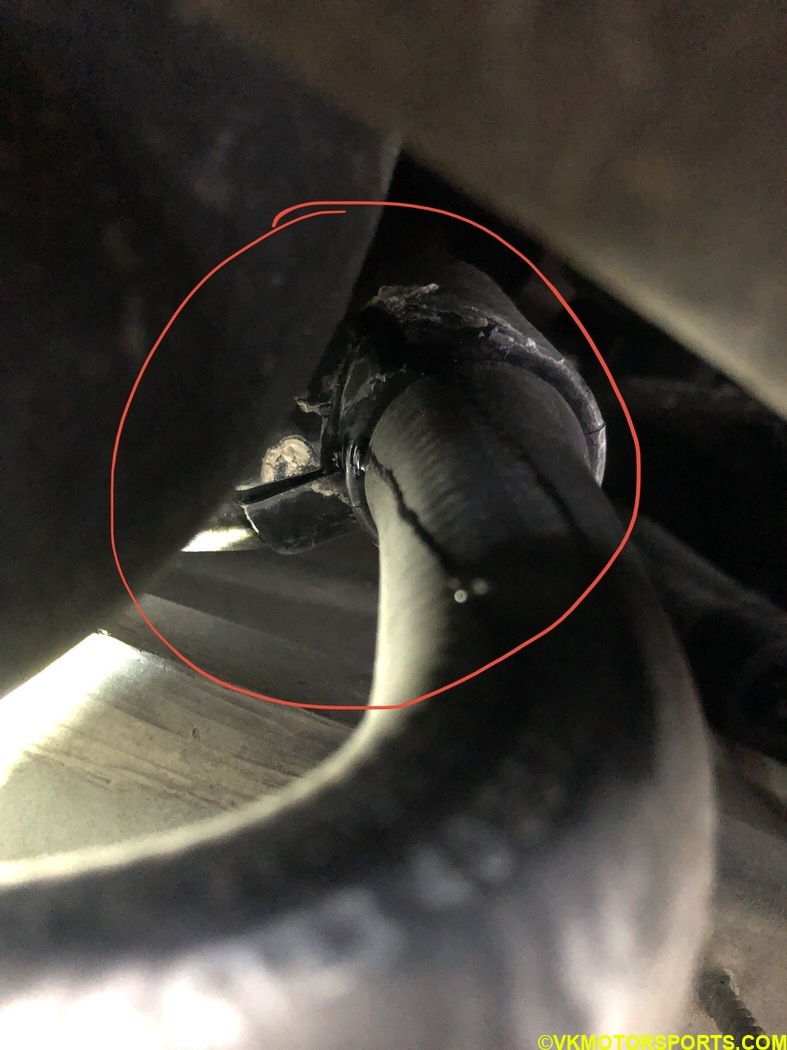 Figure 10. Coolant hose leak
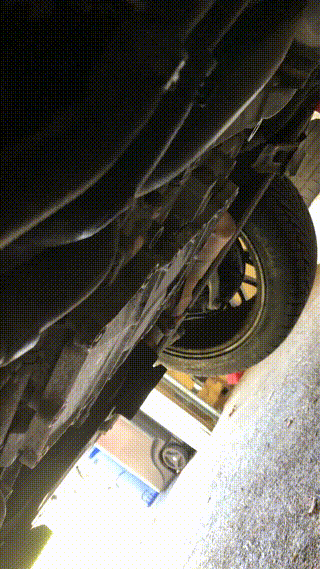
Figure 11. Coolant hose leak - drip drip