In the previous post, I installed aftermarket seats in the 2005 G35 coupe. However, the airbag lights were on and the codes being shown, as in Figure 1, were B1129, B1022 and B1034 (not pictured). This is due to the fact that the side airbags are not
present in the aftermarket seats. In this post, I describe how to simulate the airbag sensor using a 2.2 Ohm 1/4 Watt resistor and this process is also incorrectly referred to as airbag delete. You already “deleted” the airbag when you removed your stock factory seats, you want to simulate the airbag sensor to make the Airbag Control Unit think that there is an airbag present. That is done with a 2.2 Ohm 1/4 Watt resistor.
HARDWARE REQUIREMENTS
- 2.2 Ohm 1/4 Watt resistor - 2 pieces
- Black 24-30 gauge copper electrical wire
- Digital Multimeter
- Heat Shrink Tube Kit
- Soldering Iron Kit
- Electrical Tape
- Wire Stripper & Cutter
- 5” Needle Nose Pliers for Electronics
- Heat Gun
- OBD-II Code Reader - Foxwell NT624 Elite
CHECK THE ERROR CODES
Using the Foxwell NT624 Elite OBD-II scanner, I was able to check what error codes the missing airbag sensors in the seats was being displayed. You may or may not see this if your OBD-II code reader is not equipped to scan the airbag control module.
The codes were B1129, B1022 and B1034 (not pictured) in Figure 1. (I only remembered to take this photo after I fixed the driver side code.) The codes mean the following:
B1129- Passenger side airbag missing or circuit is open.B1022- Occupant sensor disconnected or circuit is open.B1034- Driver side airbag missing or circuit is open.
In this post, I can only show how to fix the B1034 code which is to make the driver side airbag missing error go away. So far this 2.2 Ohm 1/4 Watt resistor trick only worked to do that. It looked to me that until I fixed the B1022 code, the B1129 would not go away despite it being
the same process.
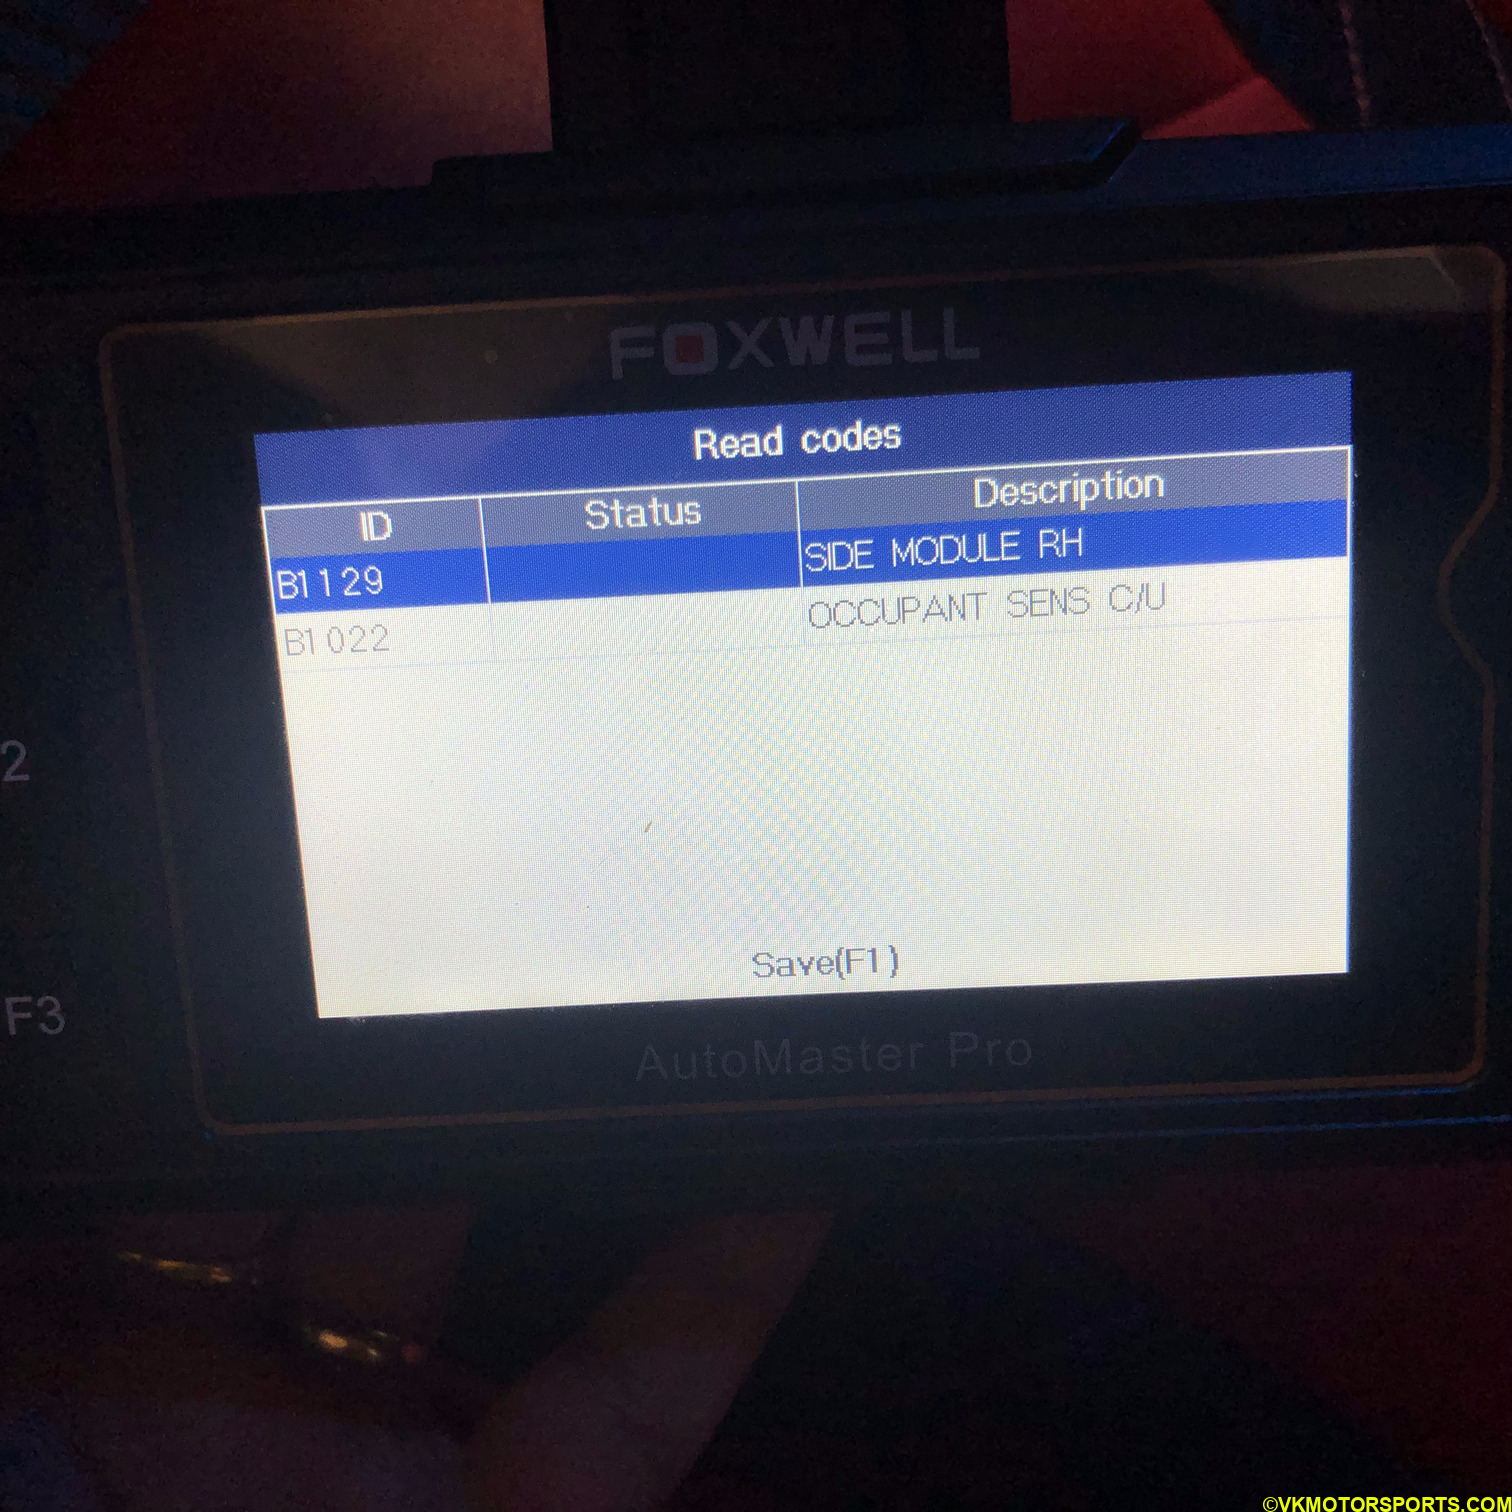 Figure 1. Missing airbag sensor error codes
INSTALLATION
Step 1: Locate the yellow airbag connector on the wiring harness for the driver and passenger seats. Cut the connector and save it for the future.
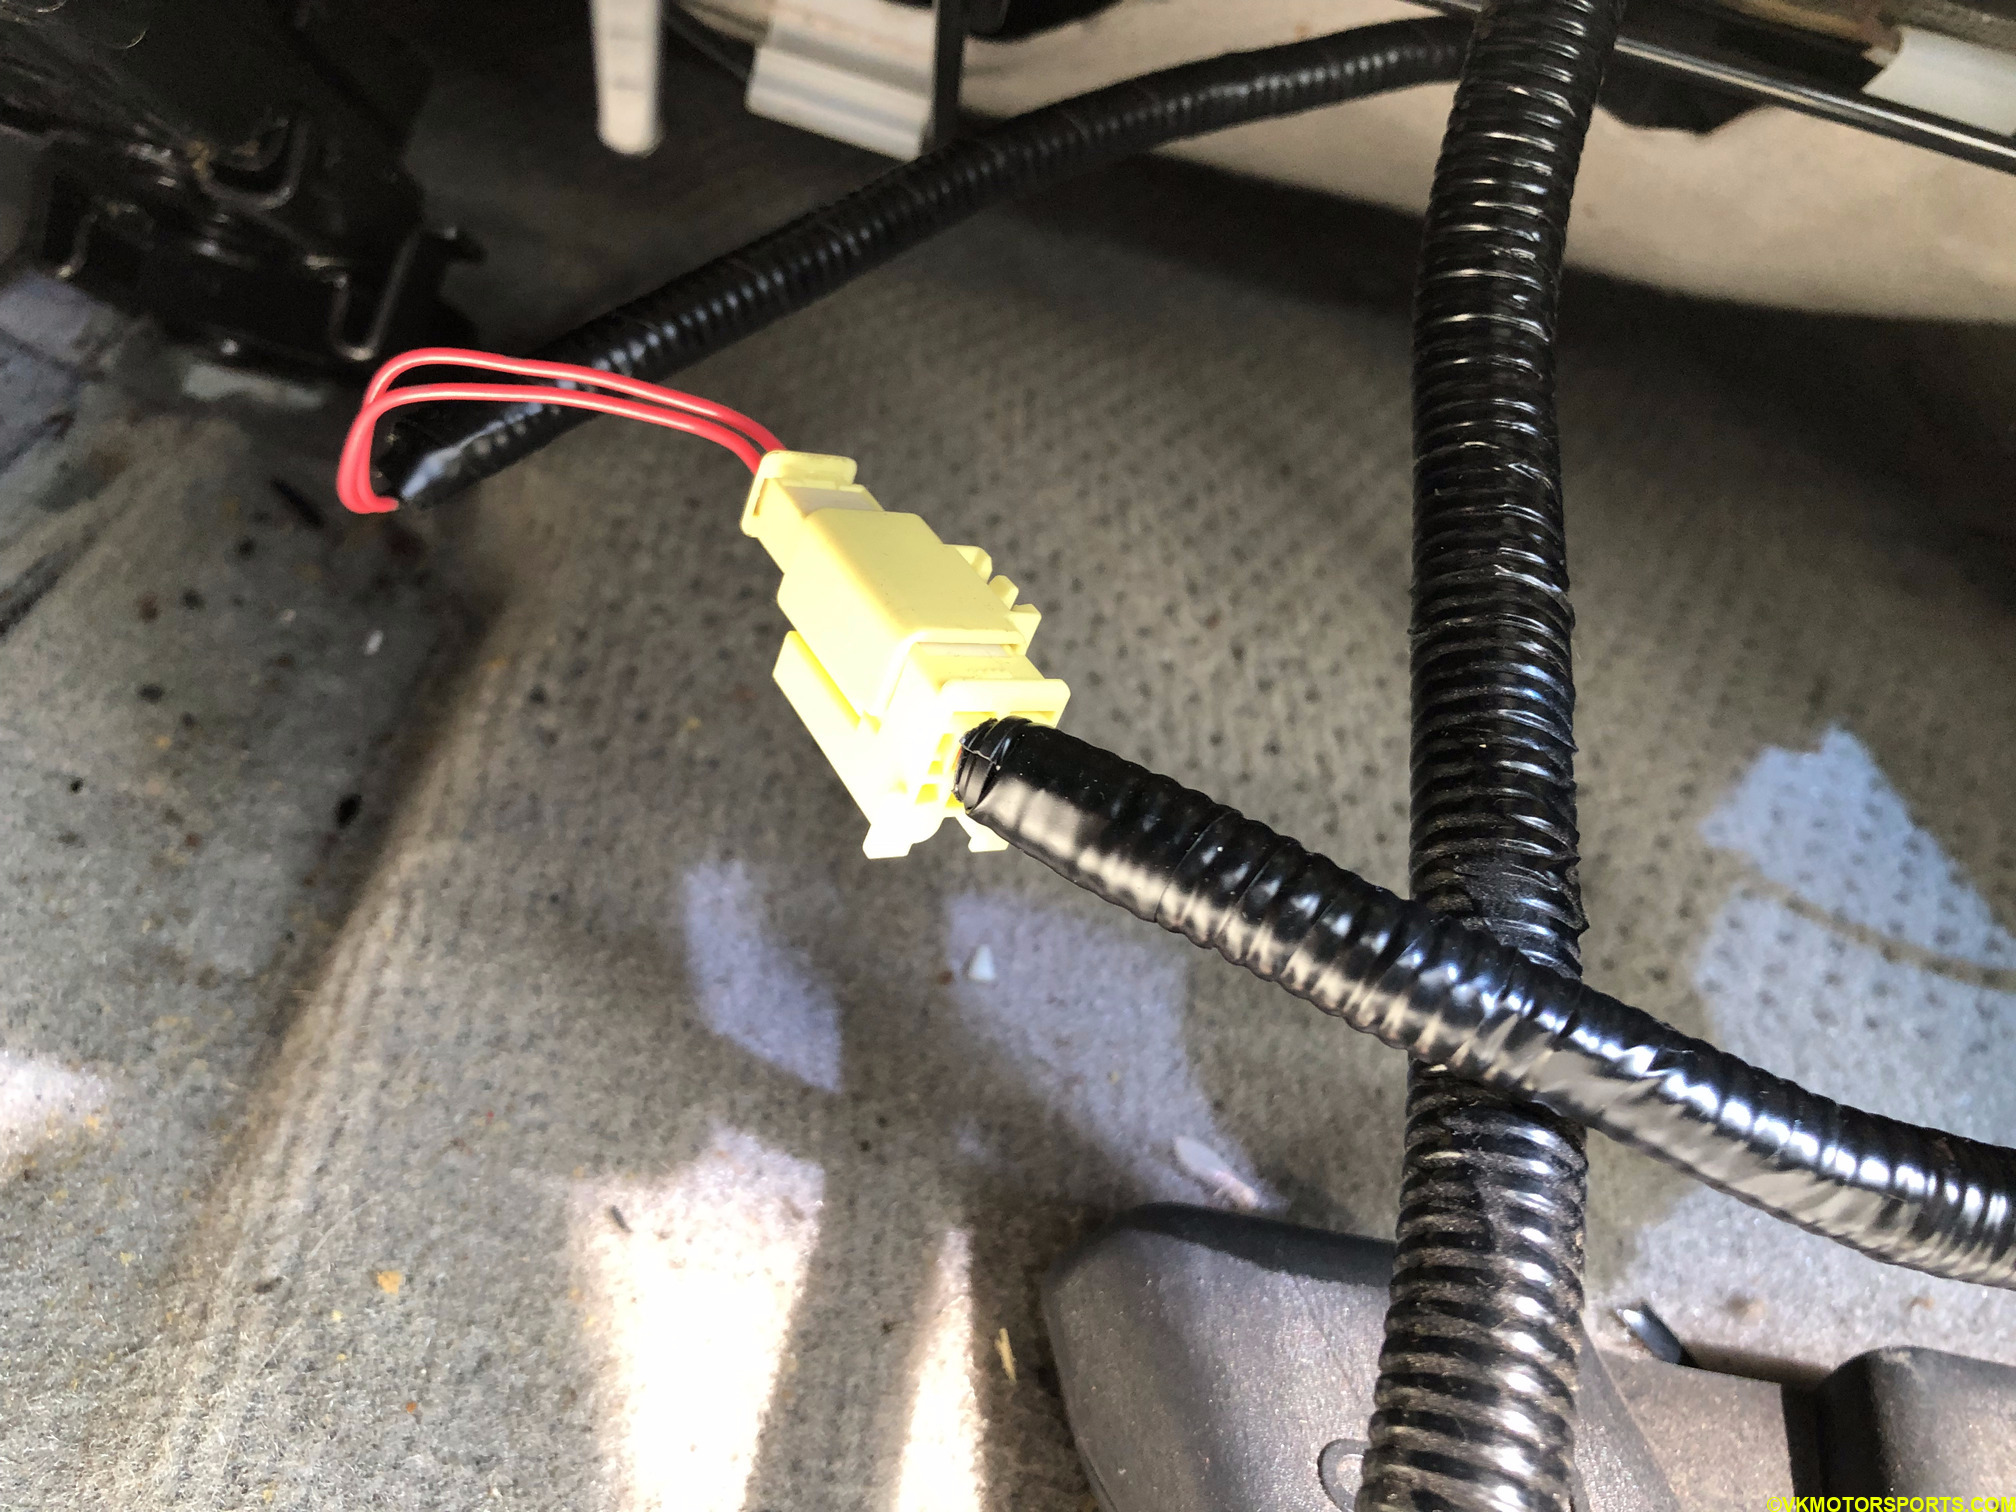 Figure 2. Locate the yellow airbag connector on the wiring harness
Step 2: Now take the electrical wire and cut a few inches using the wire stripper. Solder each end of a single 2.2 Ohm 1/4 Watt resistor to the stripped wire ends as shown in Figure 3.
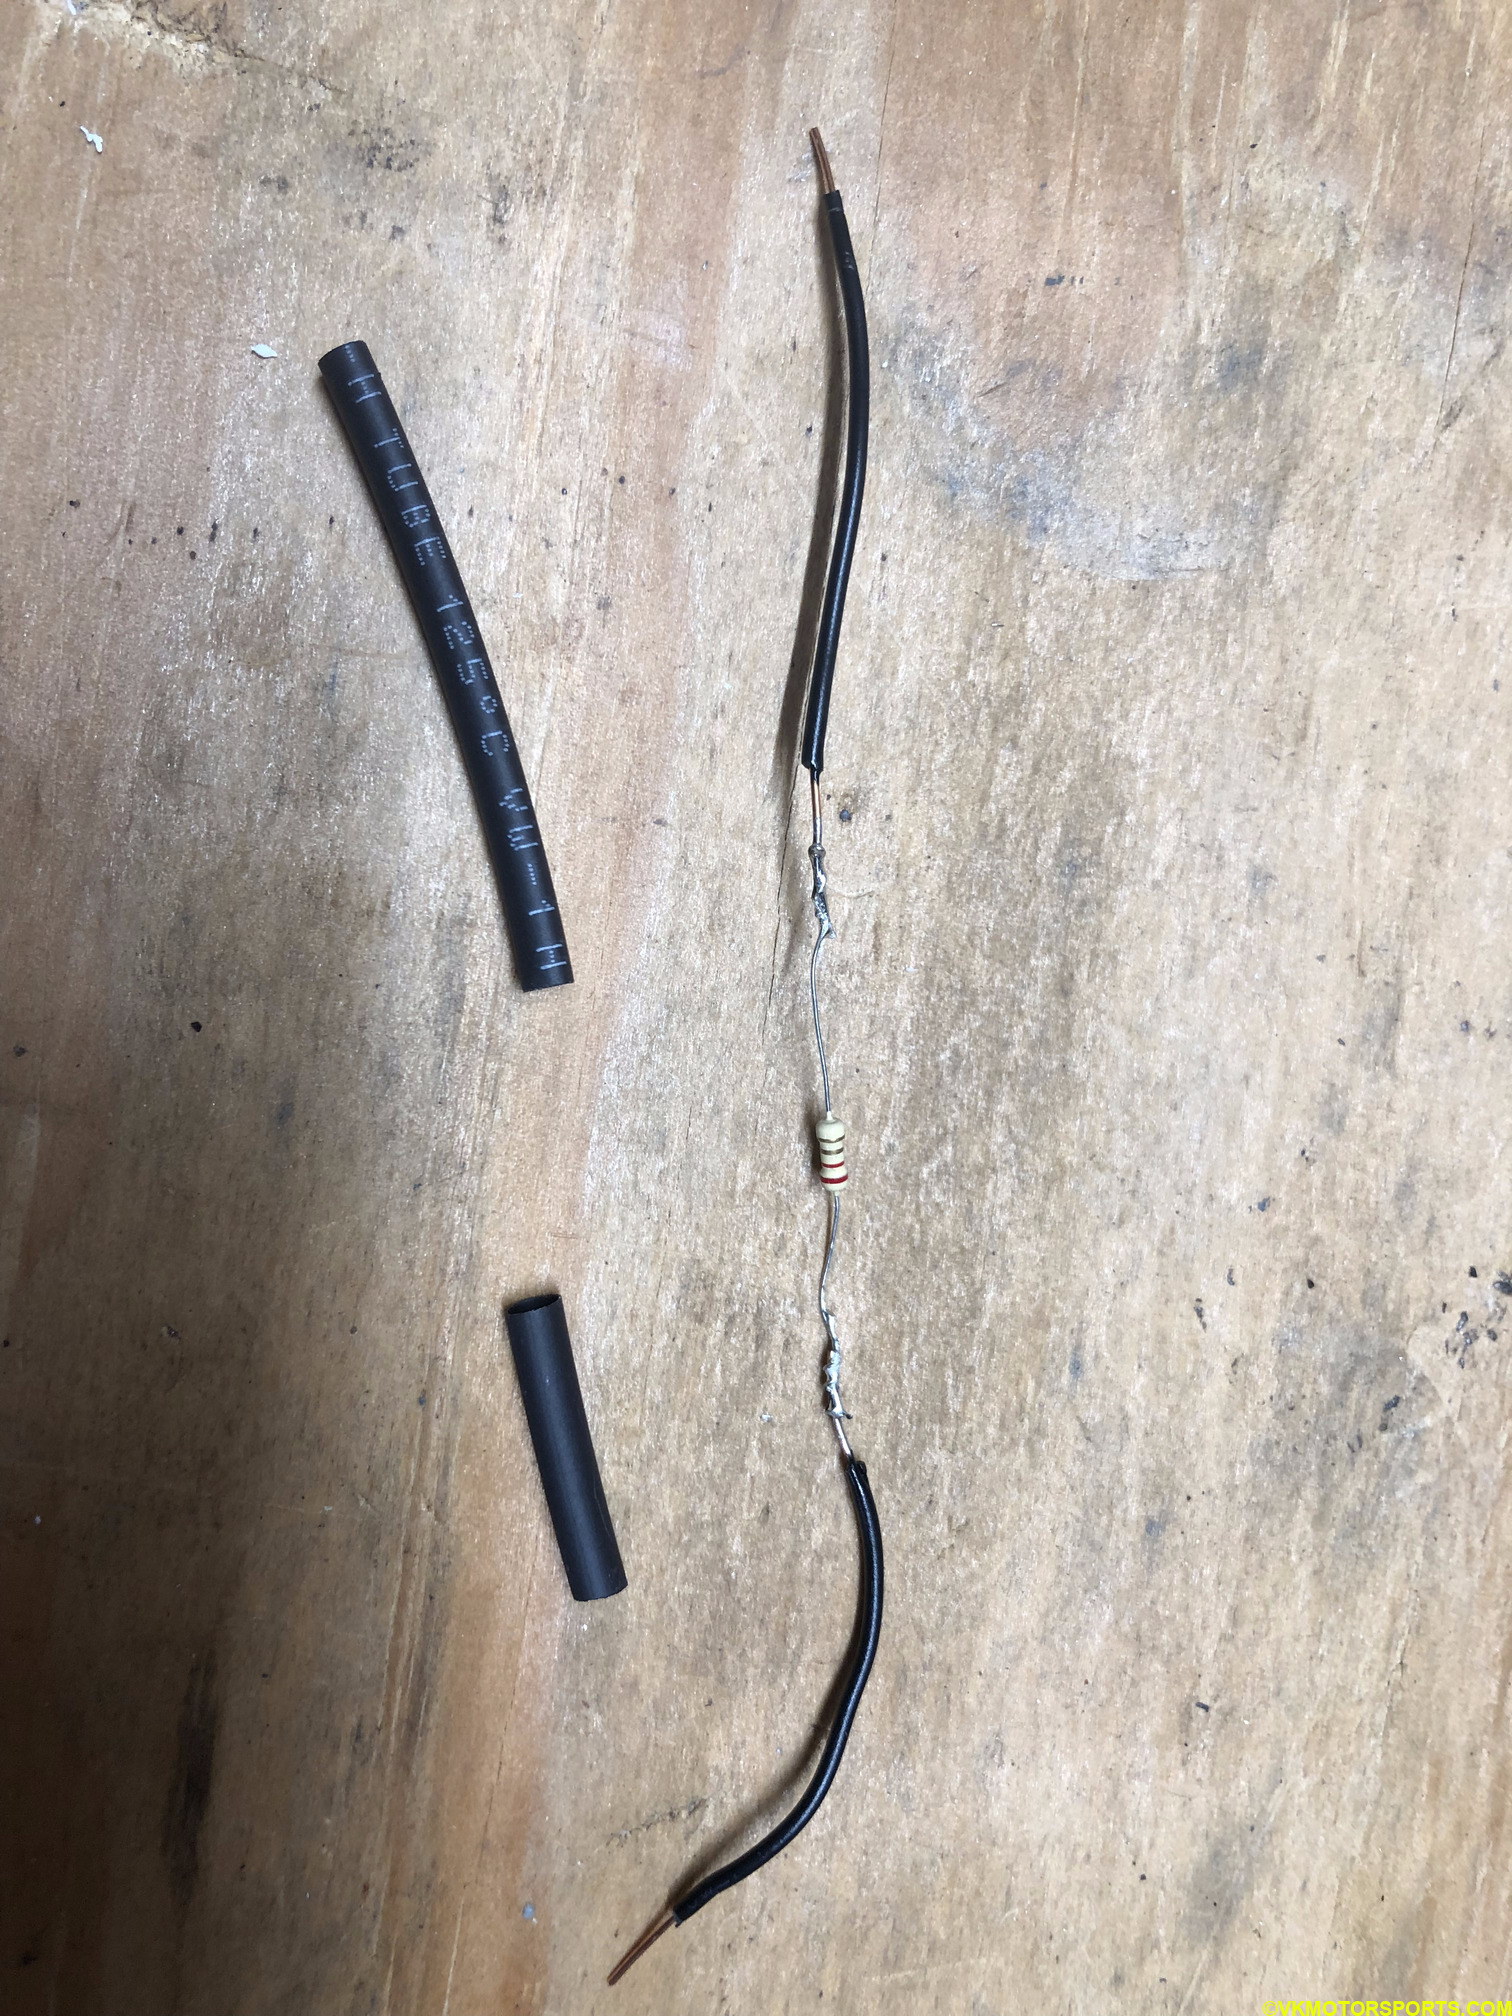 Figure 3. Solder the resistor to the electrical wire
Step 3: Cover the exposed soldered ends with the thinnest heat shrink tubes from your kit, and using the heat gun heat it up till it shrinks, as shown in Figure 4. An astute observer may notice, that one of my heat shrink tubes was cut too small, so I ended up using electrical tape to cover any leftover exposure.
NOTE: Using the digital multimeter check that the resistance of this wire is now 2.2 Ohm. Sometimes, the parts on Amazon can be fake so you want the resitance to be around 2.2 Ohms.
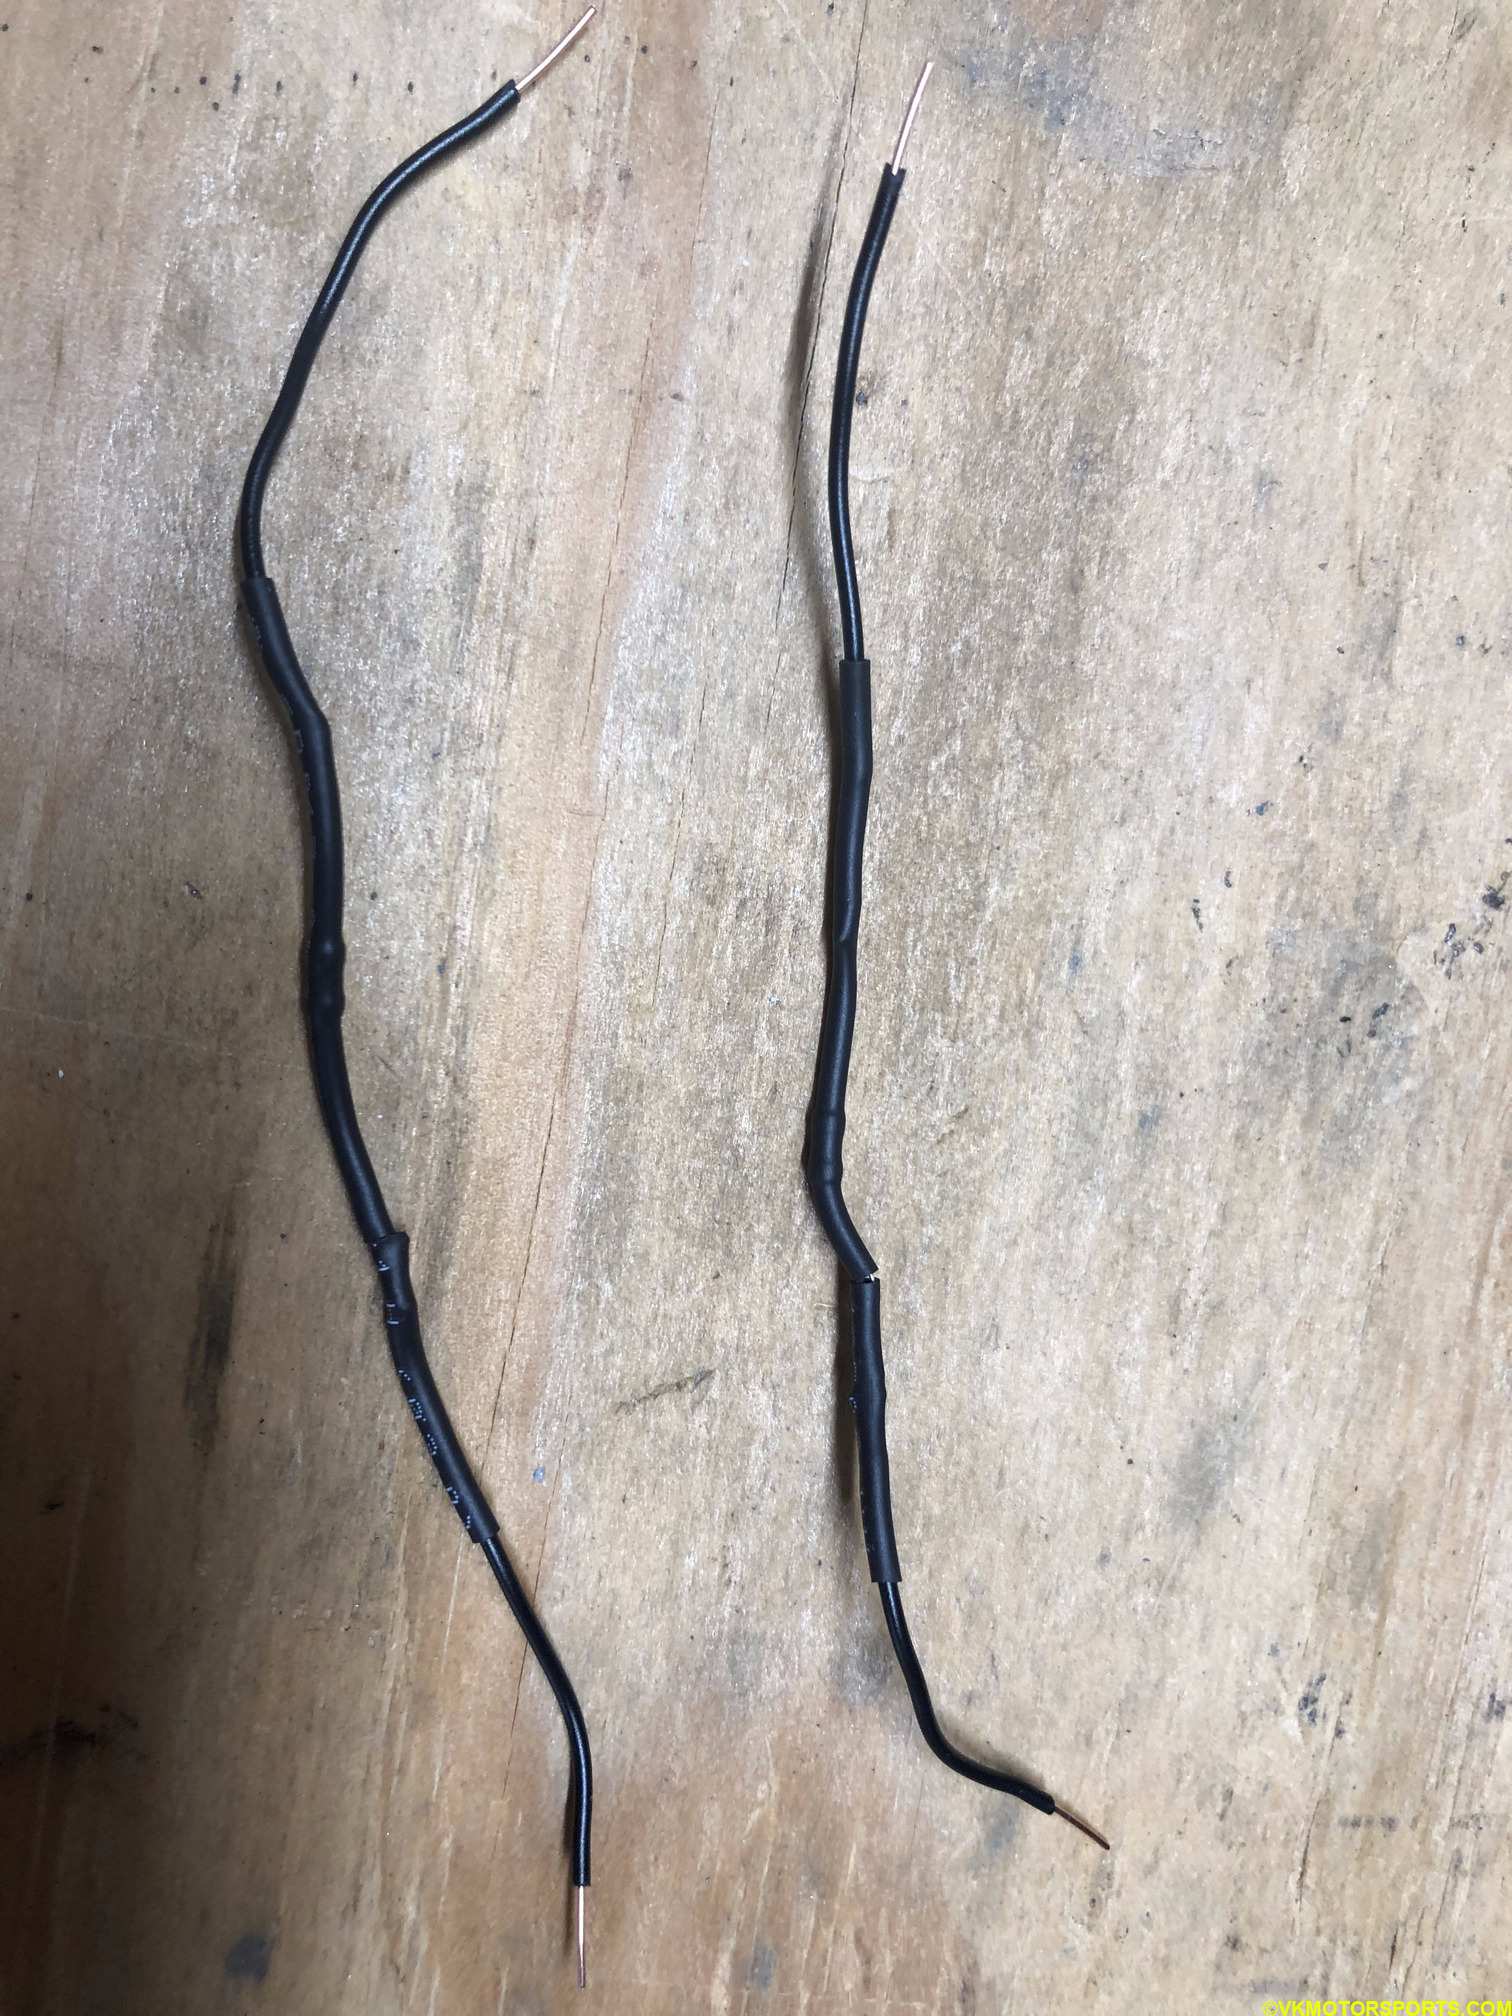 Figure 4. Heat shrink tubing covered exposed connections
Step 4: Now the main step is to take the yellow connector wiring you had exposed in Step 1, and connect it to our resistor from Step 3. Use the wire stripper and needle nose pliers to make this joint strong, and using the soldering iron kit solder the connections. Remember to insert the heat shrink tubing before doing the soldering as seen in Figure 5.
 Figure 5. Solder the resistor to the airbag connector harness
Step 6: Using the heat gun as in Step 3 shrink the tubing around the exposed connections. You should see it look like Figures 6a and 6b.
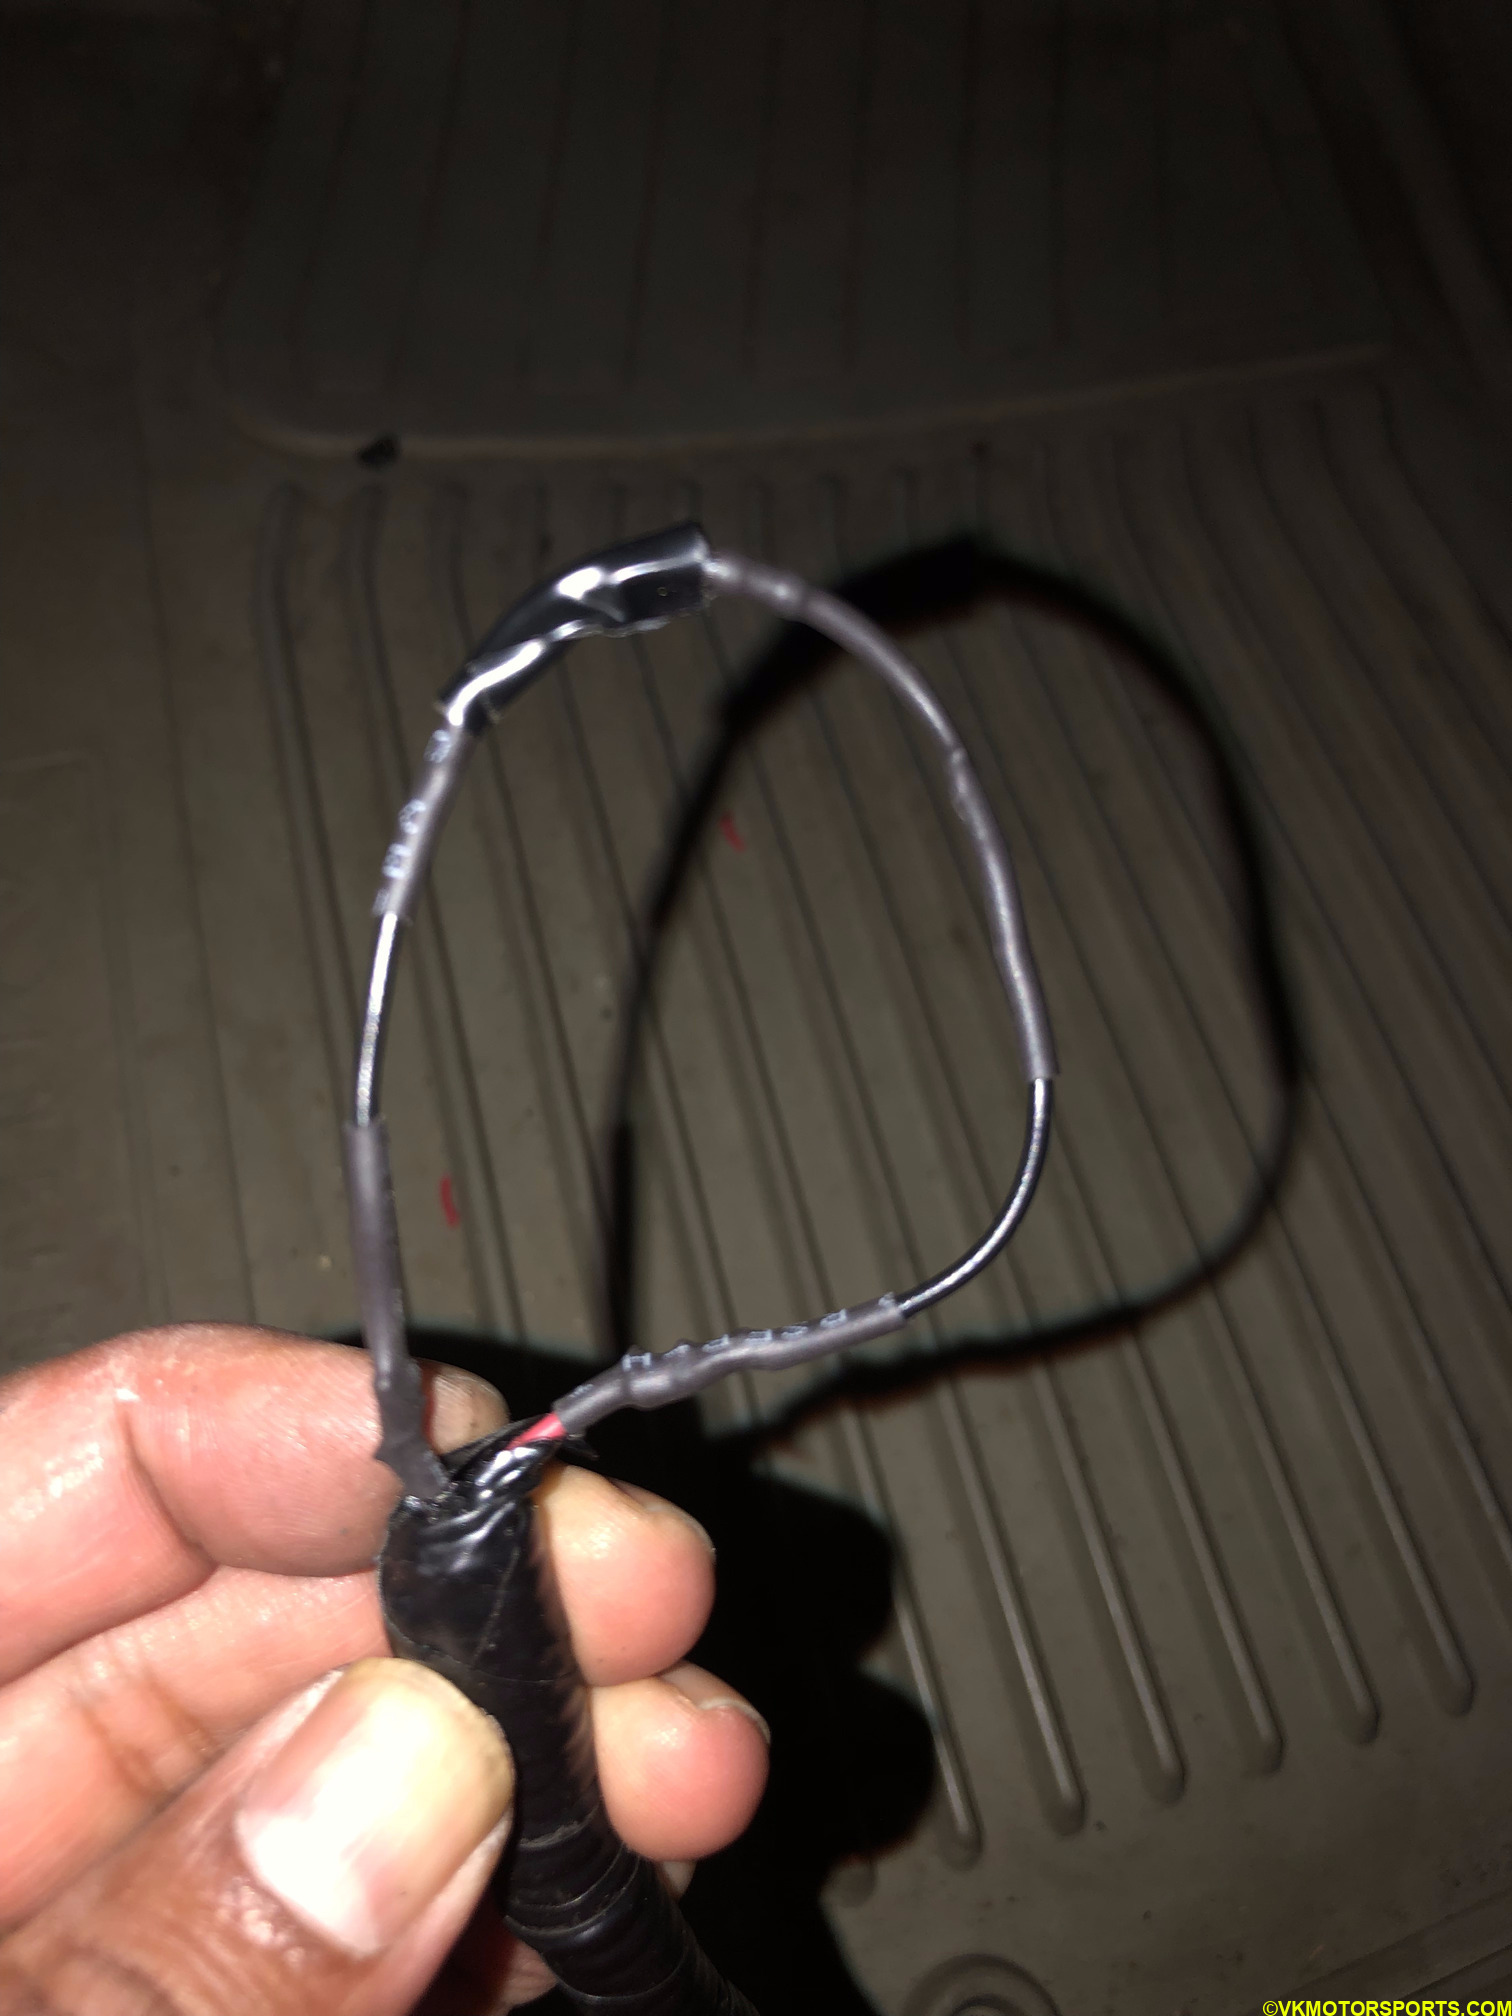 Figure 6a. Connected resistor
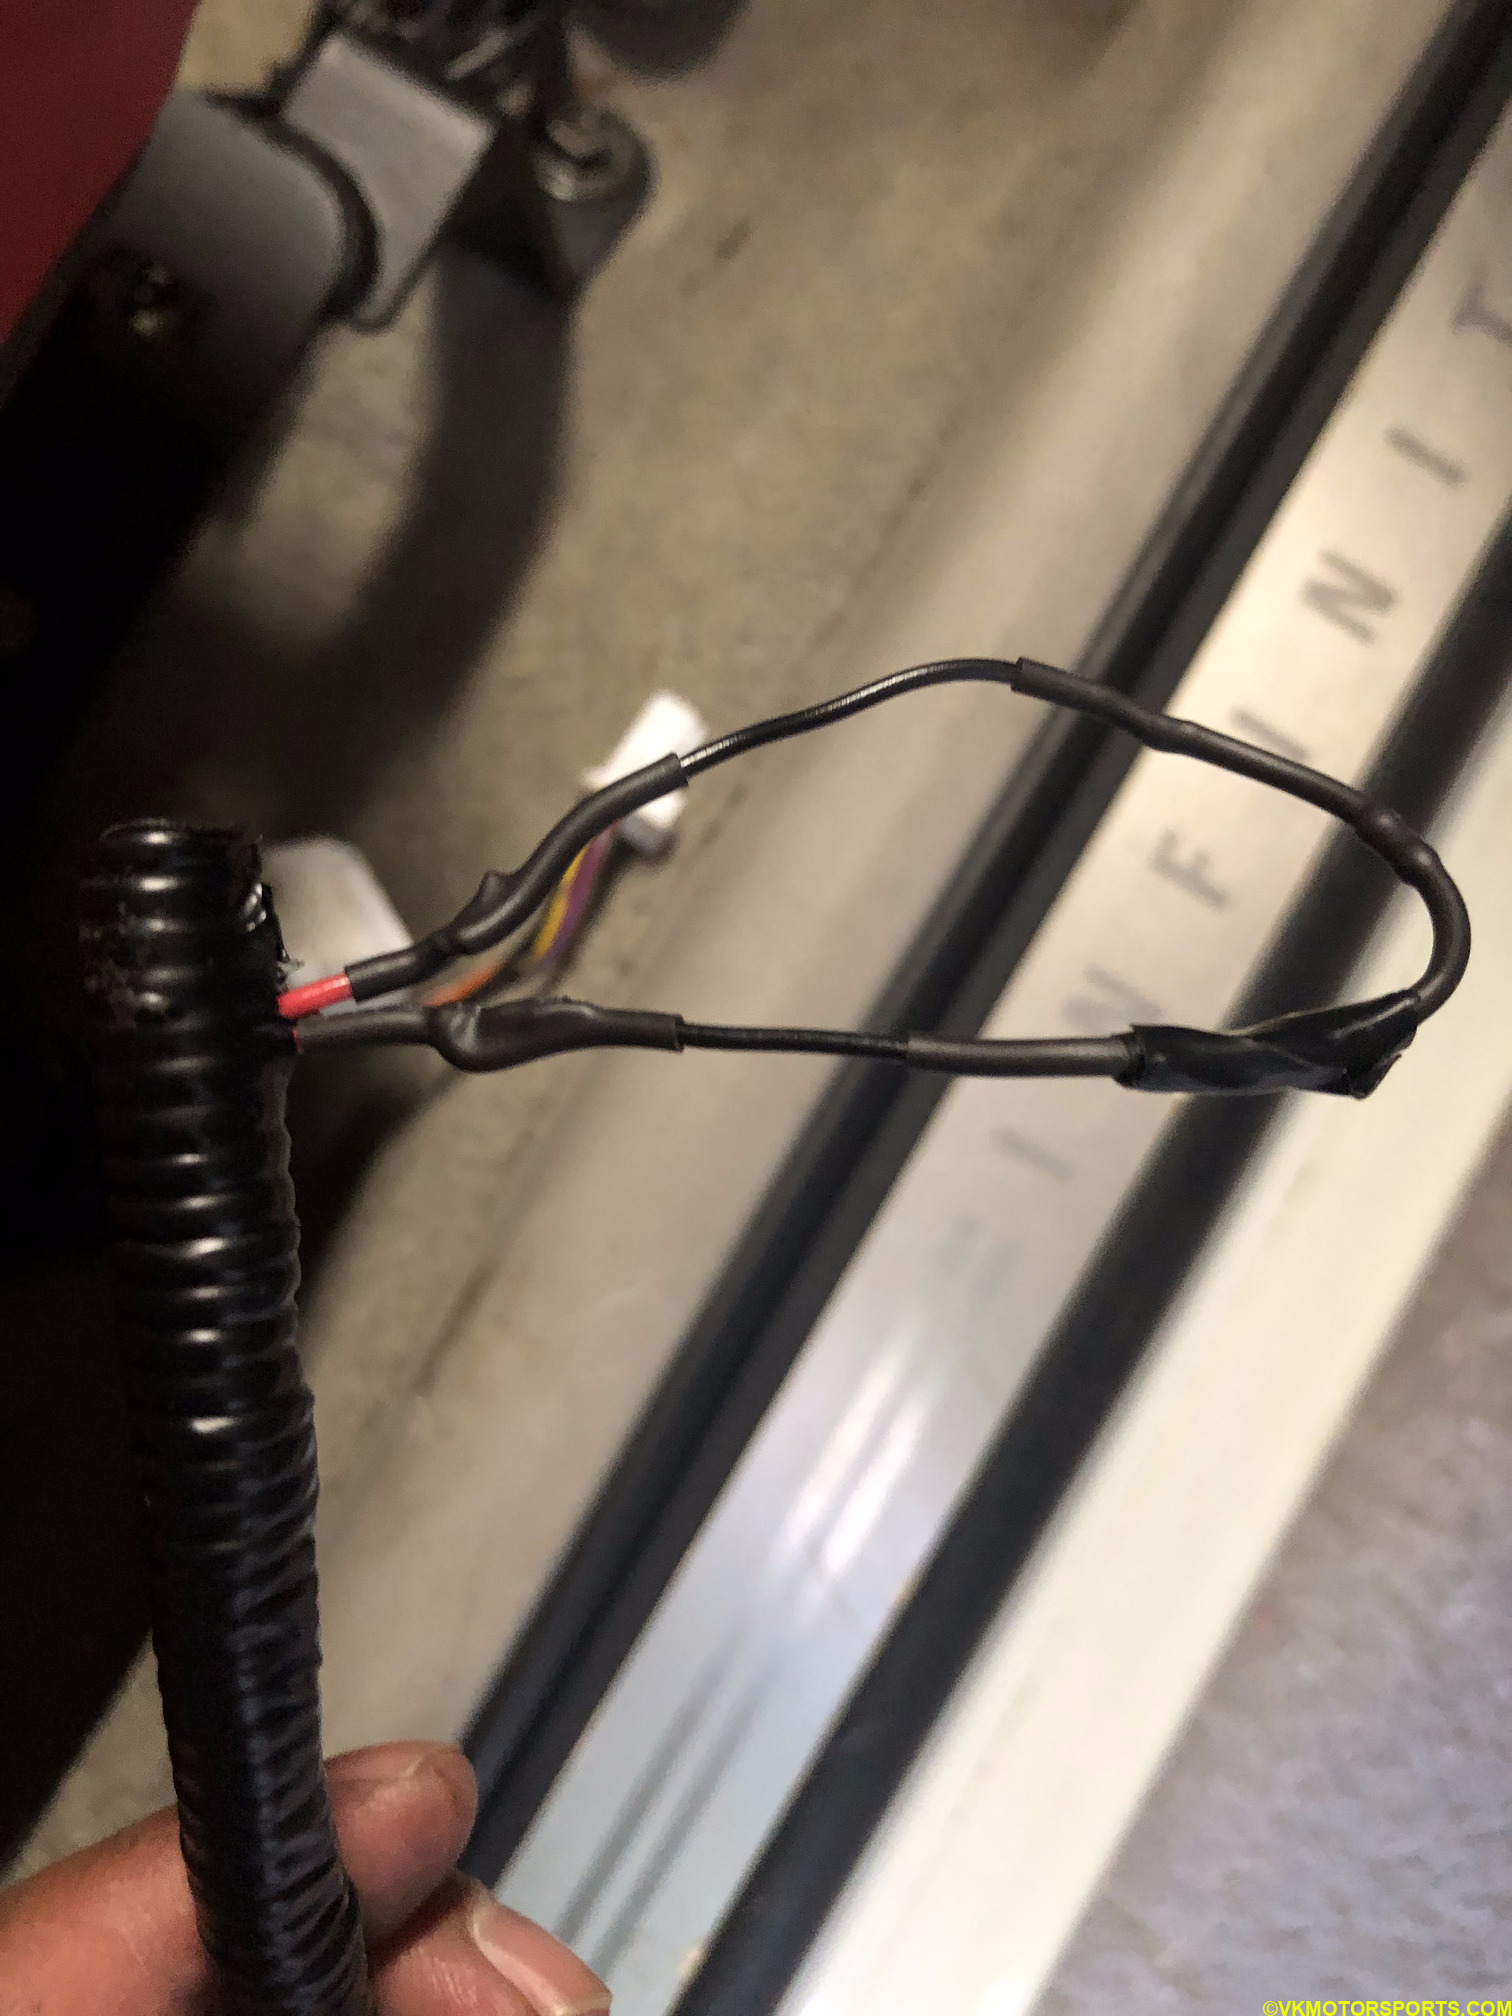 Figure 6b. Connected resistor
Step 7: Now you need to follow the airbag reset process as outlined in the service manual page SRS-20.
Once the airbag light has been reset, you should be able to see the blinking light in the instrument panel disappear or you should refer to the code reading section above and check the airbag module codes again. I was able to get the driver side code B1034 to go away, but still need to research how to get the B1022 code to go away. Since the aftermarket seats do not have a passenger weight sensor, also known as an occupant sensor, we need to simulate that sensor too but with a different contraption.