A few weeks ago I had ordered a replacement glove box from eBay for the Miata. The glove box that came with it would fall off because its locking mechanism was irrepairably broken as shown in Figure 2 and Figure 3. Initially, it was usable but everytime I wanted to store something in the glove box, I spent several minutes trying to get it to stay in place and lock.
The Miata being a convertible has a locked glove box that opens with the ignition key. Hence, there is a requirement to swap the lock from the old glove box into its replacement. I hoped that it would be an easy replacement, and it was, as you shall see in this post.
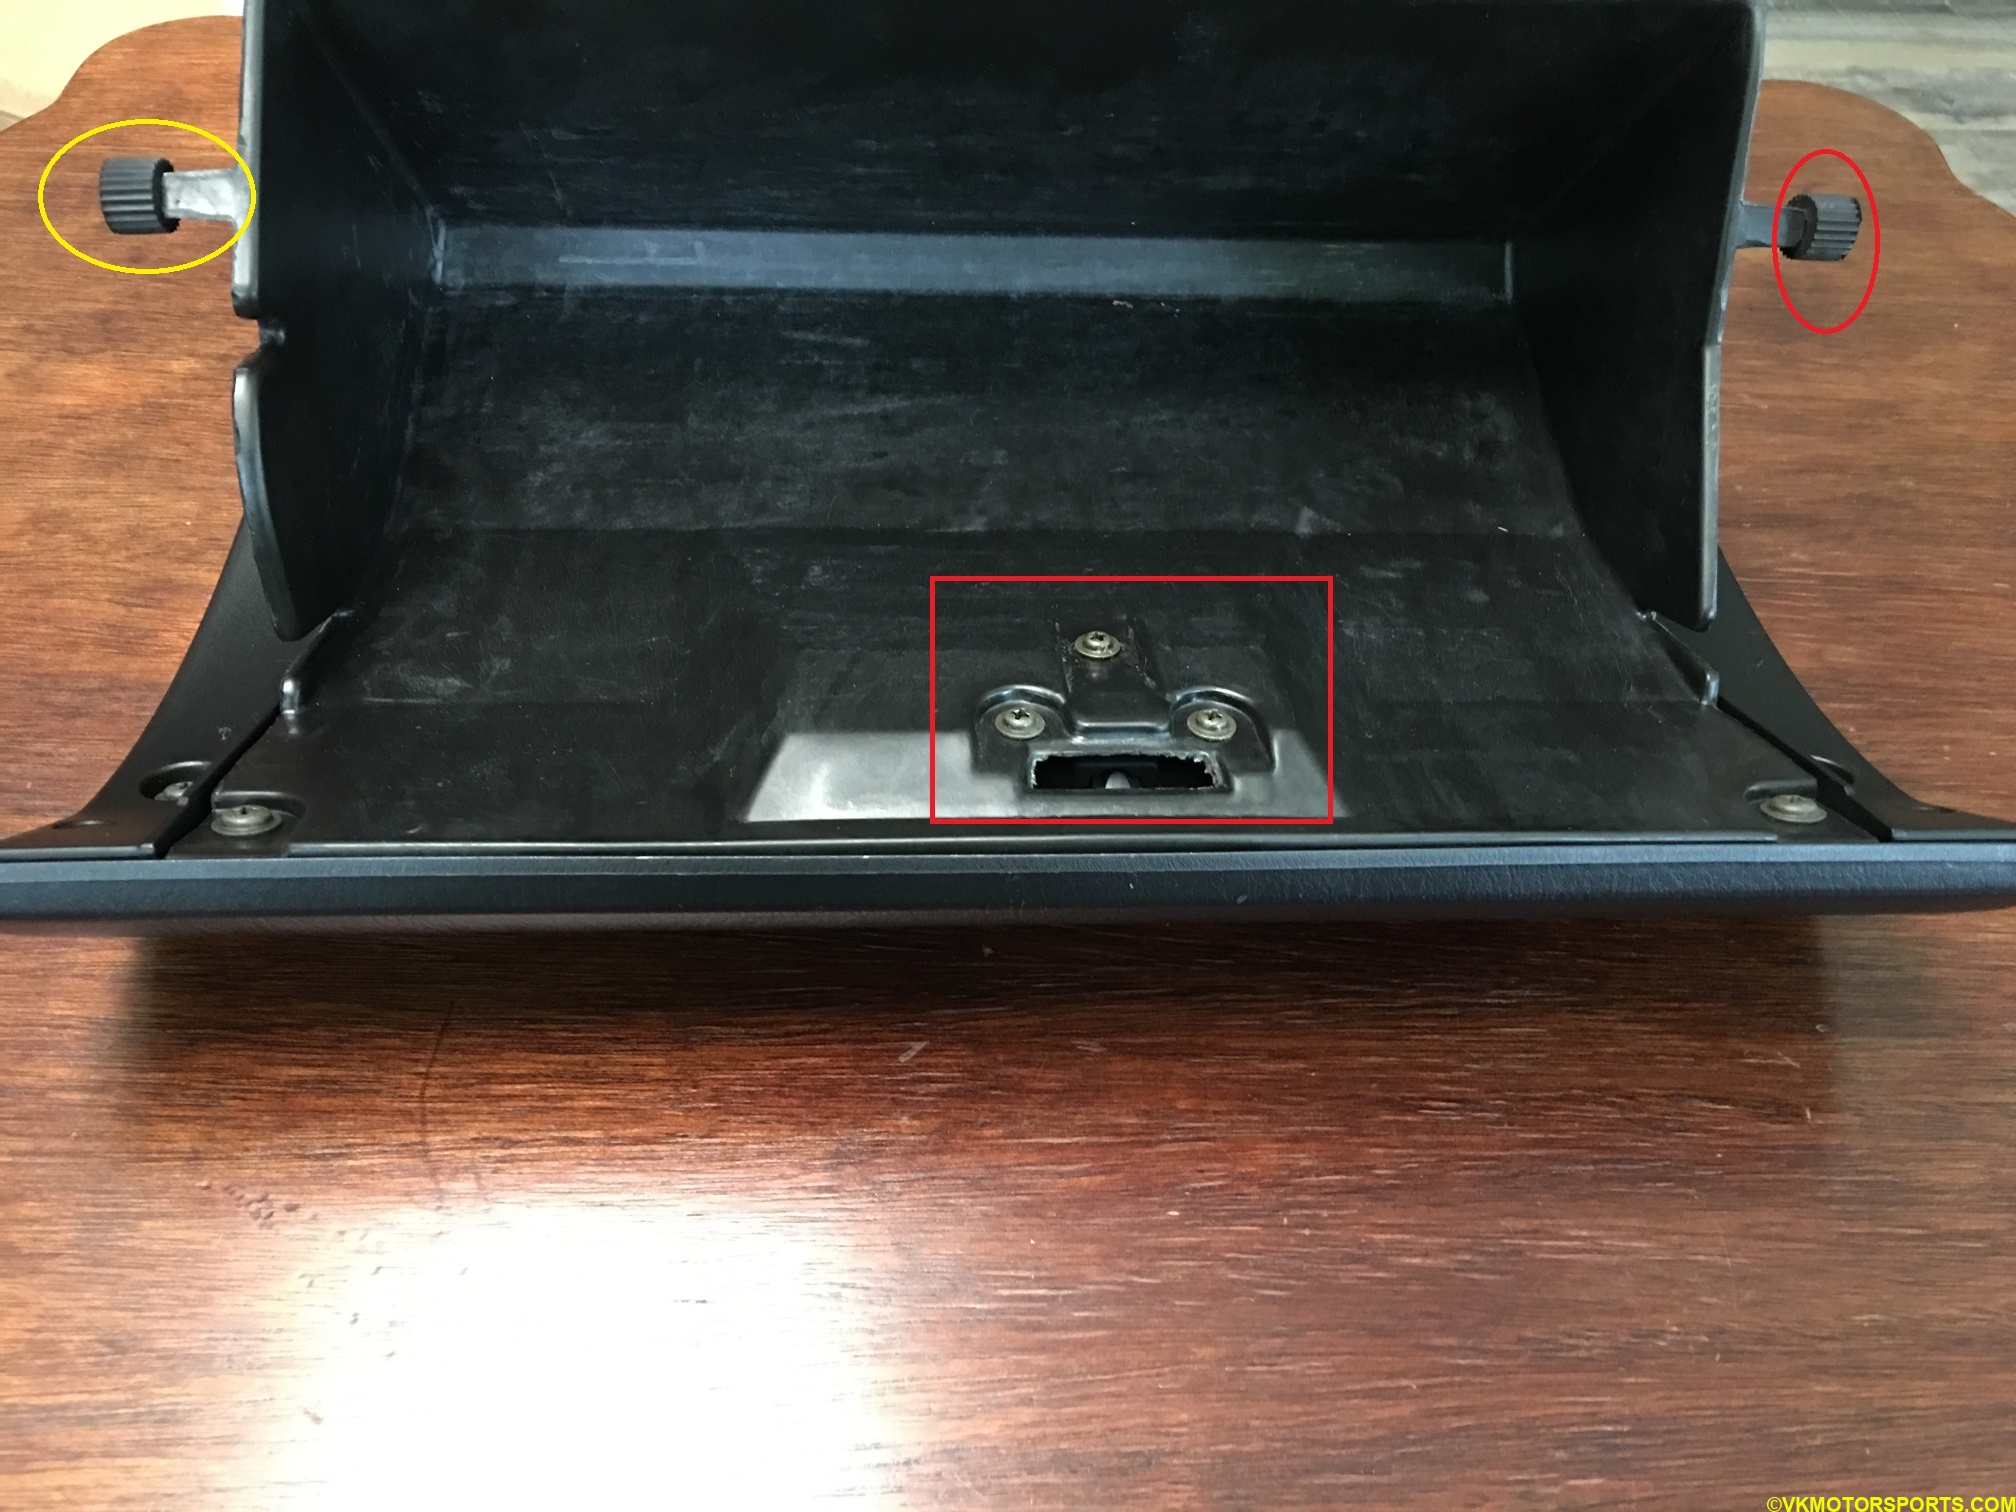 Figure 1. The original glove box with the lock screws marked and the roller covers that need to be used in the replacement glove box
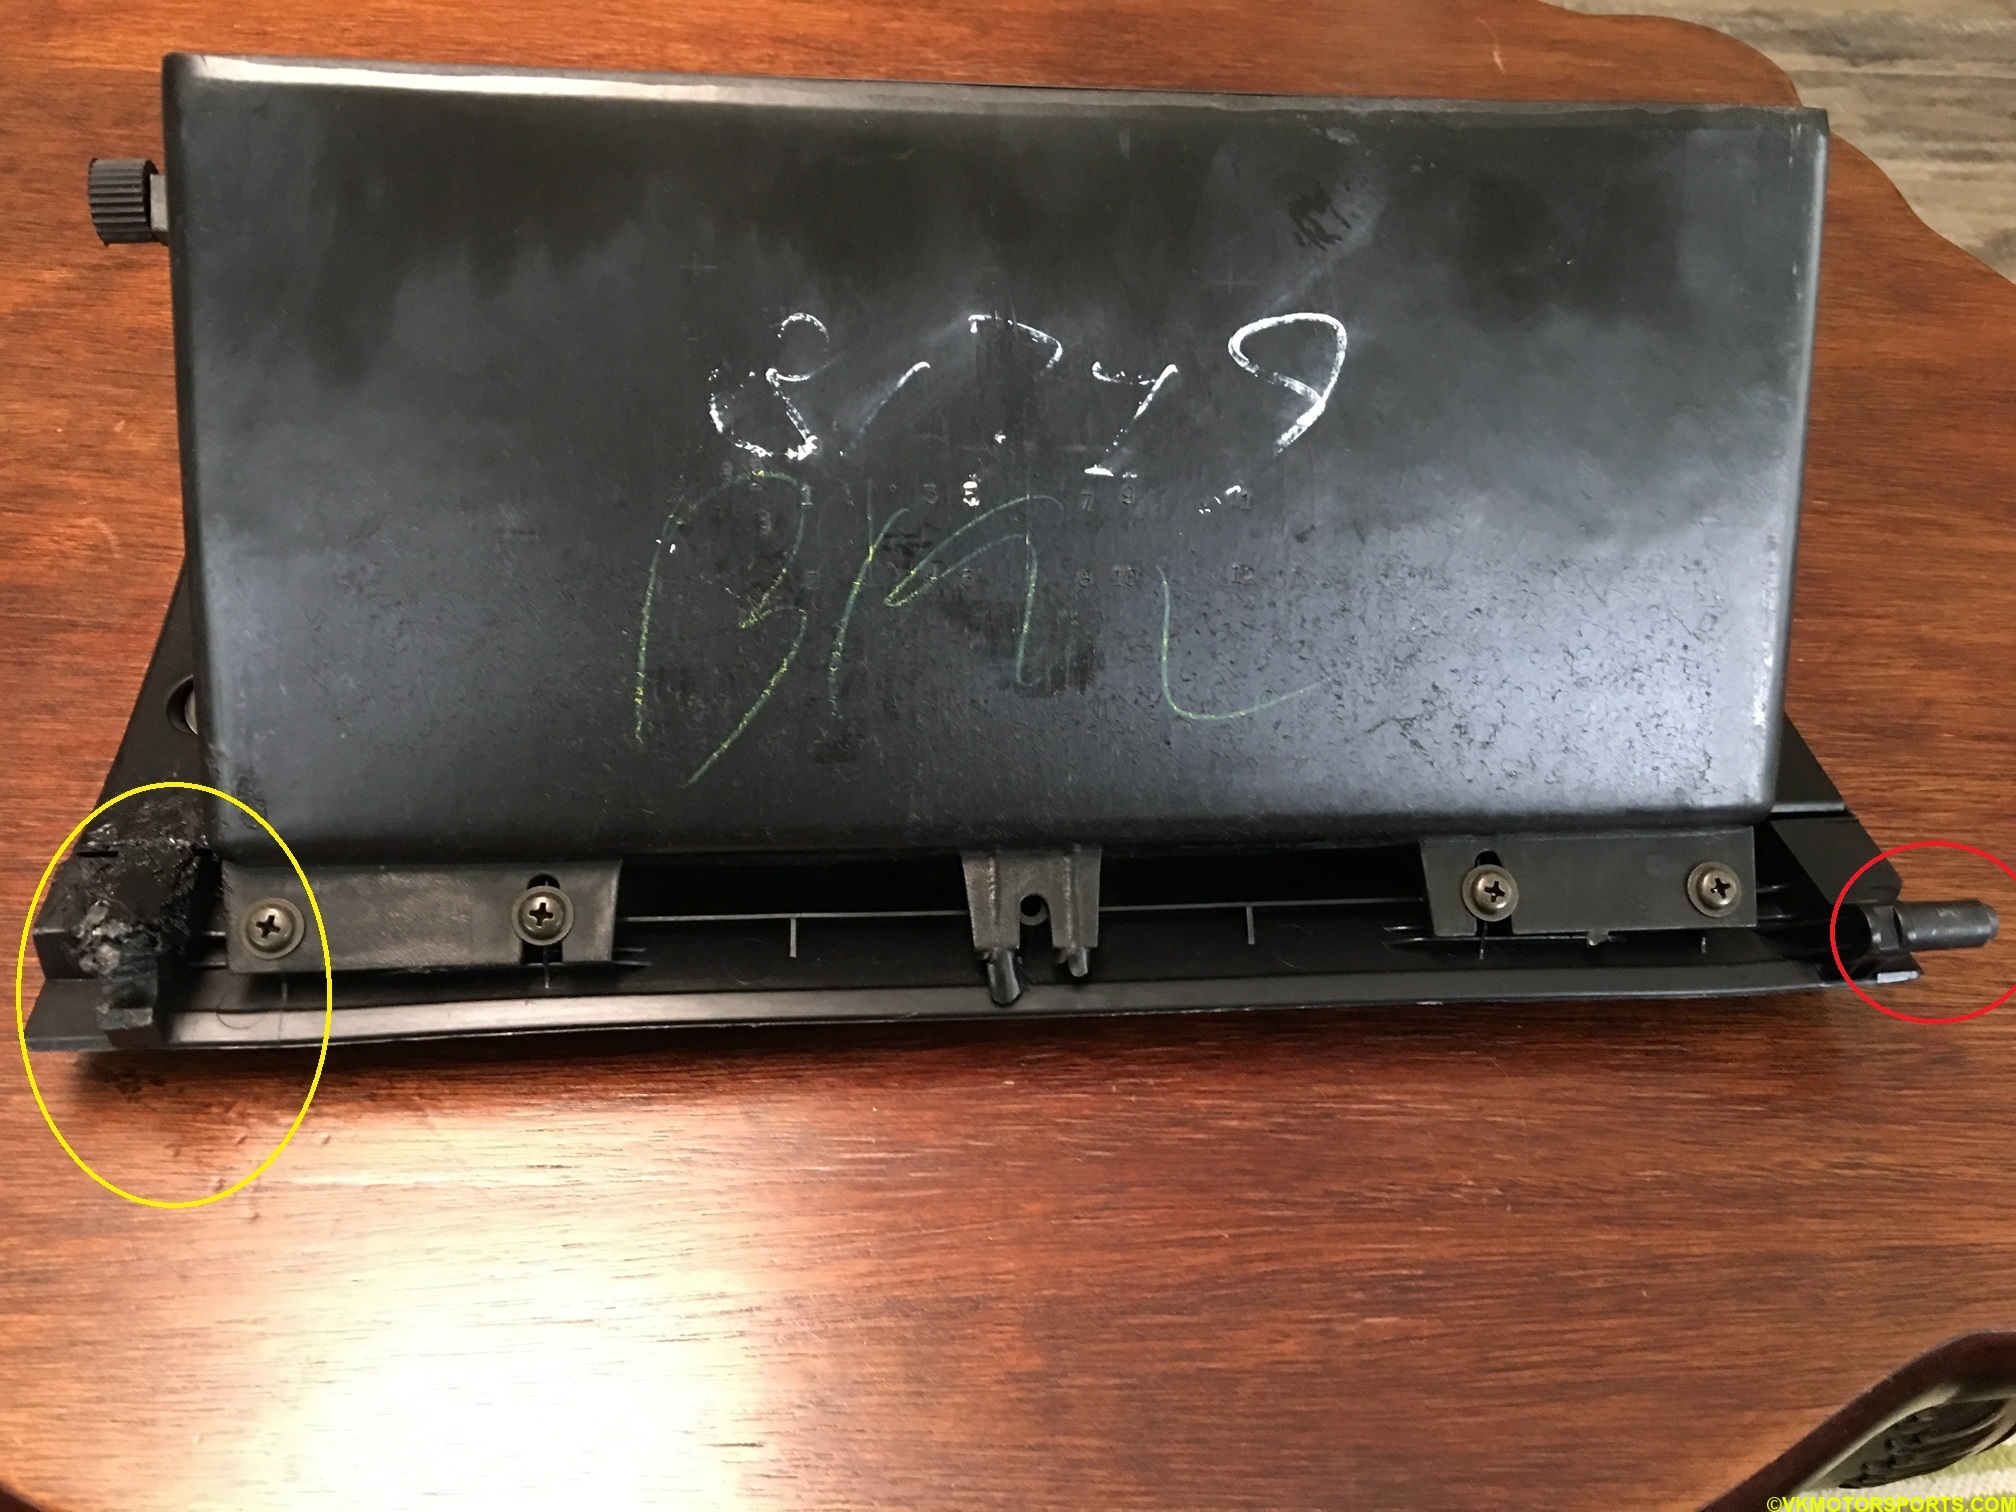 Figure 2. The back side of the glove box where you can see the latching mechanism is broken
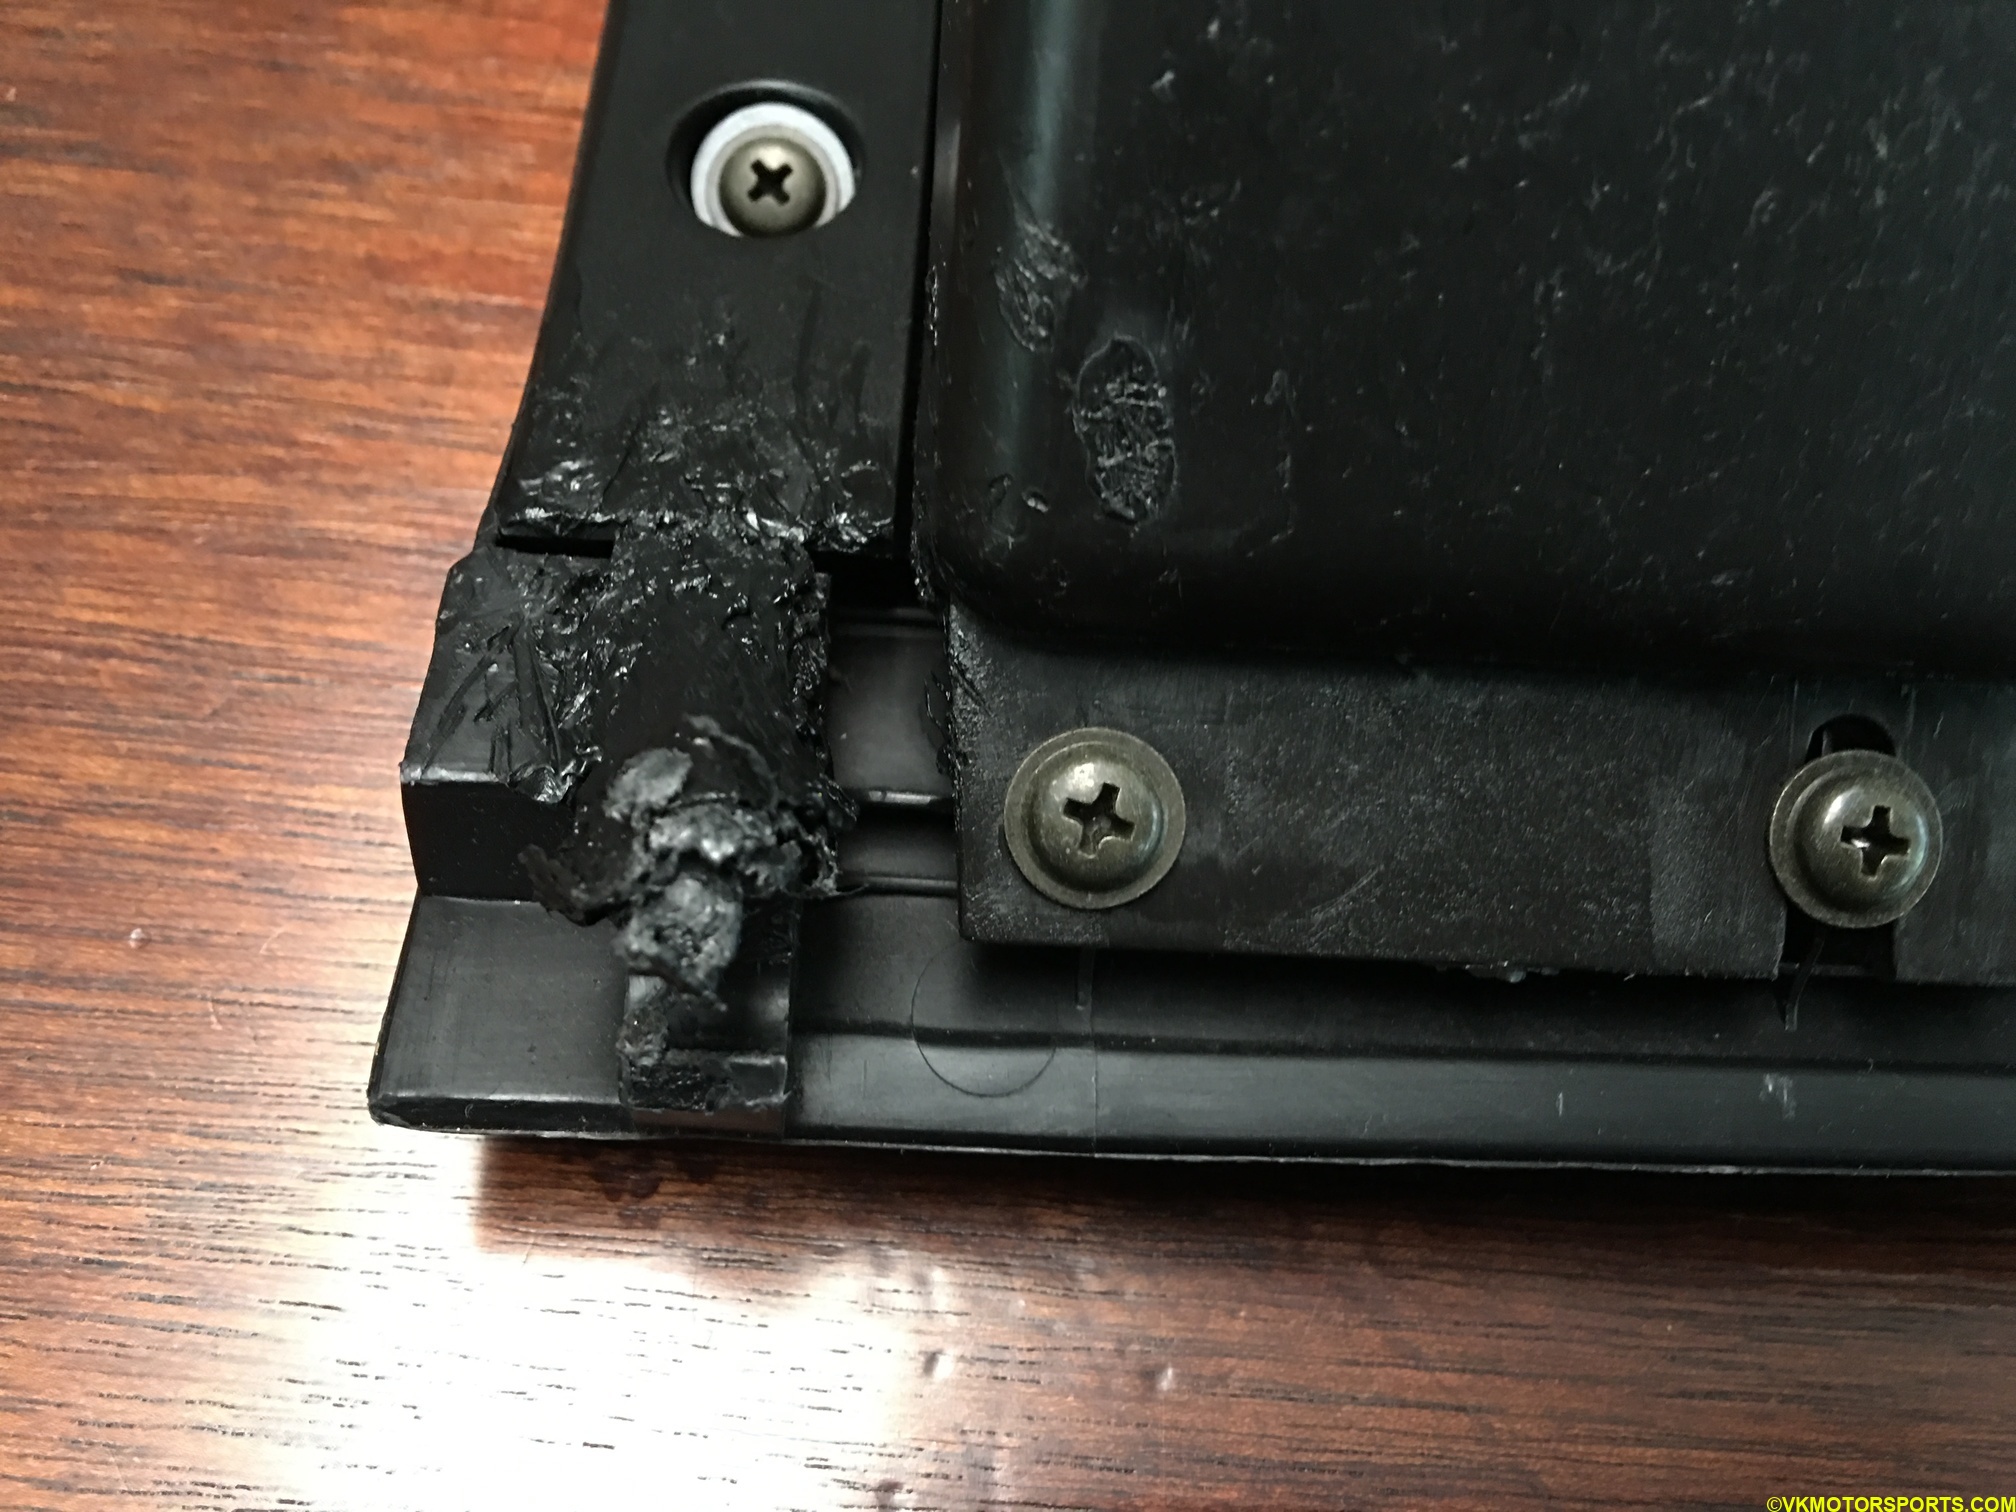 Figure 3. An enlarged close-up of the broken latch mechanism
Detach the lock from the glove box by unscrewing the three screws as seen in the red rectangle in Figure 1, and in the enlarged close-up in Figure 4.
You will be able to pull the lock out once the screws have been taken out as in Figure 5. The rear of the lock will look like as in Figure 6 where you can see the slots for the three screws that were holding the lock to the glove box.
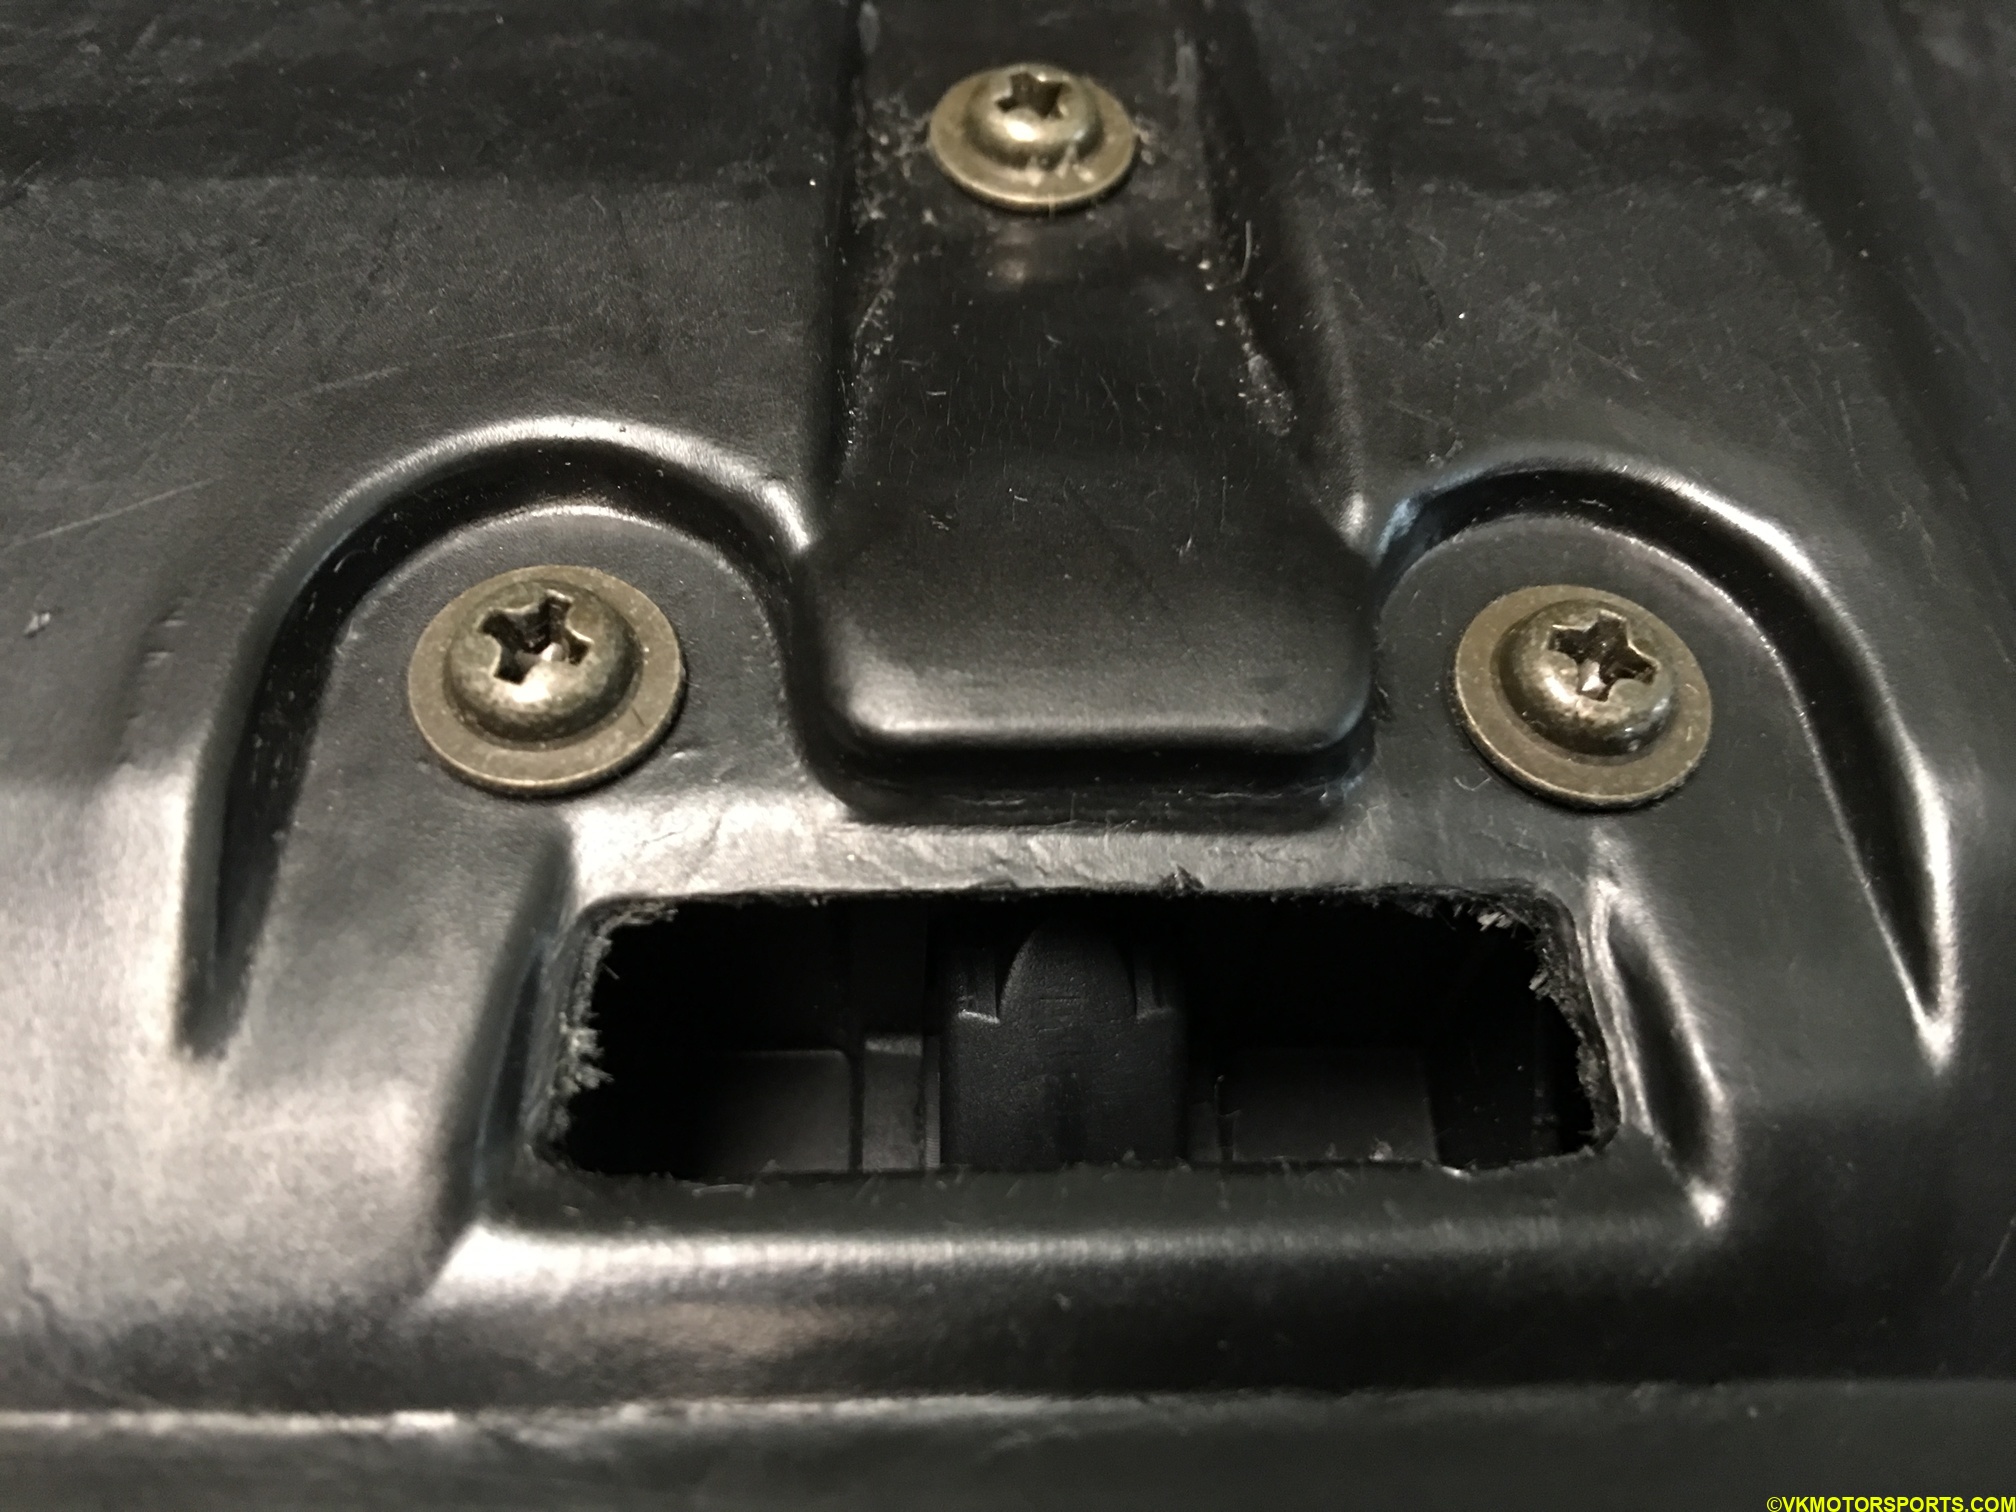 Figure 4. A close-up of the screws holding the lock to the glovebox.
 Figure 5. The lock once the three screws have been removed.
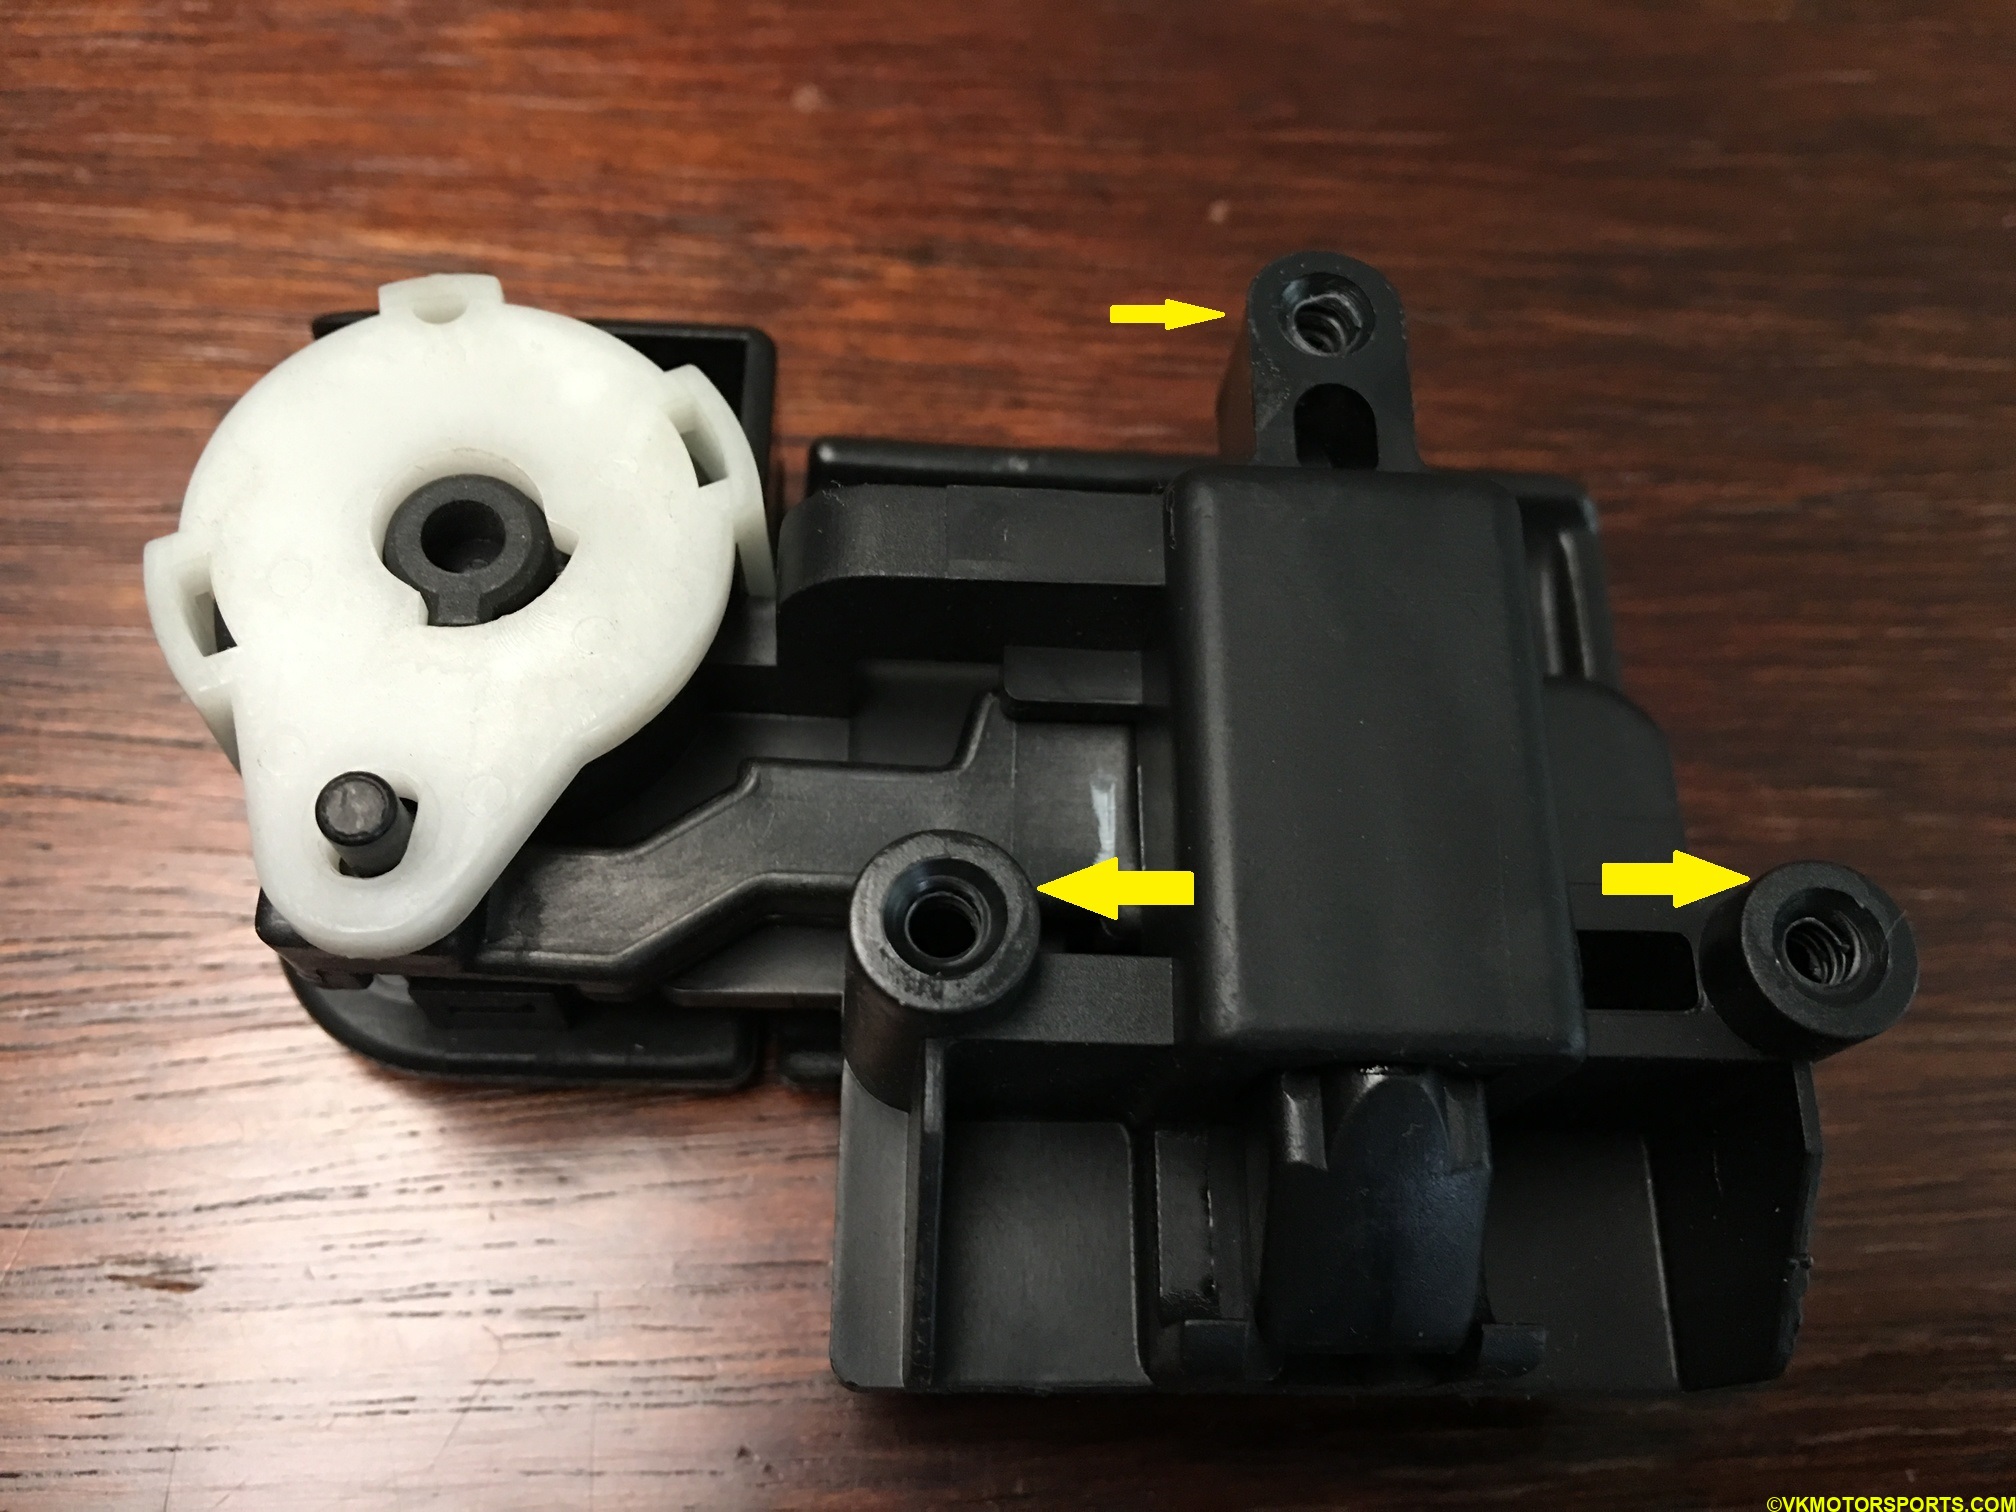 Figure 6. The rear of the lock showing where the three screws fit in.
Let us take a look at the replacement glove box in Figure 7. We want to remove the side roller covers as seen in Figure 1 and place them on the replacement glove box instead, and also replace the lock that we have just removed. Figure 8 shows how the actual latching mechanism is supposed to look like, as compared to the damaged one seen in Figure 2 and Figure 3. Figure 9 shows what the replacement glove box without a lock looks like. You can clearly see the three holes for the screws that need to hold the lock in there.
 Figure 7. The inside view of the replacement glove box, similar to Figure 1
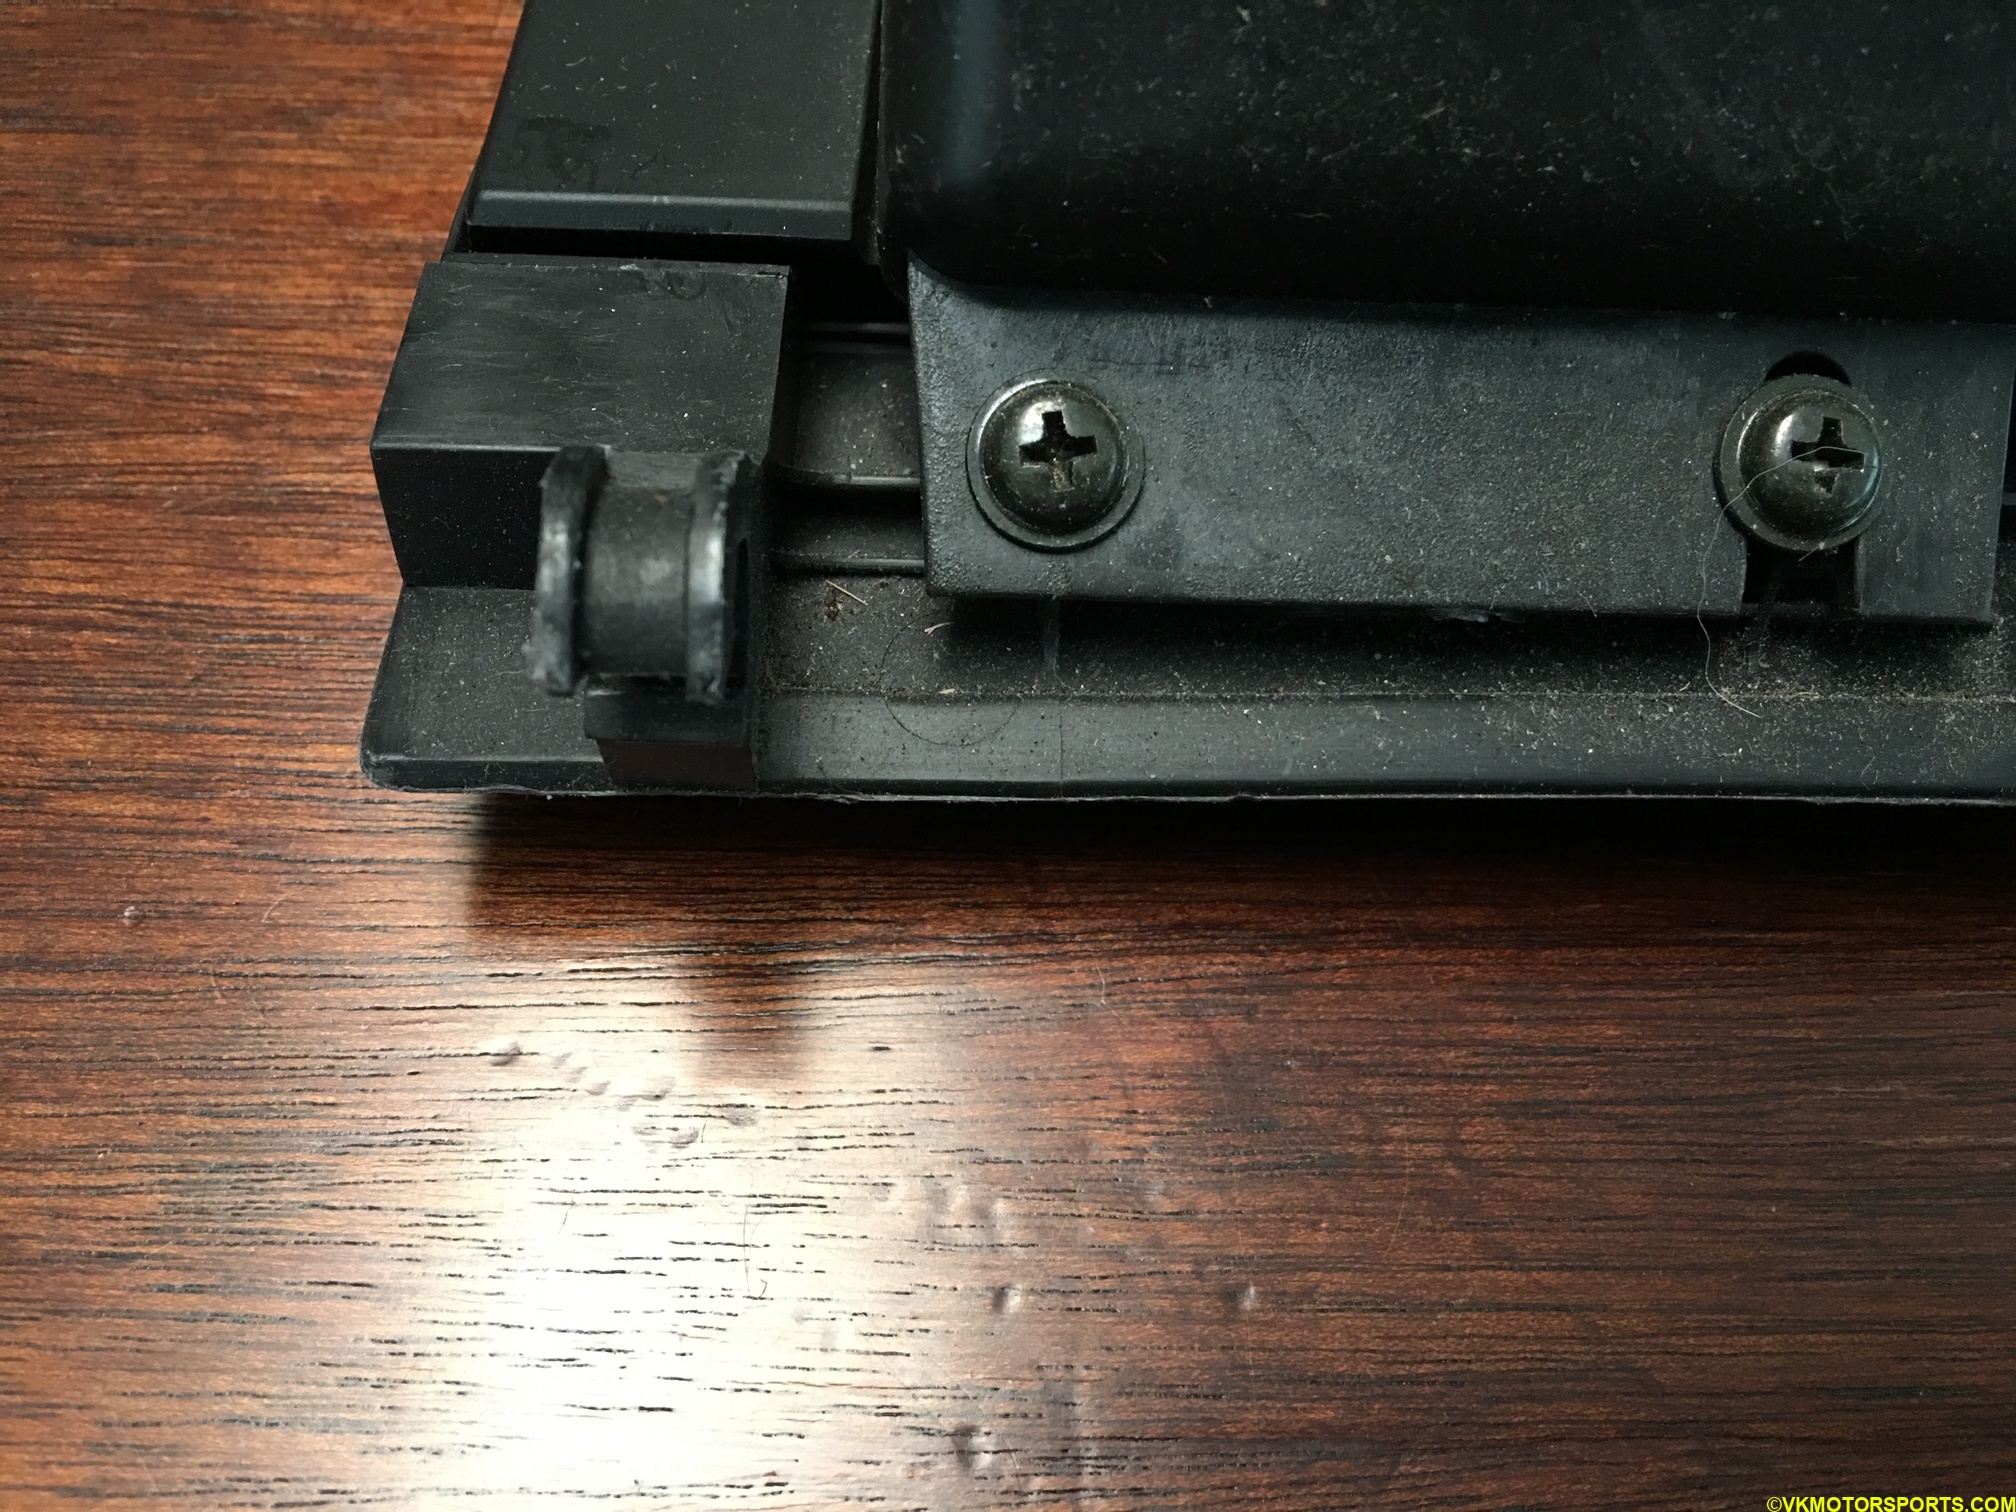 Figure 8. A working latching mechanism in the replacement glove box, as compared to figures 2 and 3
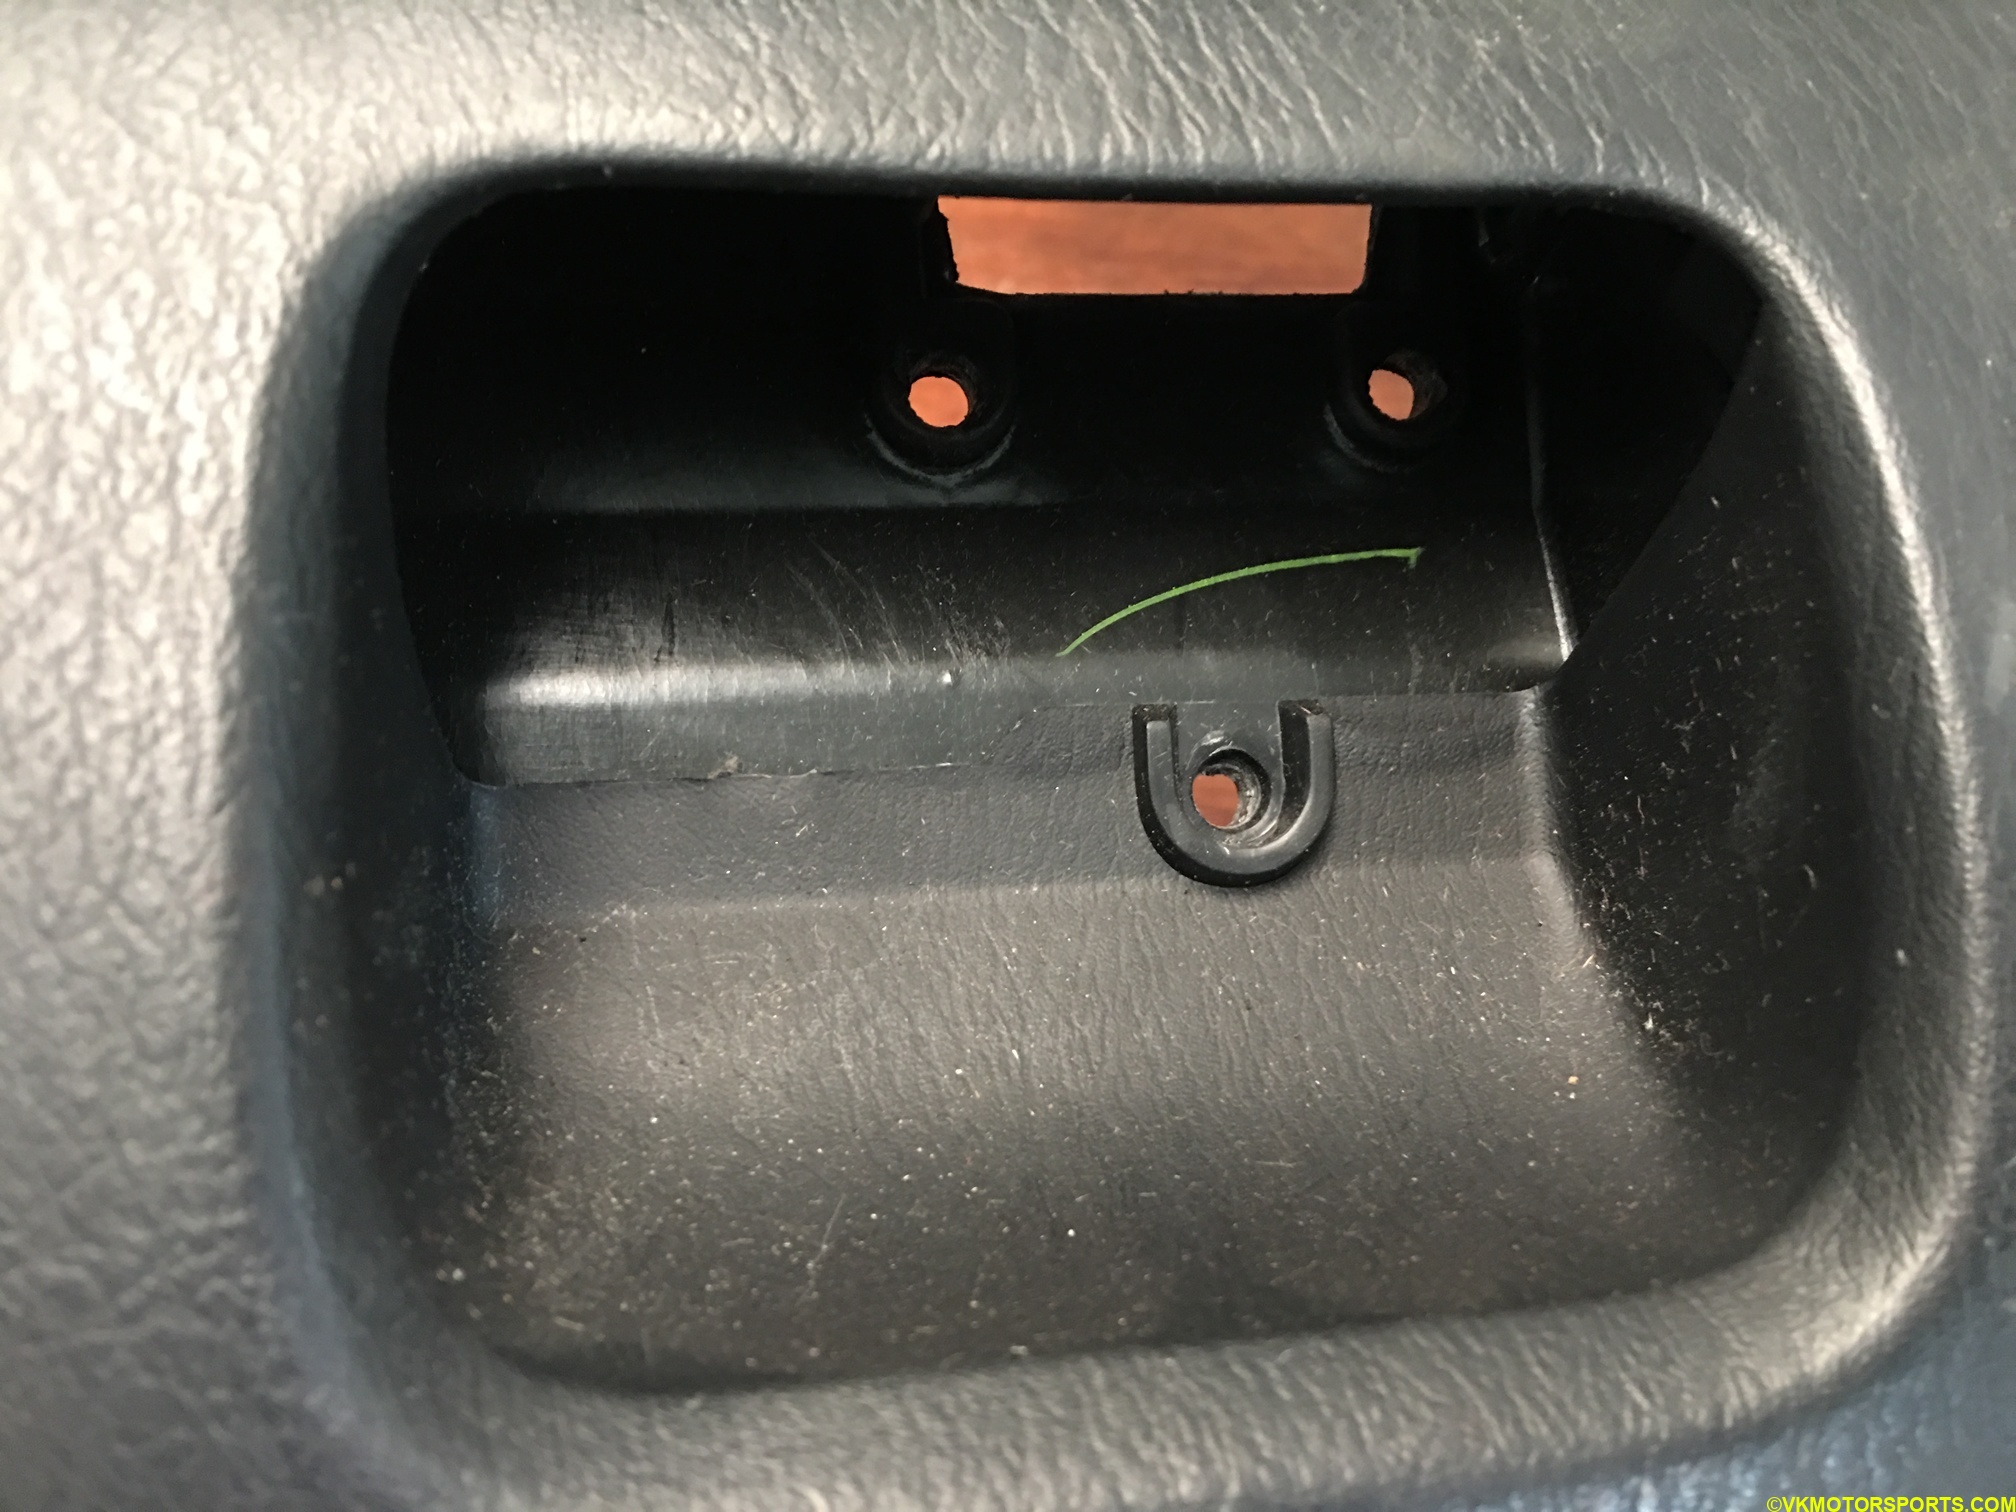 Figure 9. The lock screw holes in the replacement glove box for where the locking mechanism will fit
Place the lock in position, with the front of the lock (Figure 5) facing you and turn the glove box around, and screw in the lock in the three holes (Figure 6 and 9). It should look like in Figure 10 and Figure 11 after the lock has been fixed to the replacement glove box.
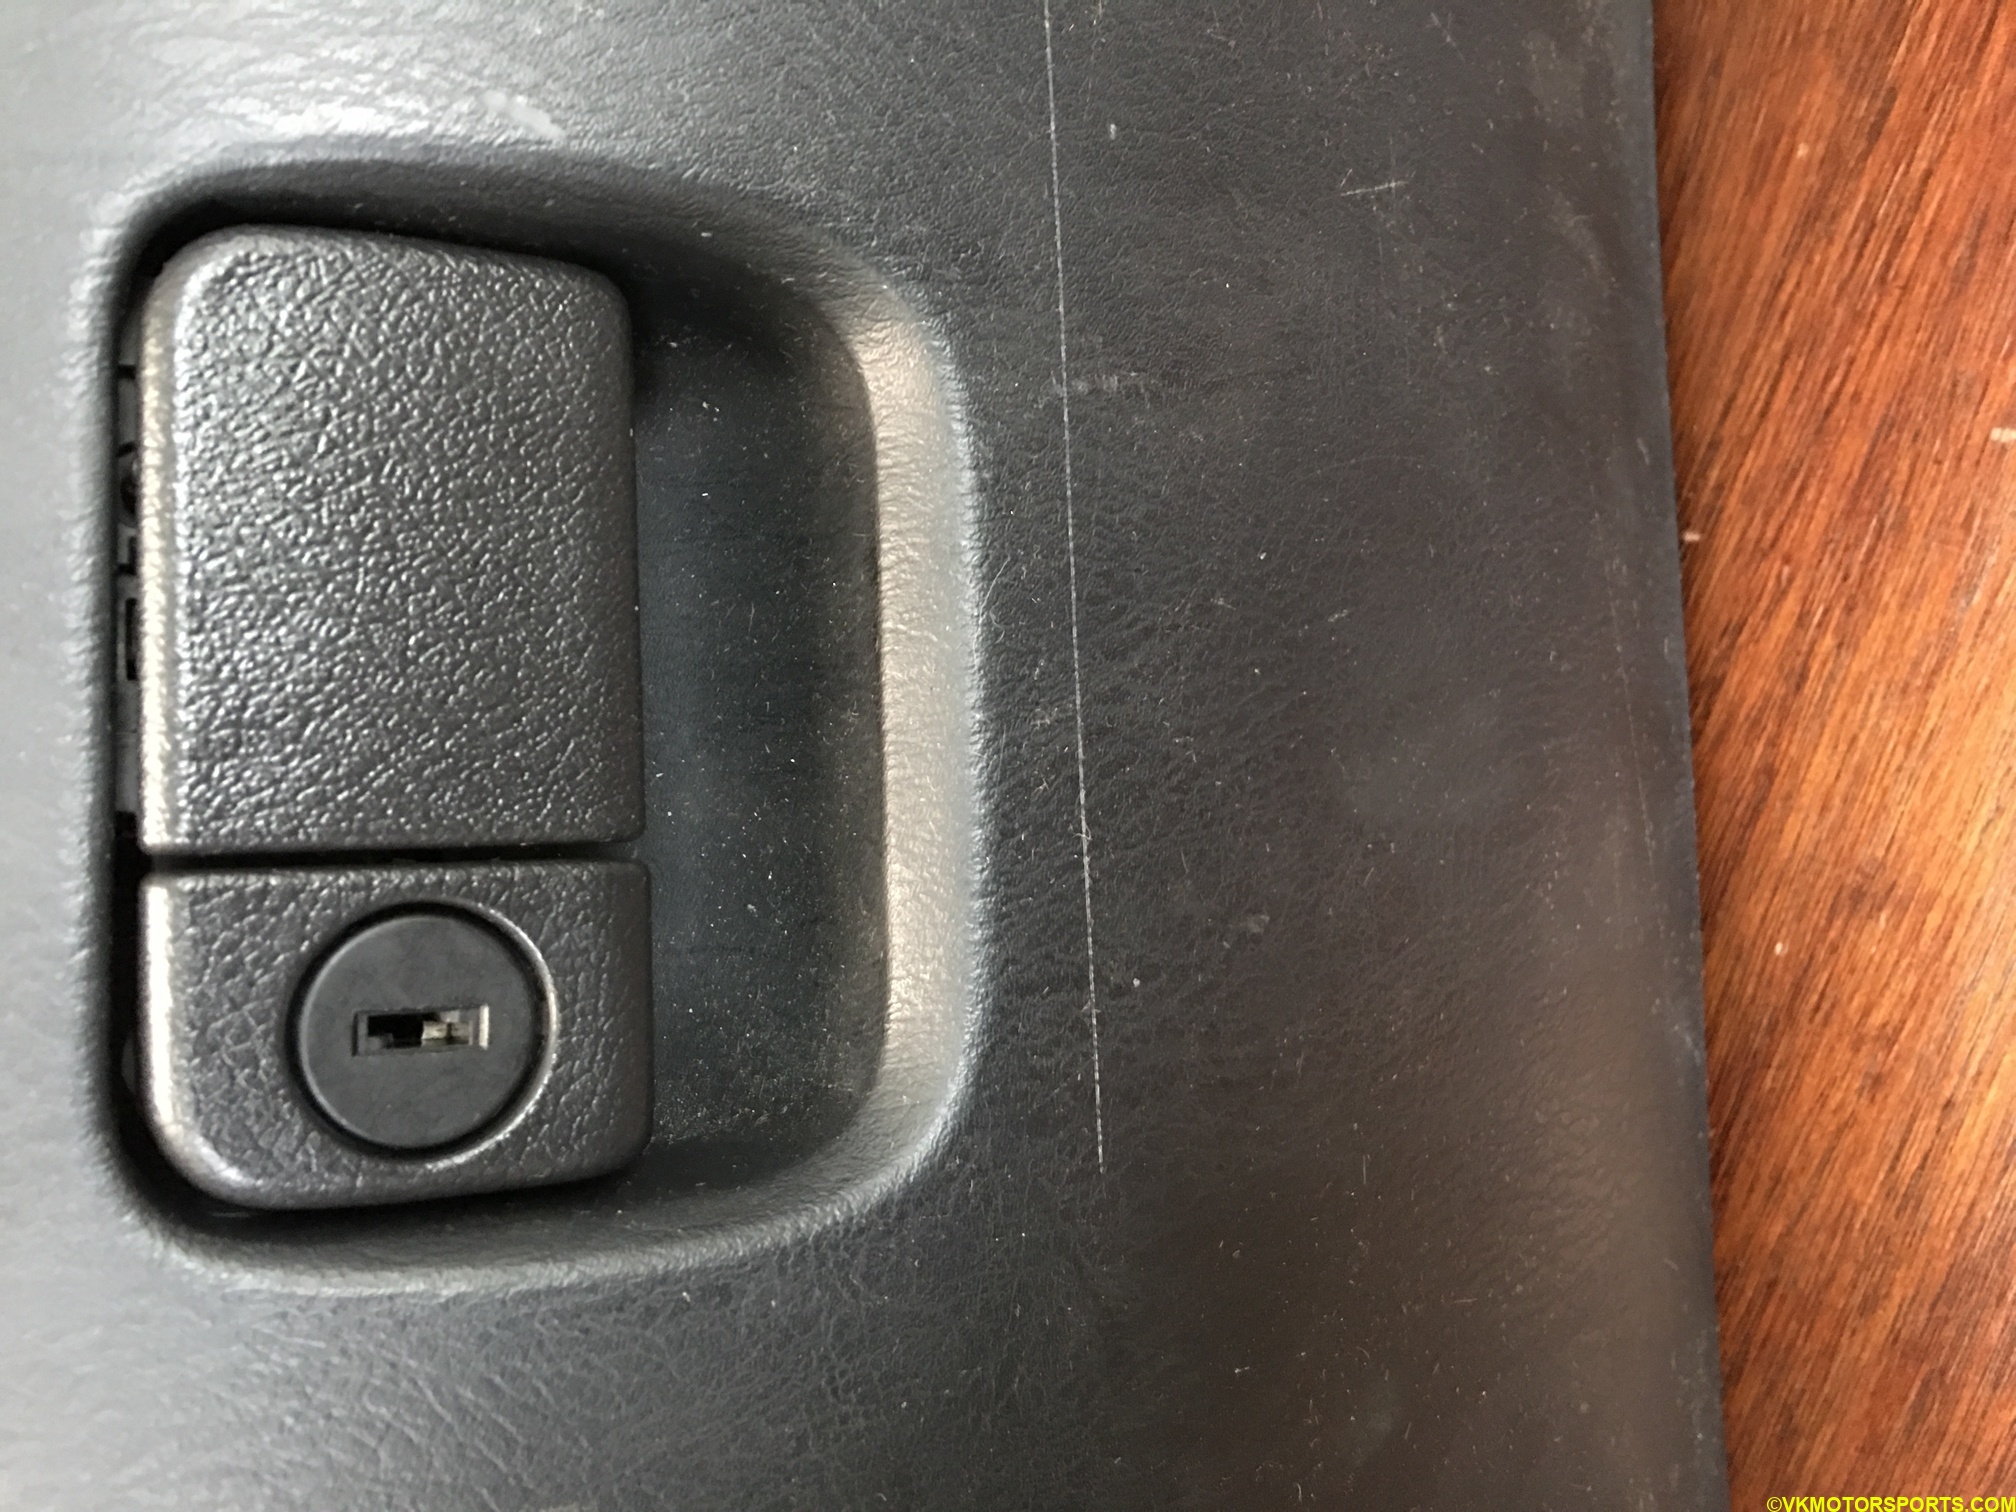 Figure 10. Lock placed in position
 Figure 11. Screws added in position to hold the lock to the glove box
Now we need to attach the replacement glove box to the glove box latching mechanism. If you look at Figure 2 and Figure 8, the left side latching mechanism fits on a cylindrical hinge-like thing as seen in the yellow circle in Figure 12 and Figure 13, which is in the passenger-side of the car where the glove box resides. The projection seen in the red circle in Figure 2 is supposed to fit into the hole shown in the yellow circle in the Figure 14, and the roller covers are supposed to slide on the slot marked with a yellow arrow on Figure 14. Figure 15 shows a close-up view of the hole, from a different angle, where the projection of the glove box fits into.
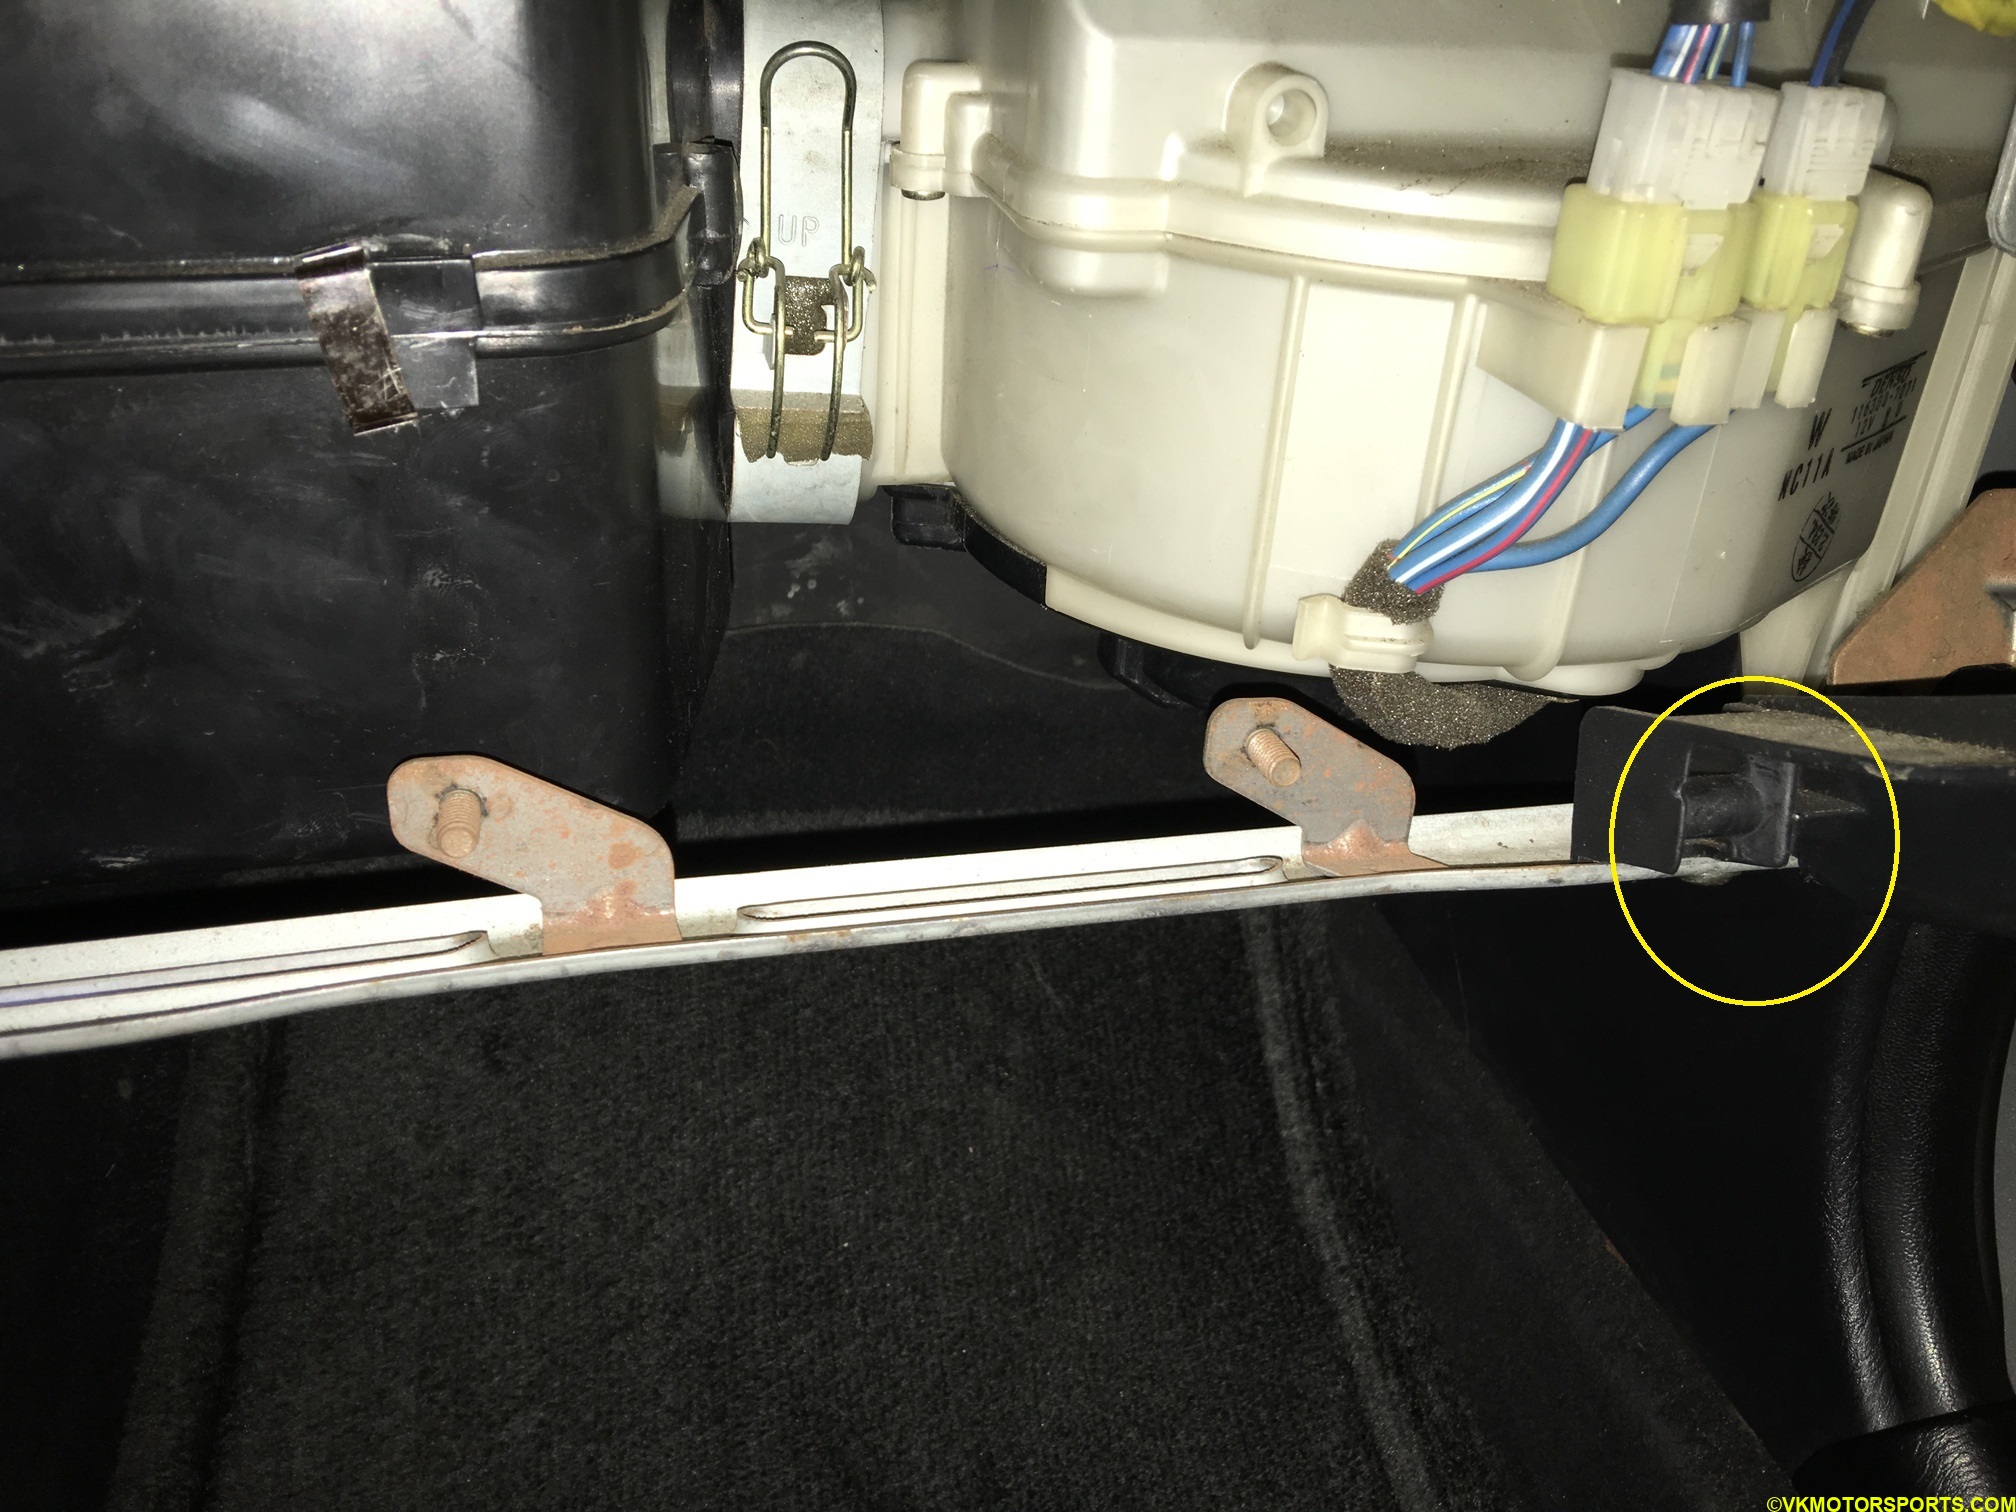 Figure 12. The latching mechanism in the car where the glove box fits in
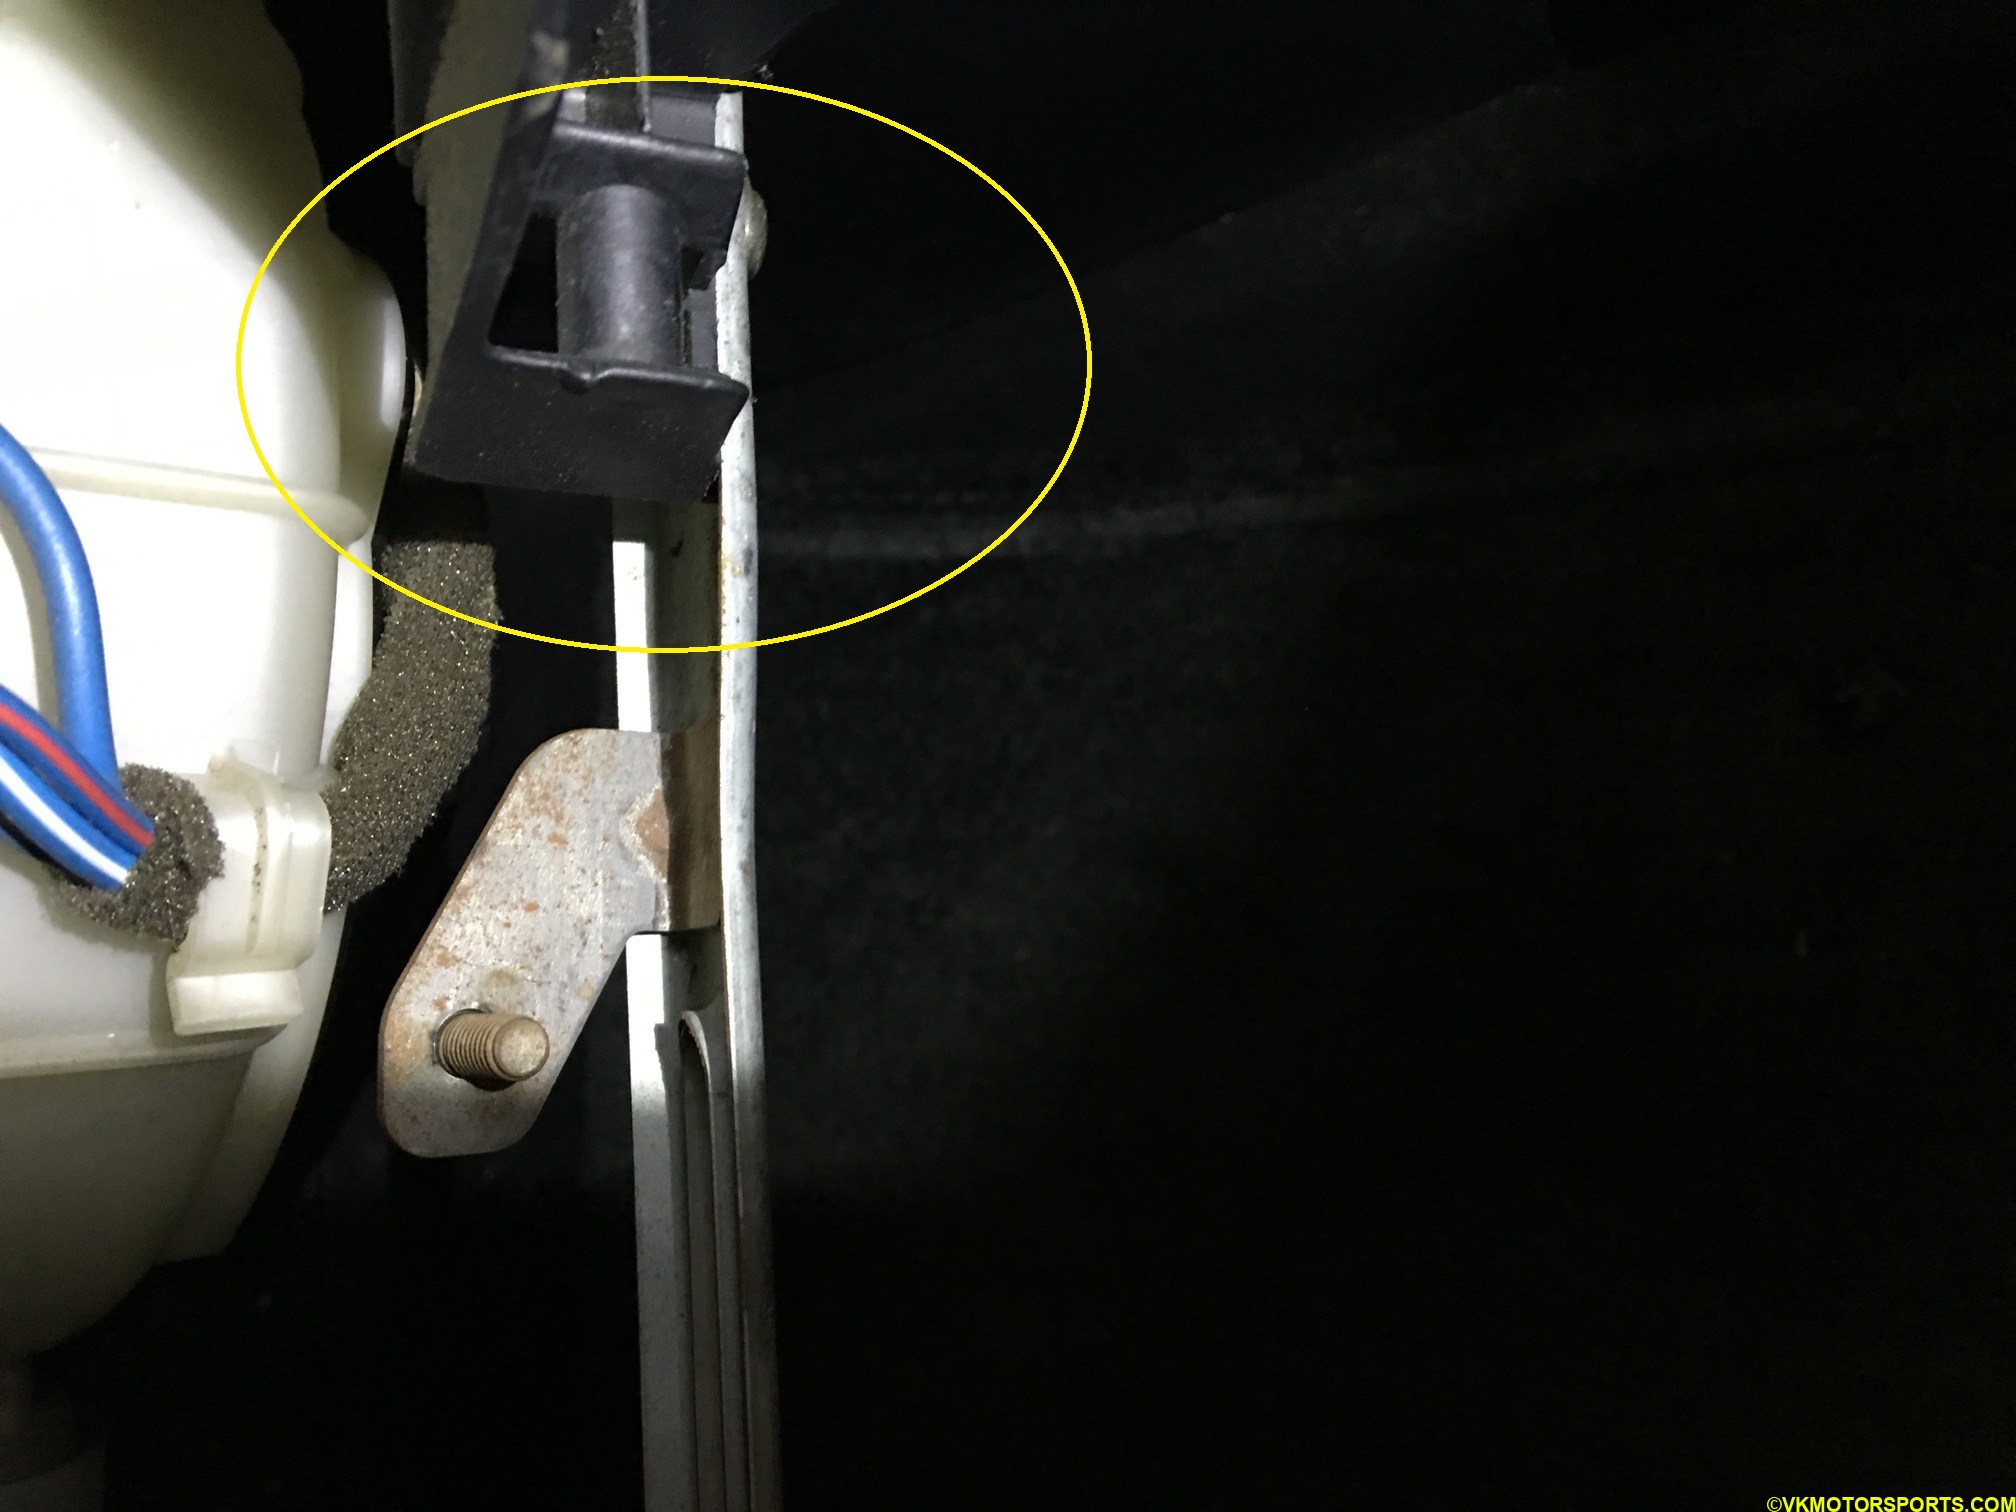 Figure 13. A close-up of the latching mechanism
 Figure 14. Left-side slider slot in the car for the glove box
 Figure 15. Left-side slot close-up of the hole where the glove box fits into
Once you have installed the replacement glove box, you should check if the lock works and the fitting is flush with the car’s interior. It worked for me and it took about 20 minutes, most of the time spent in trying to take proper pictures of the task.