I saw a Samurai sword handle shifter on a friend’s JDM import and decided to get one for myself through eBay a few weeks ago. It arrived today from China and I installed it in 5 minutes.
This is what the package that contains the handle, adapters and screws looks like as in figures 1, 2 and 3.
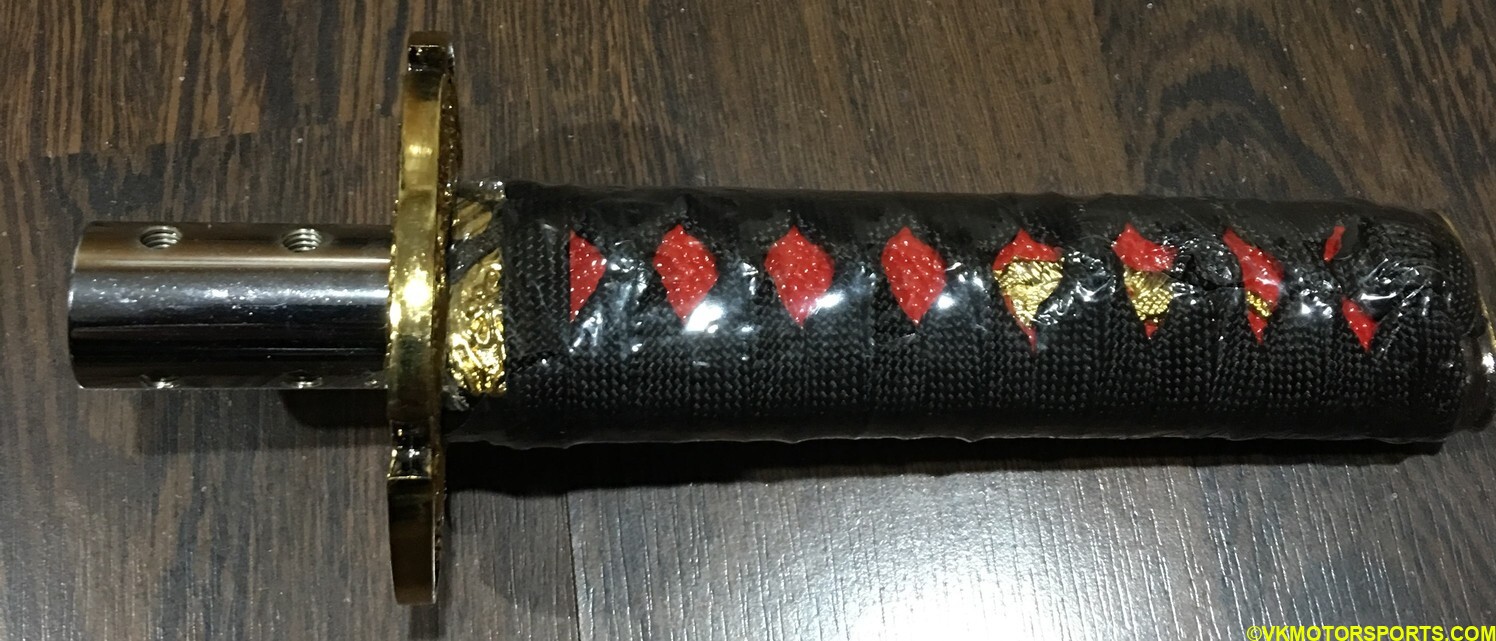 Figure 1. Side-view of shifter handle
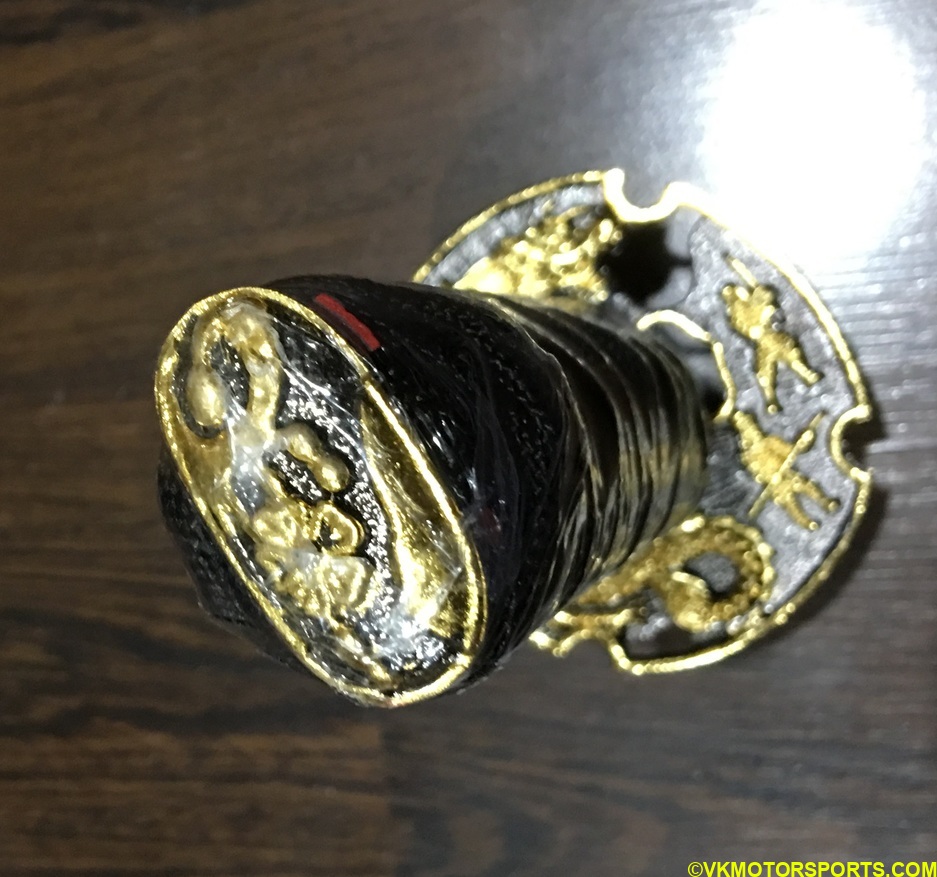 Figure 2. Top-view of shifter handle
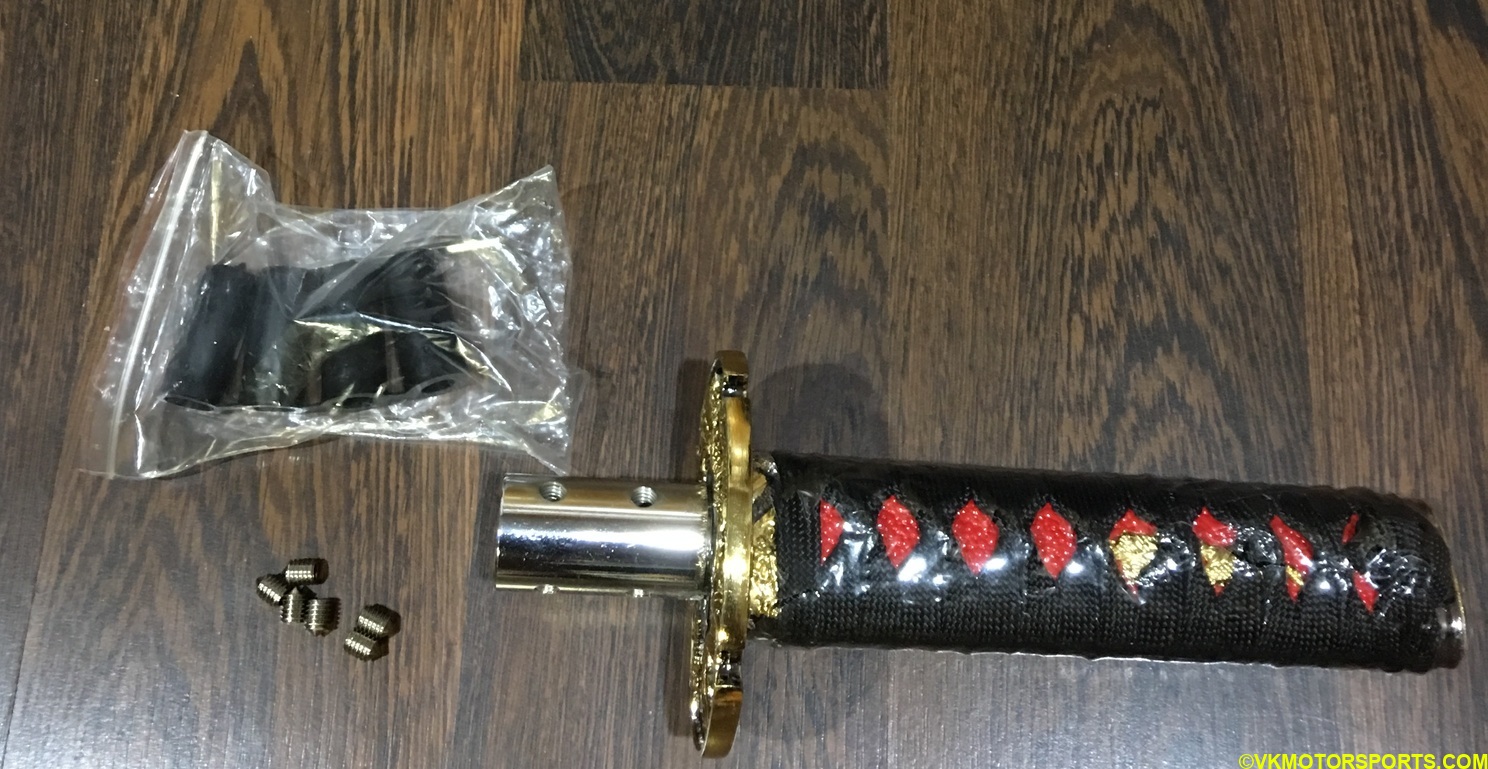 Figure 3. The handle, adapters and screws in the package
The first step is to rotate the OEM shift knob counter-clockwise (Figure 4) until it comes off as seen in Figure 5. I used a glove to rotate the knob since it gave some extra grip.
 Figure 4. Rotate the OEM shift knob counter-clockwise
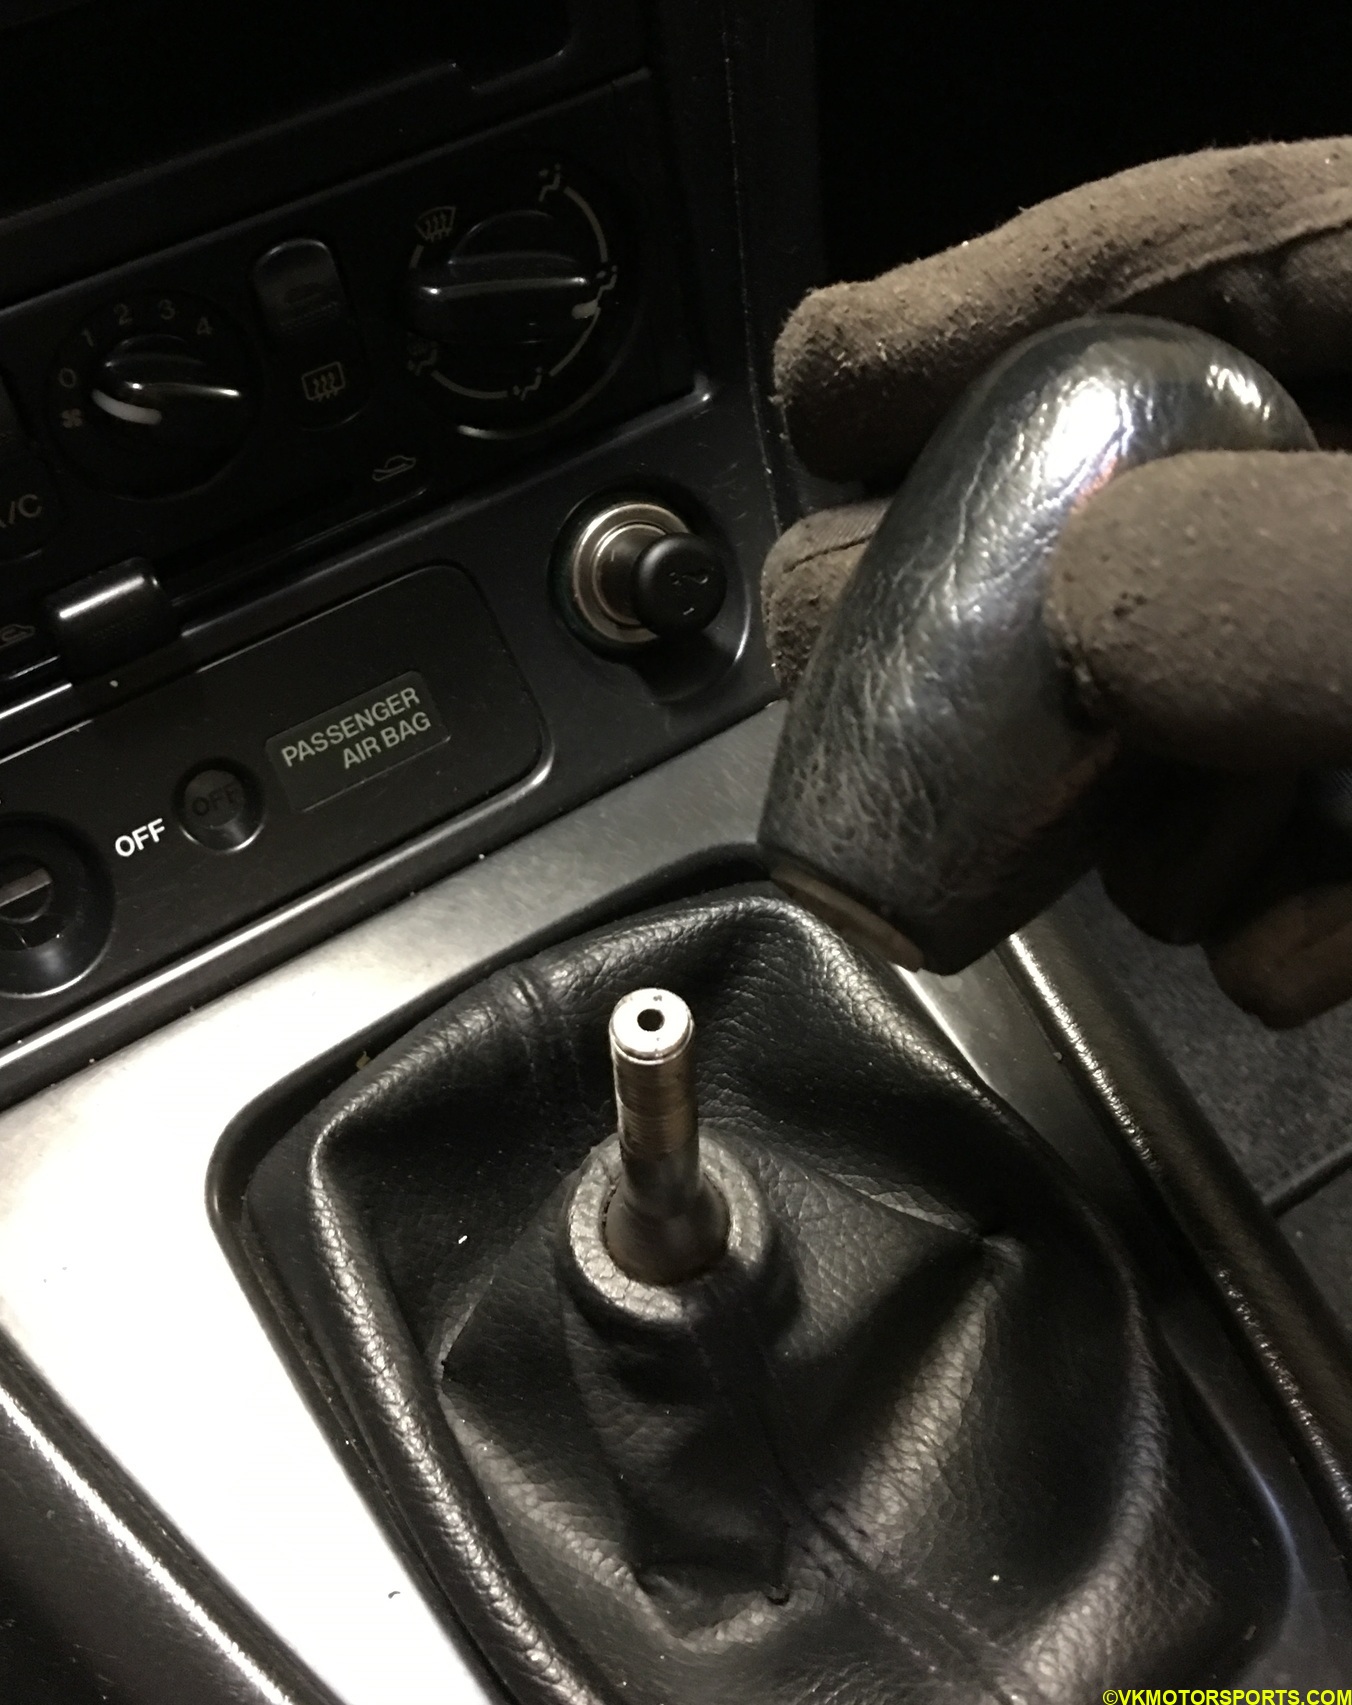 Figure 5. The shift knob finally comes off
Select the adapter that came with the Samurai sword handle that fits the tightest on the Miata’s shifter stem, and tighly install it as seen in Figure 6.
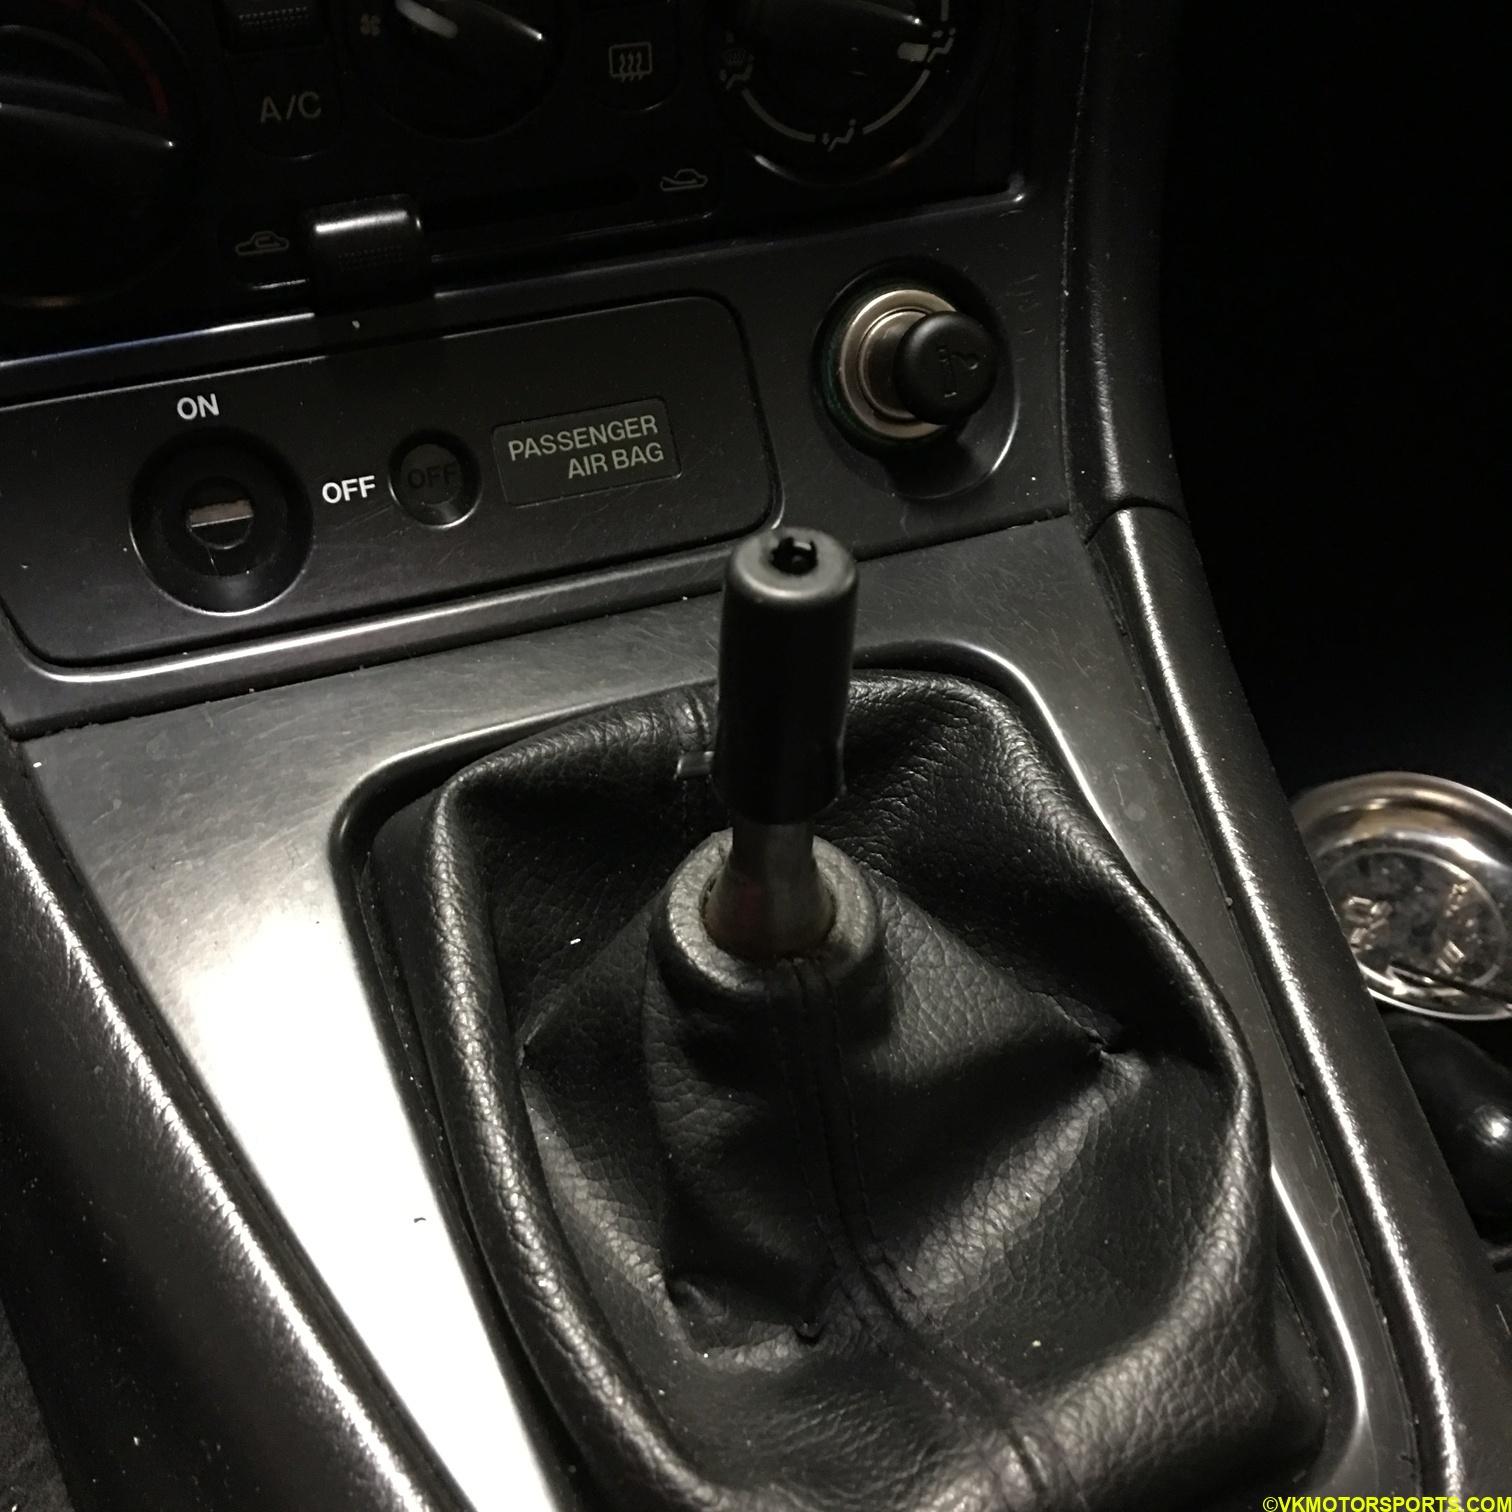 Figure 6. Install the tight-fitting adapter on the shifter stem
Next insert the sword handle over this adapter and hammer it with your hand until it fully covers the black adapter as in Figure 7.
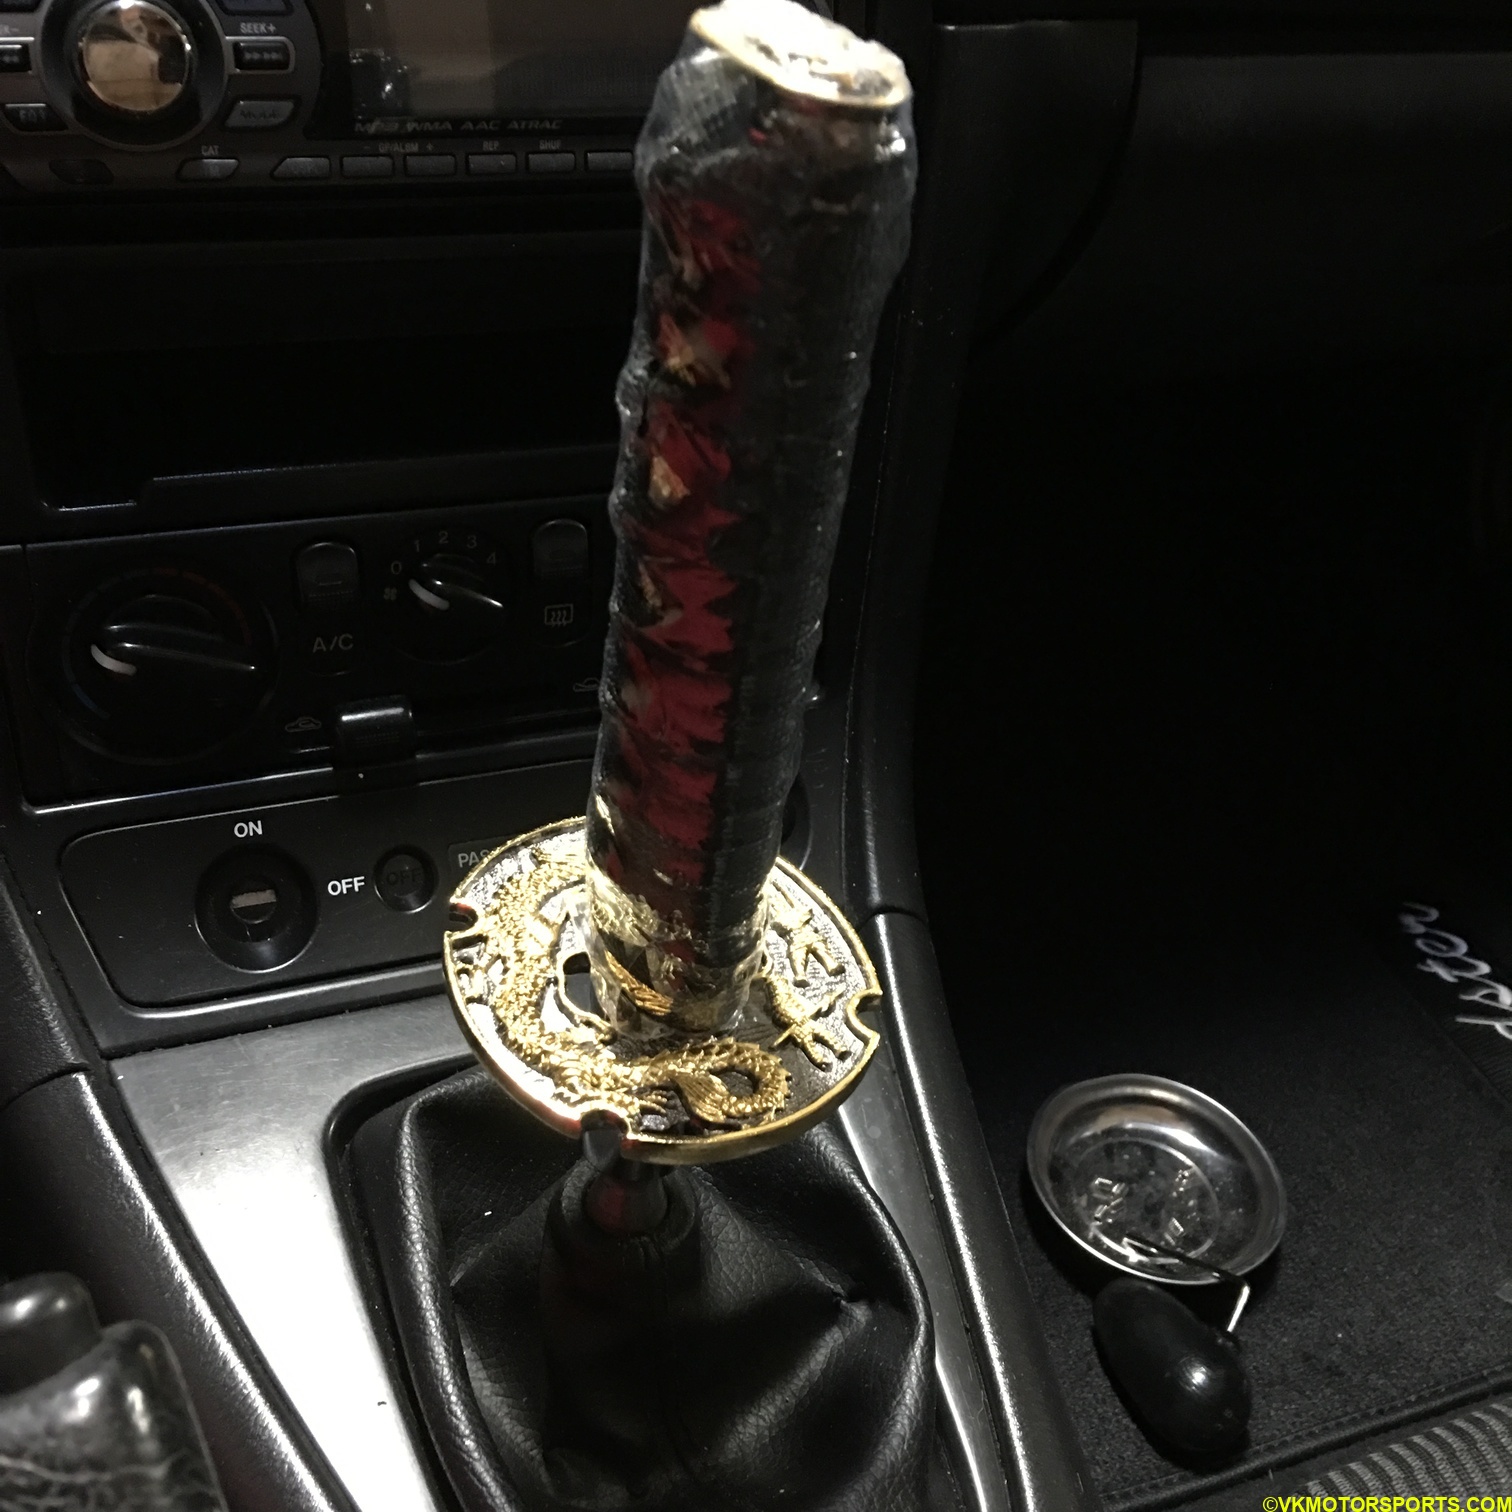 Figure 7. Insert the sword handle over the adapter
Figure 8 shows the 6 screws and an allen key that was part of the package. You need to screw the sword handle onto the shifter stem, using the screw holes in Figure 9, as tightly as possible so that the handle does not come off when the car is riding at high speeds and the shifter is vibrating. Figure 10 shows me tightening the screws and Figure 11 shows how the screws should look flush with the handle.
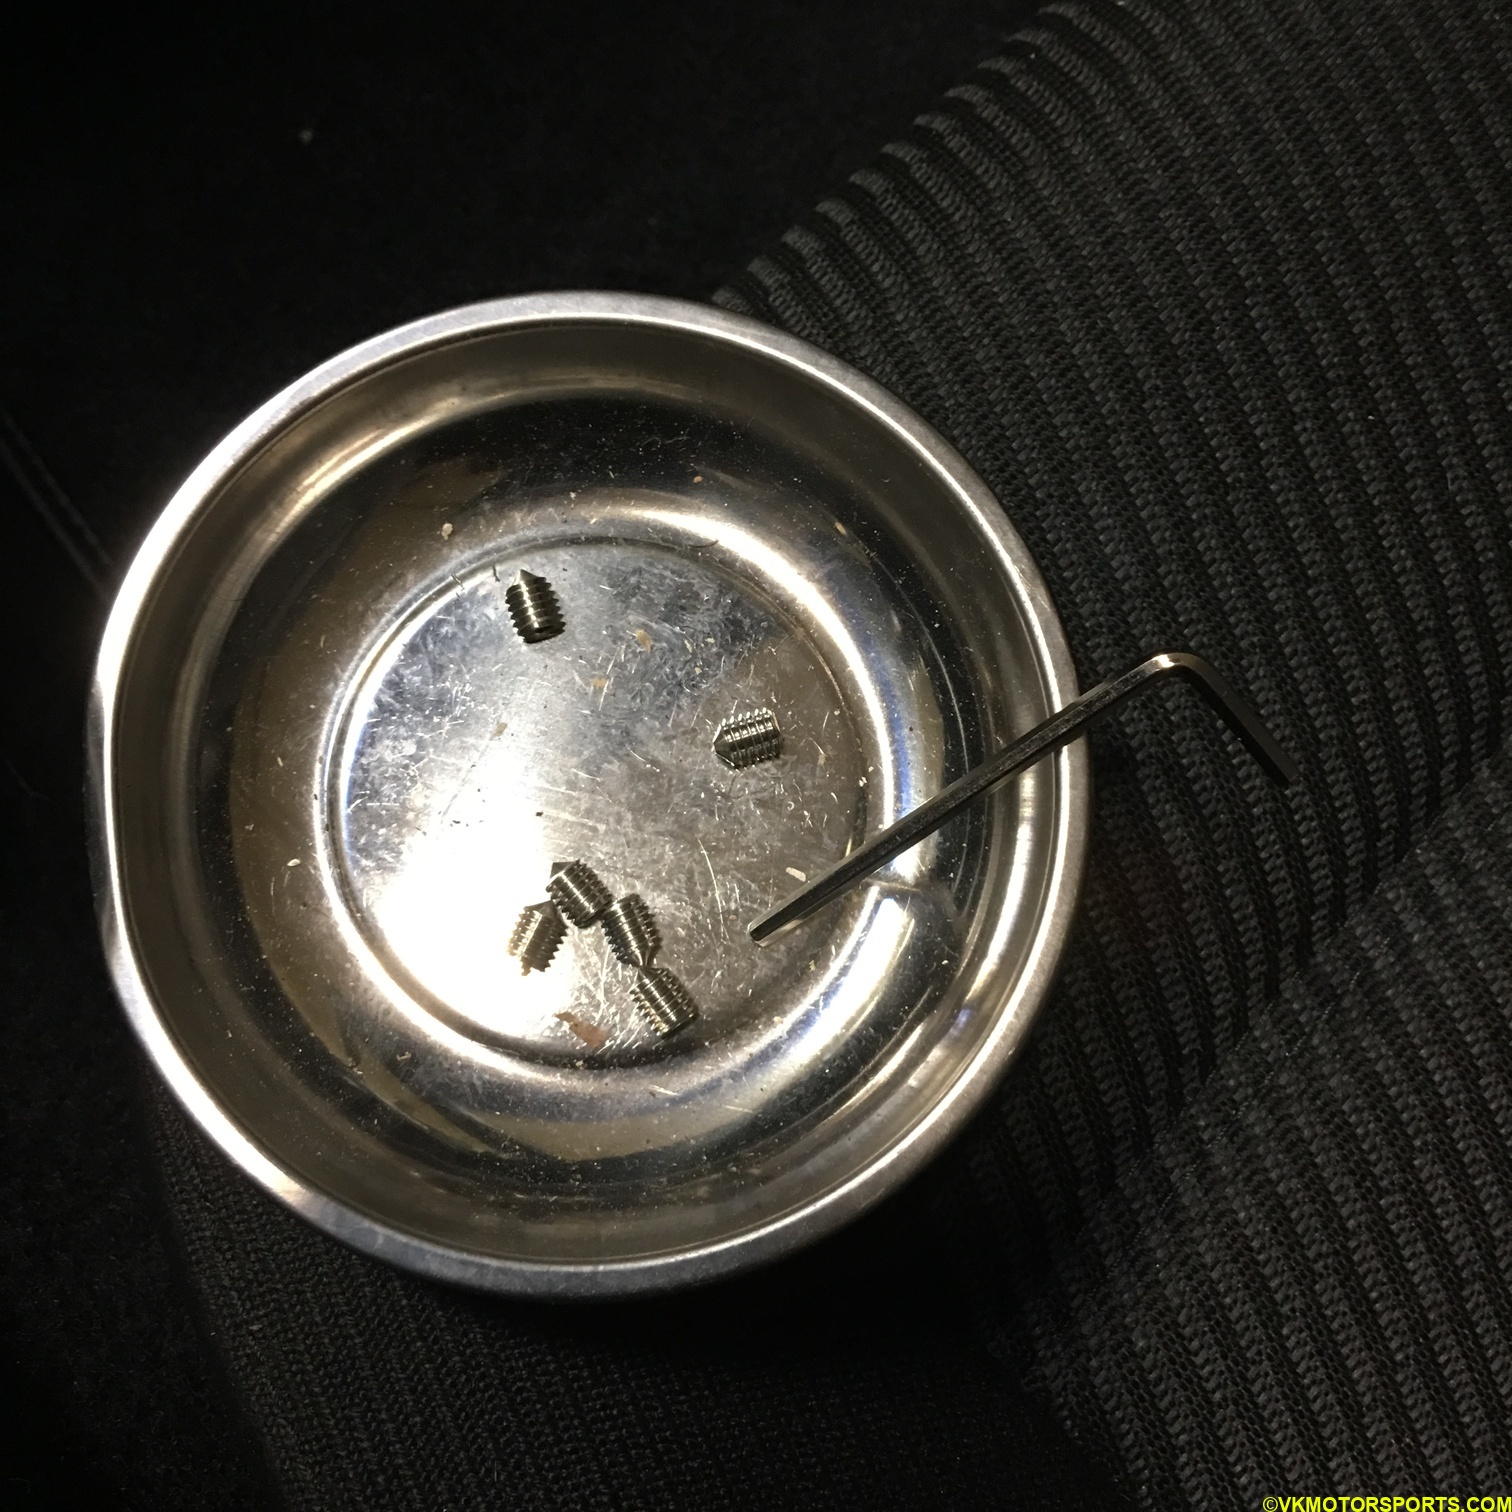 Figure 8. Screws and allen key that was part of the package
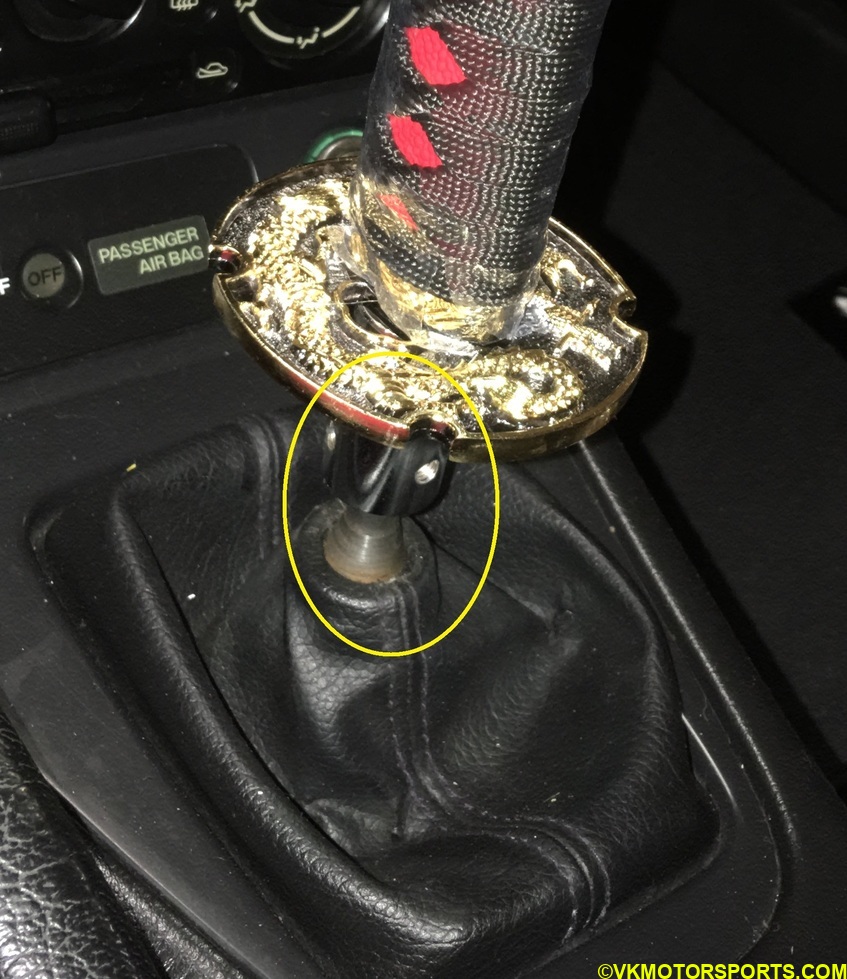 Figure 9. Screw holes on the sword handle
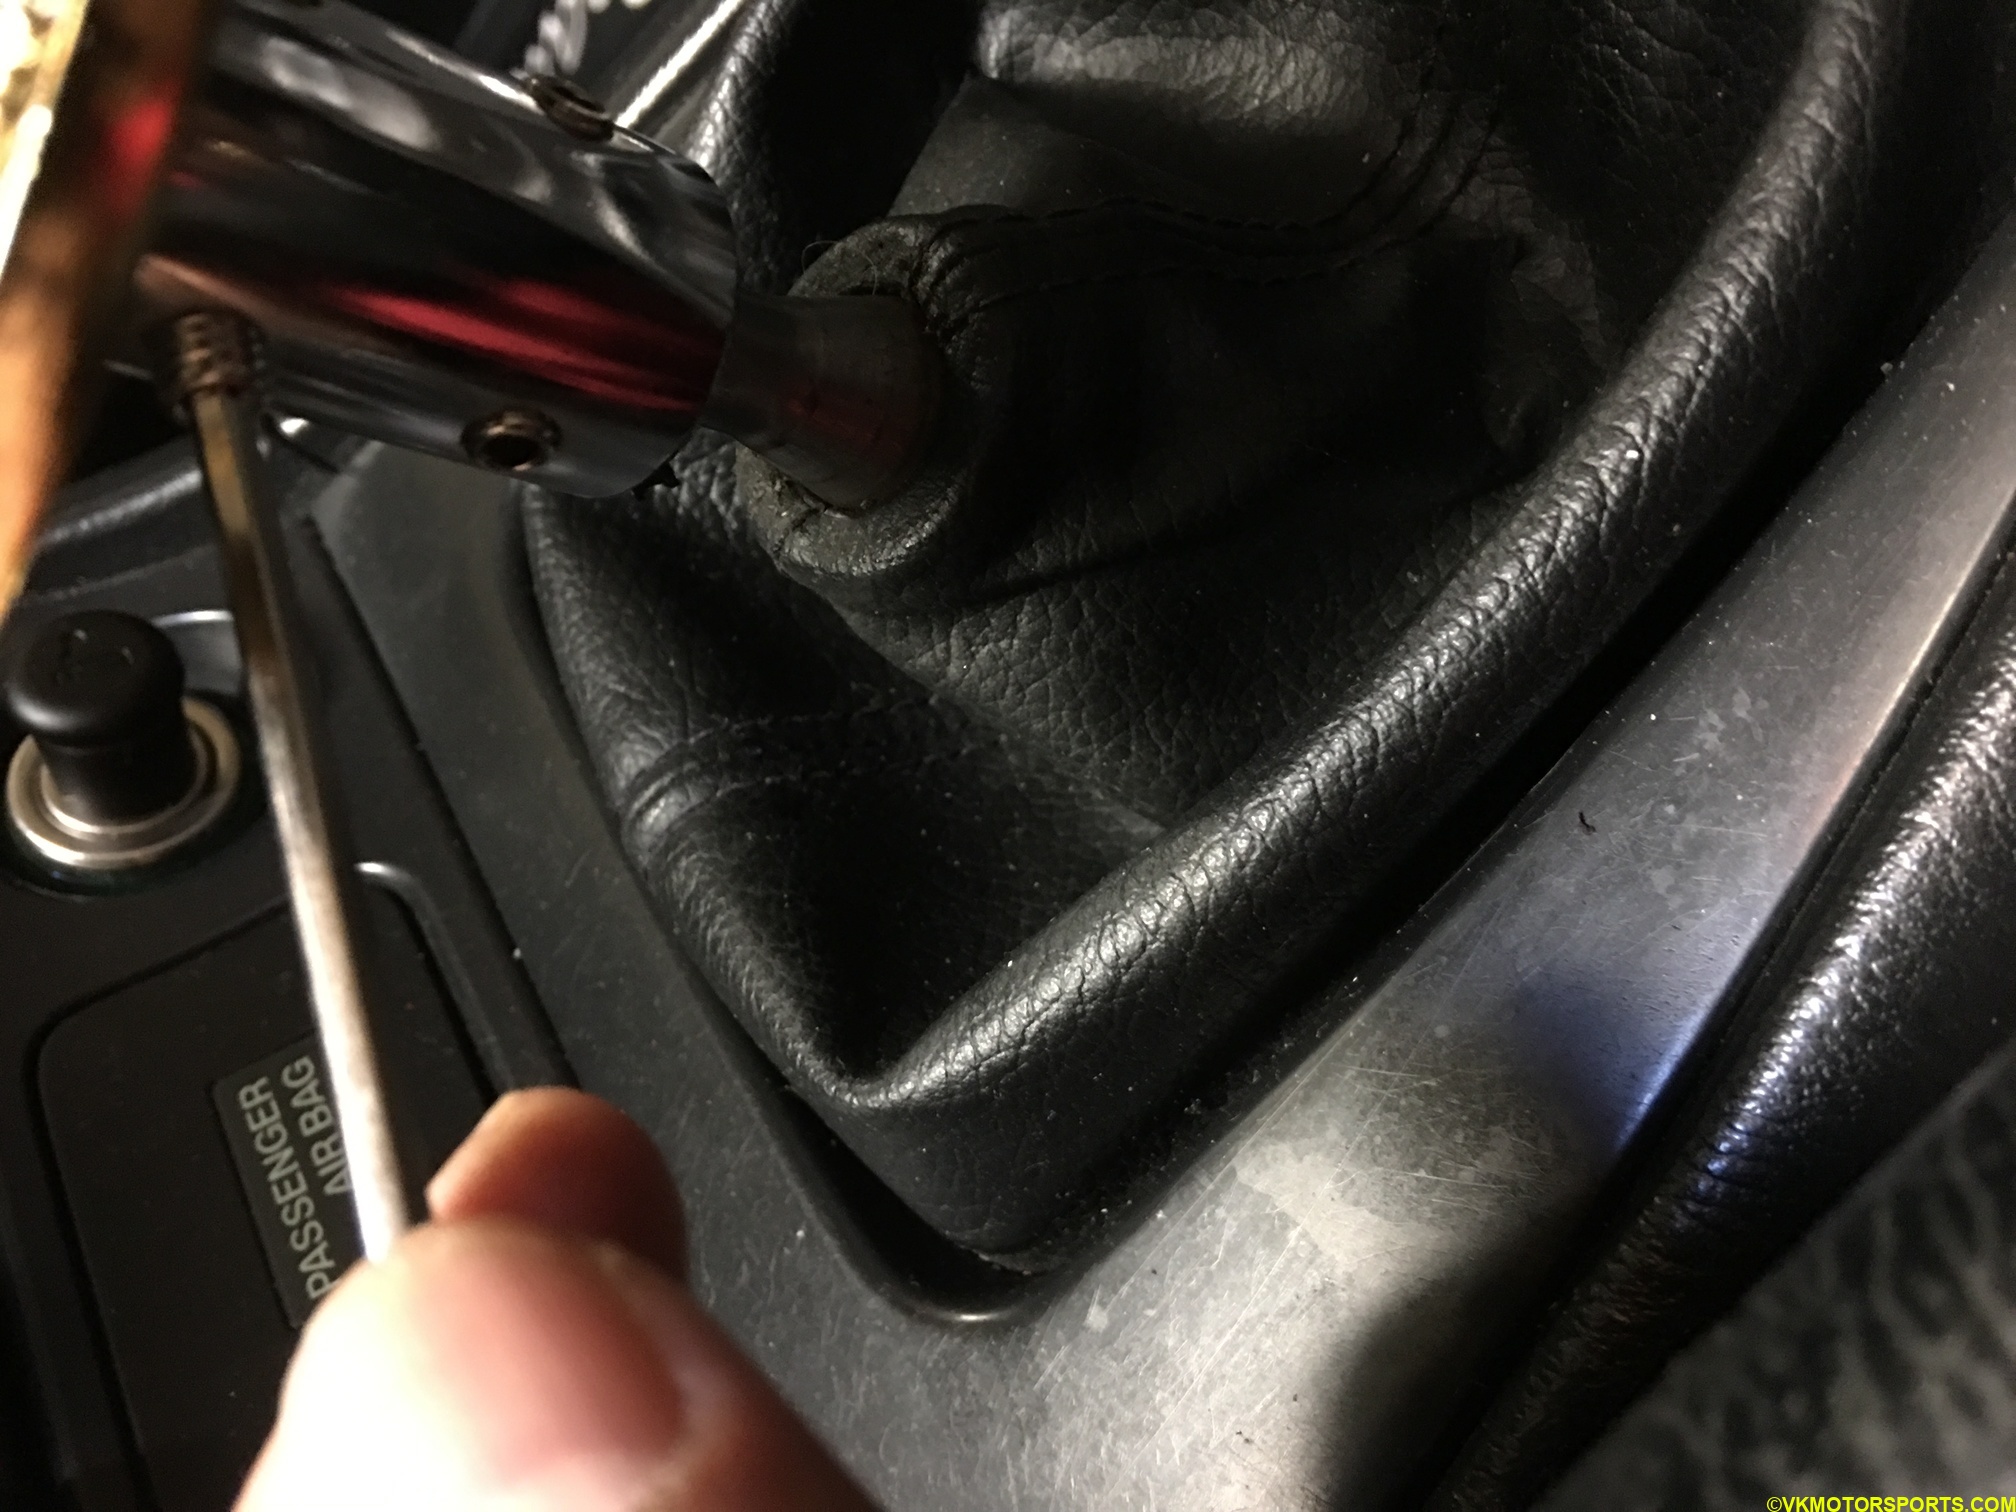 Figure 10. Using the allen keys on the screws
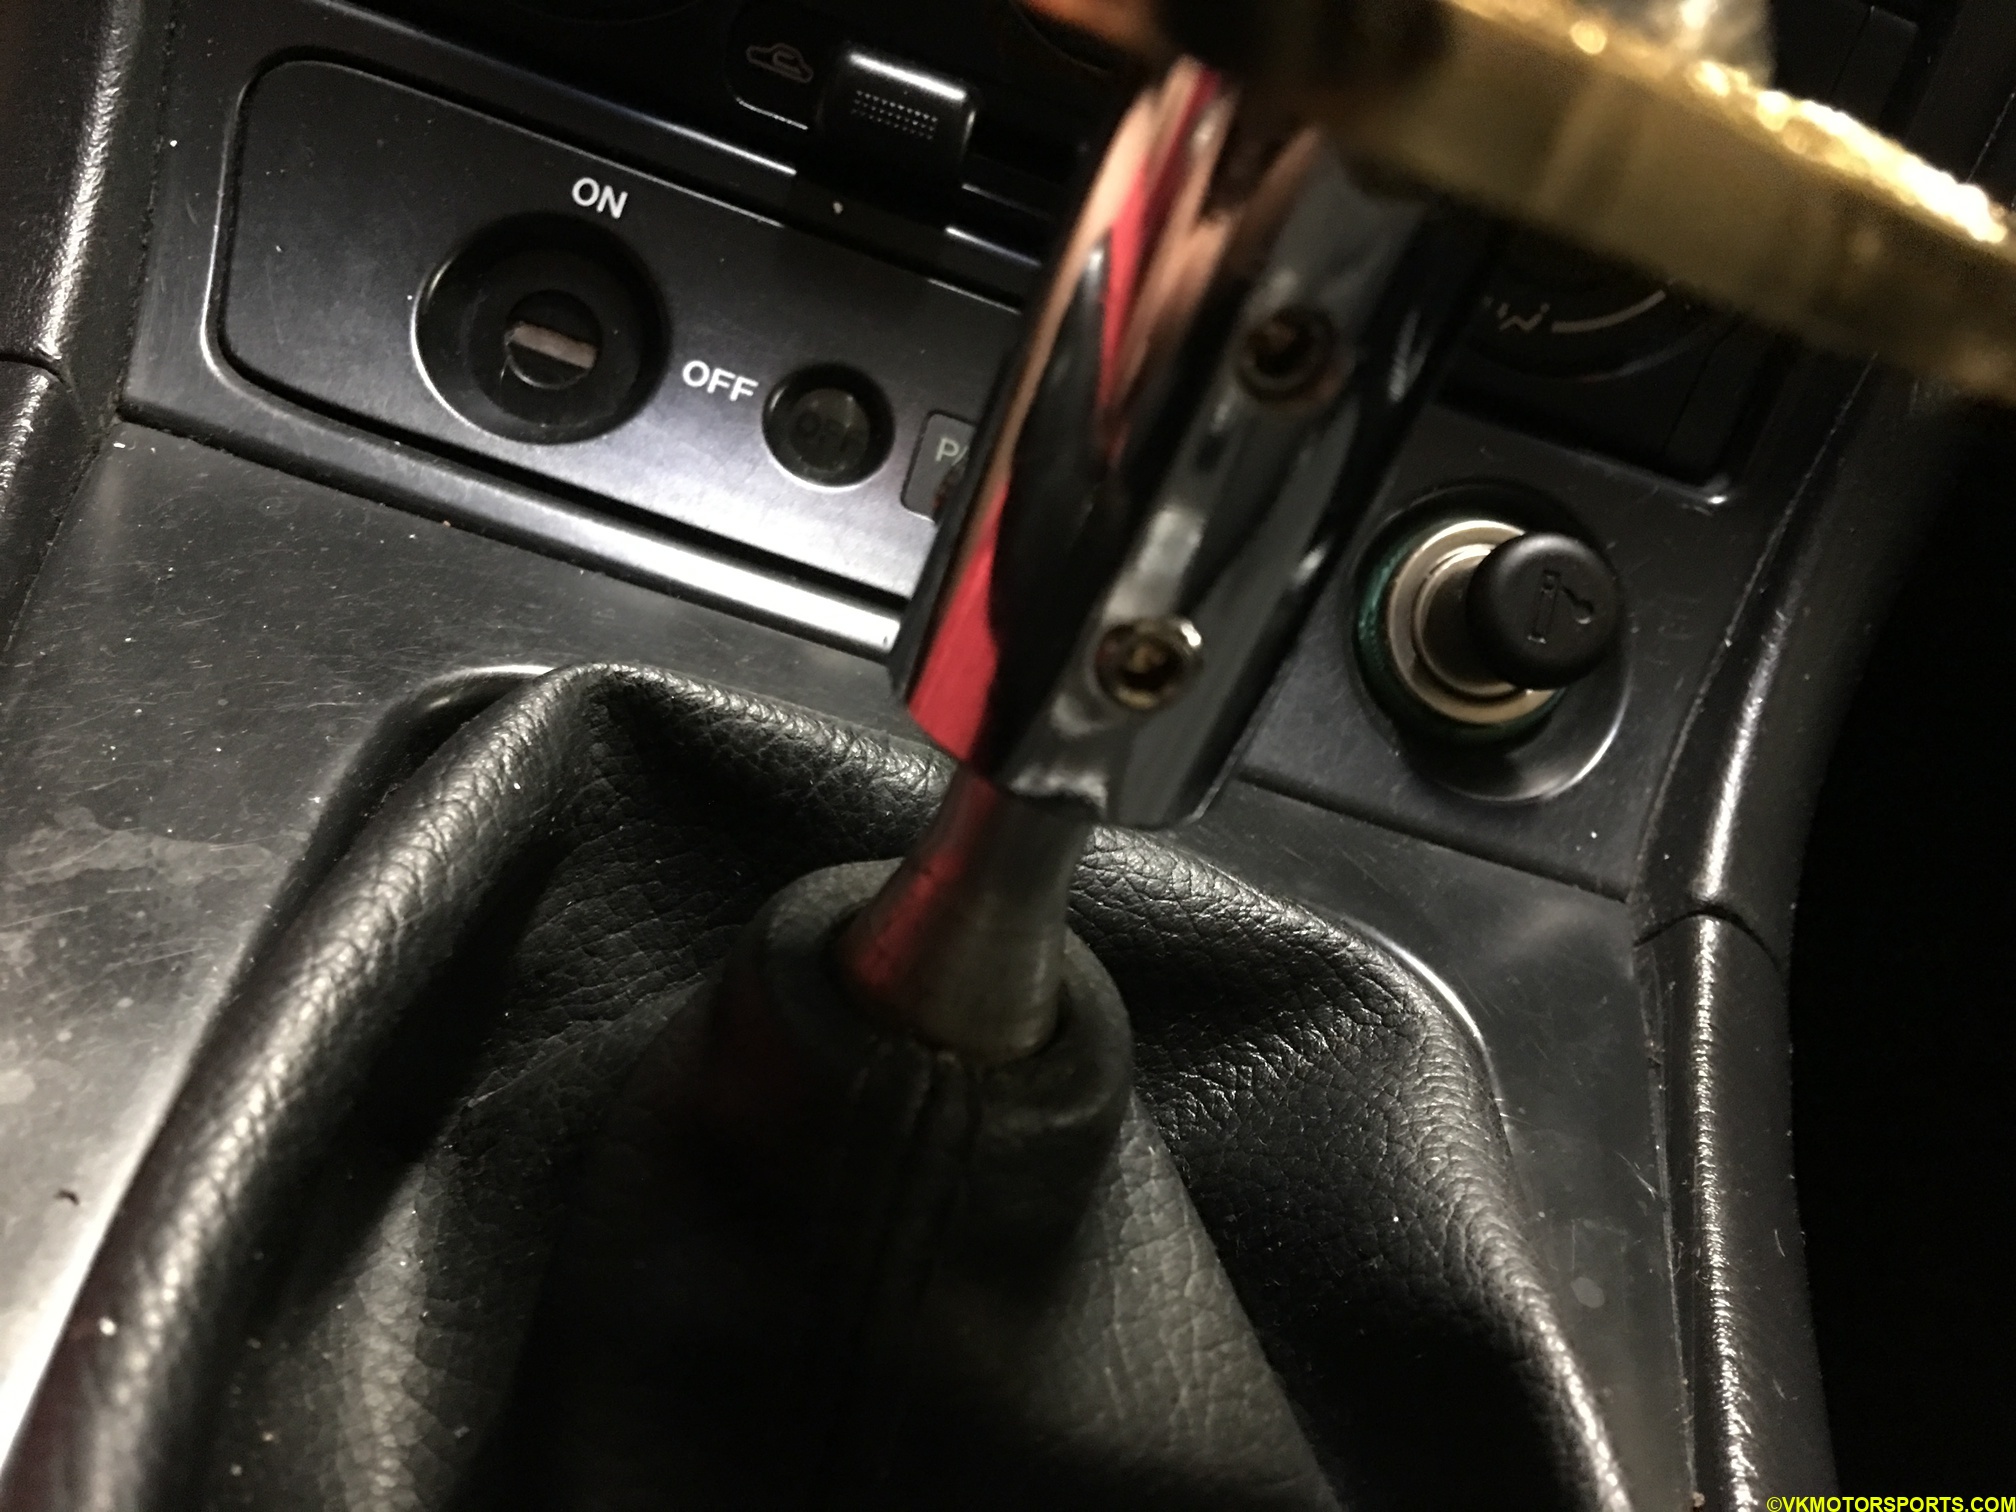 Figure 11. Complete tightening screws on the sword handle to make it flush with the surface
Once all the 6 screws have been installed and tightened, you can now take off the plastic cover on the handle and enjoy the final product. Test the shifter and see that it moves the way you want it. Figures 12 and 13 show the final images I took of the shifter once it was fully installed.
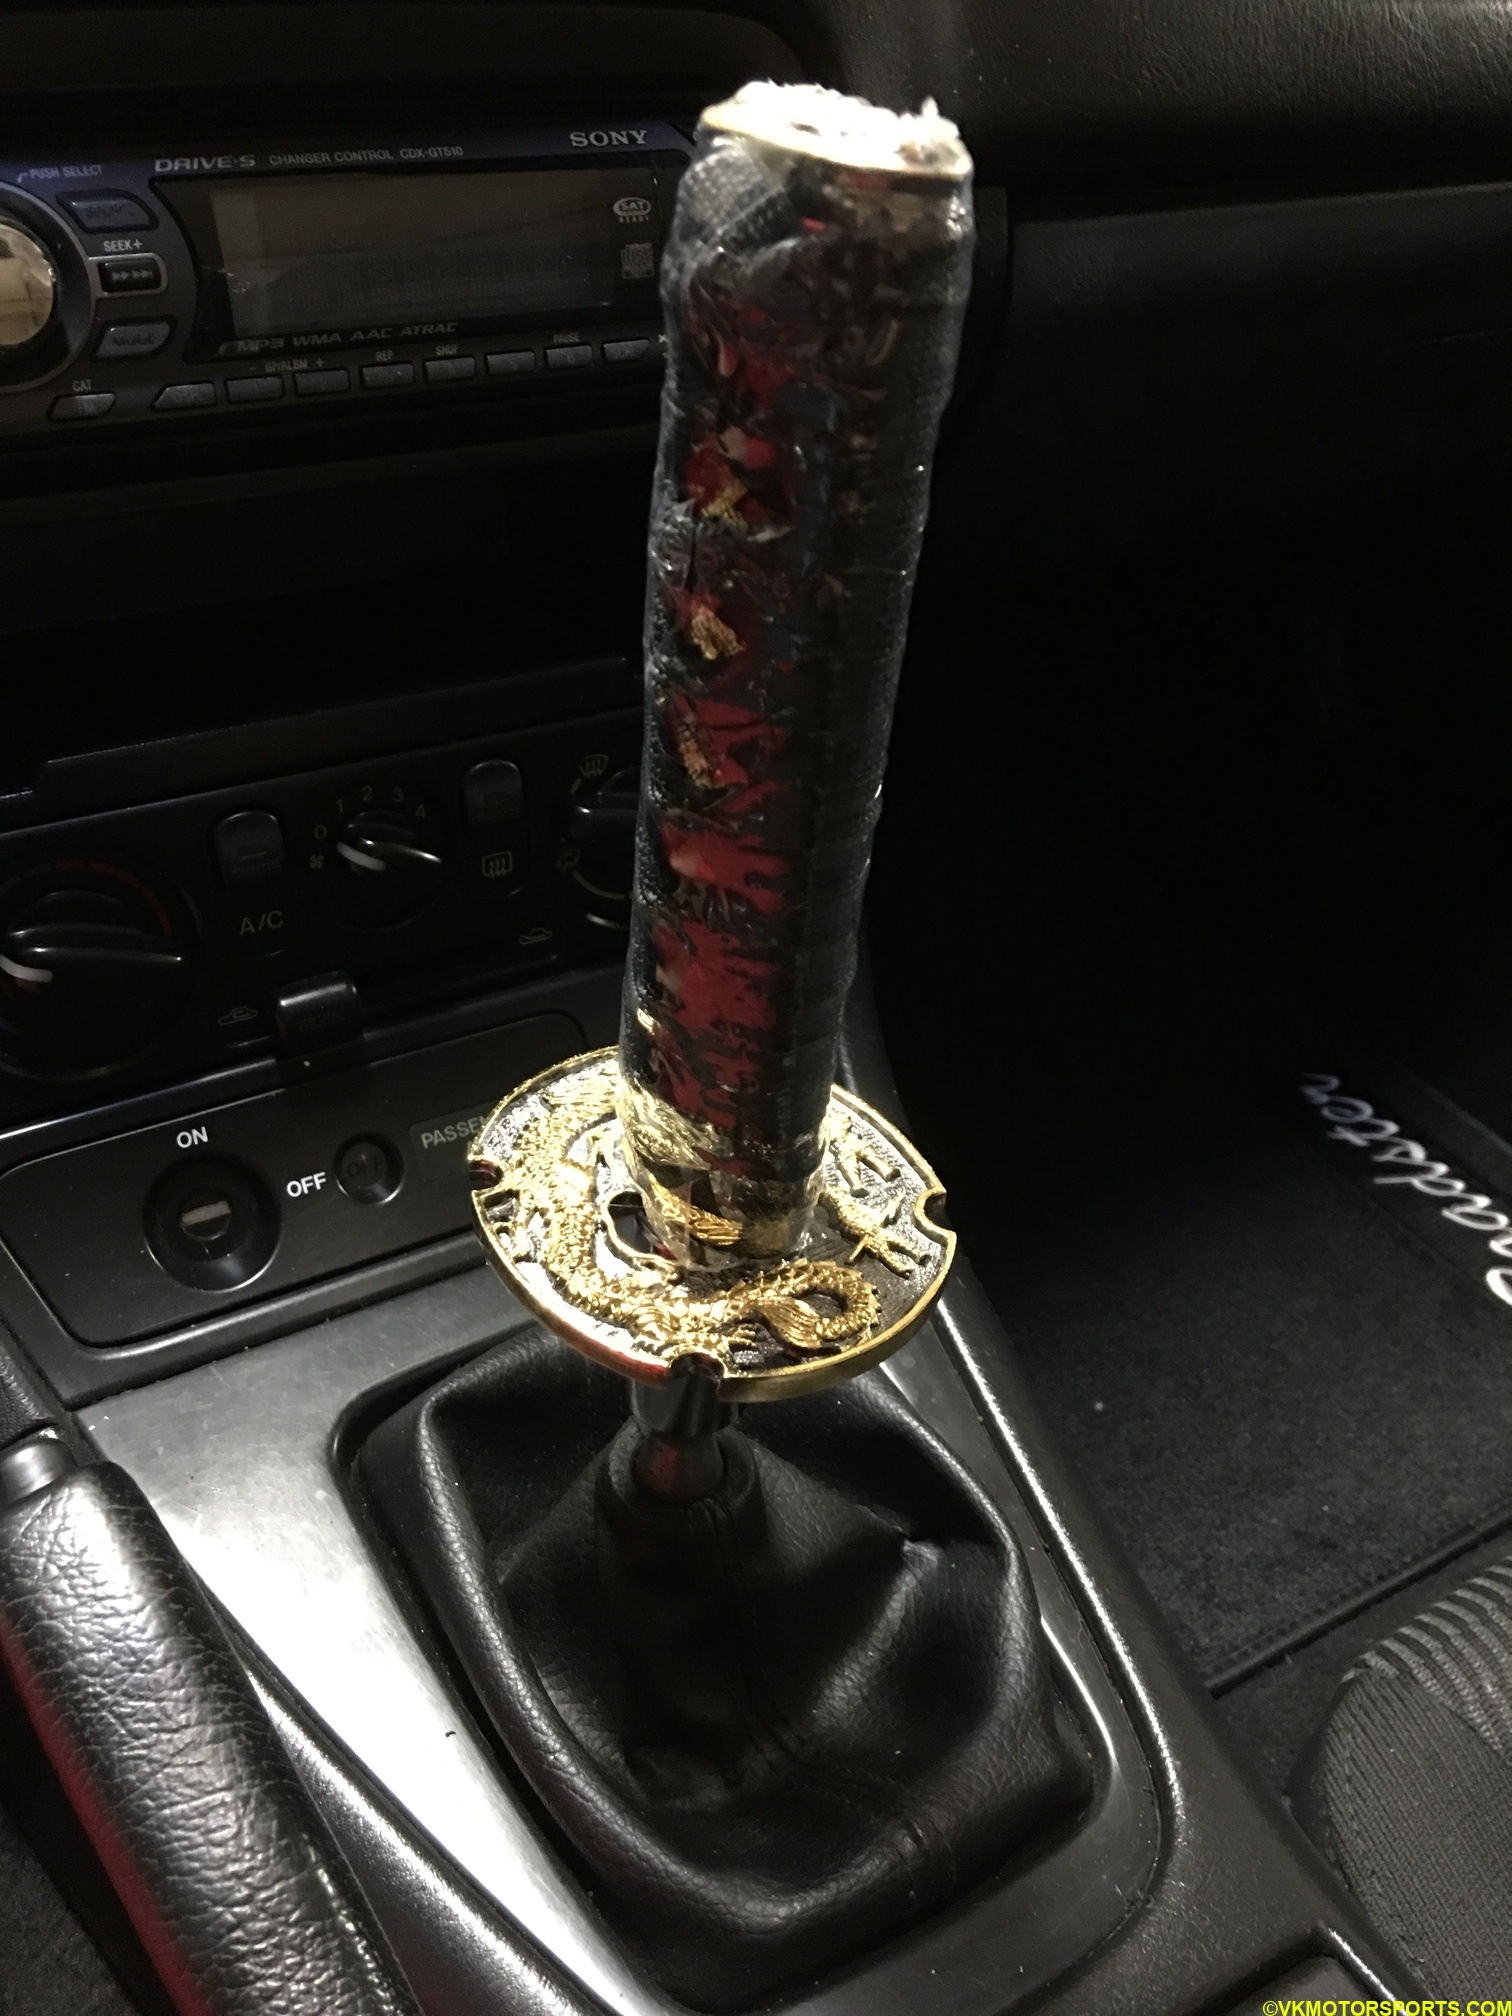 Figure 12. Close-up of the new shifter sword handle
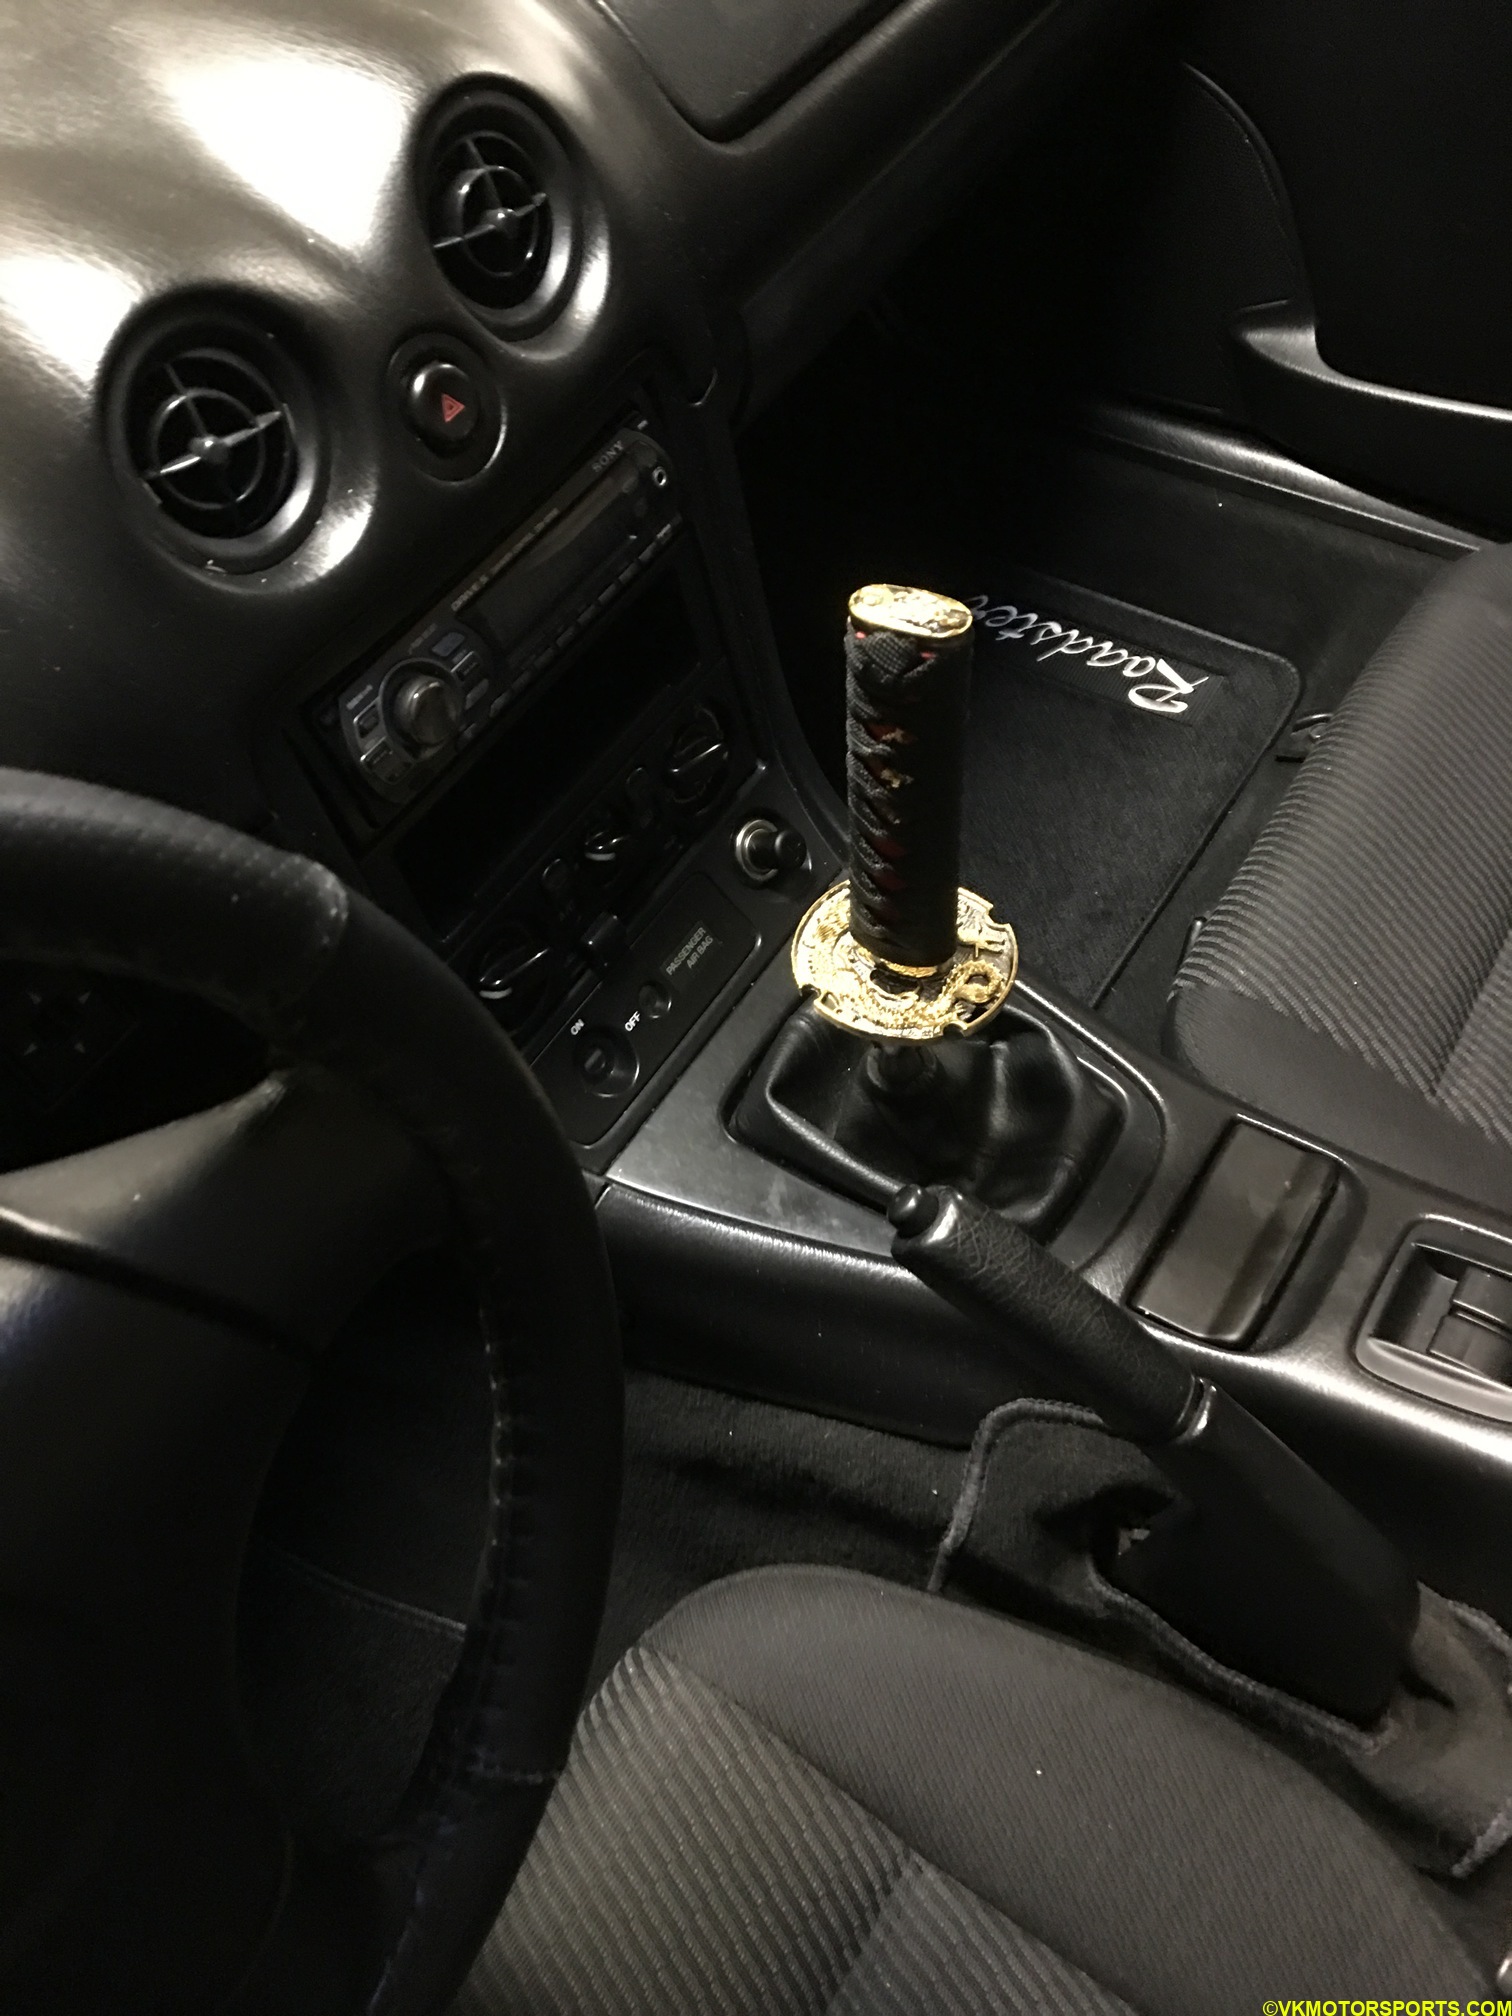 Figure 13. Better view of new shifter sword handle from outside the car