The Miata’s hand brake (or e-brake or parking brake) did not keep the car still. The car would move anyway, so I used to keep it in gear when I parked it. It was time to fix the parking brake before I took the car to the DMV for getting the emissions inspection sticker later this week. Fixing the parking brake is quite easy, but it requires removal of the rear wheels.
What you want to do is to make sure that when the parking brake lever is engaged (or pulled up), the rear brakes are engaged too and the wheels do not move. So you want to jack up the rear of the car or use a lift like I did. There is a special nut that covers up a bolt that turns via a 4mm hex key (or Allen key) to manage the control from the parking brake. You want to tighten all the way and then loosen by ⅓ (one-third) of a turn. You have to repeat this for both the rear wheels. Engage the parking brake and try to move the wheels, and if they do not then your job is complete. Below is a step-by-step process that I followed.
Step 1: First step is to remove the rear wheels. I am only showing the process for the passenger-side rear wheel here. The driver-side rear wheel is a mirror image of the passenger-side.
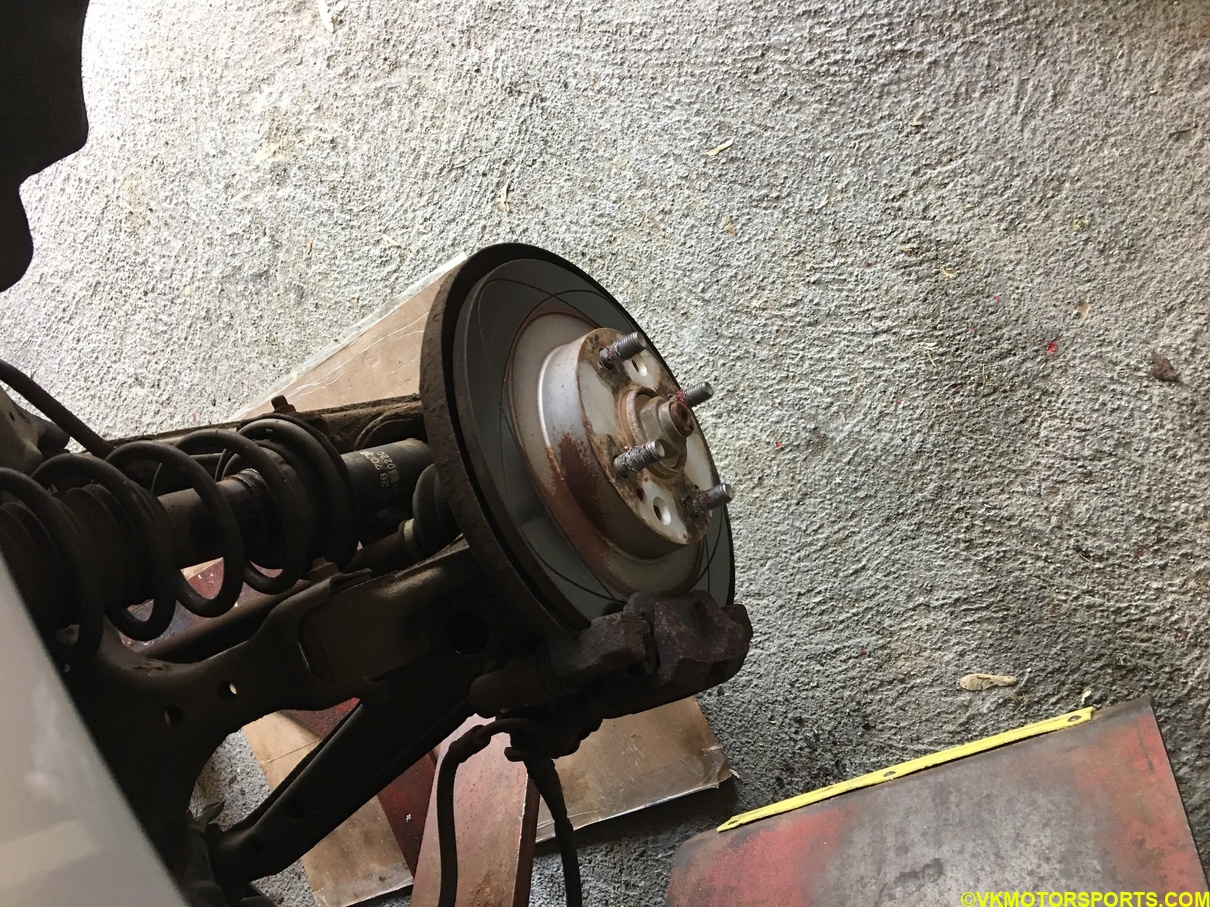 Figure 1. Take off the rear wheel
Step 2: Locate the correct bolt (pointed by the red arrow in Figure 2) and using a 14mm socket take it off. Be careful to not remove the wrong bolt, as it might lead to brake fluid leakage.
 Figure 2. Remove the bolt pointed by the red arrow
Step 3: Using a 4mm hex key (Figure 3) you must tighten the hidden bolt inside (Figure 4) fully, and then loosen by ⅓ (one-third) of a turn.
 Figure 3. 4mm hex key with detachable handle (Home Depot)
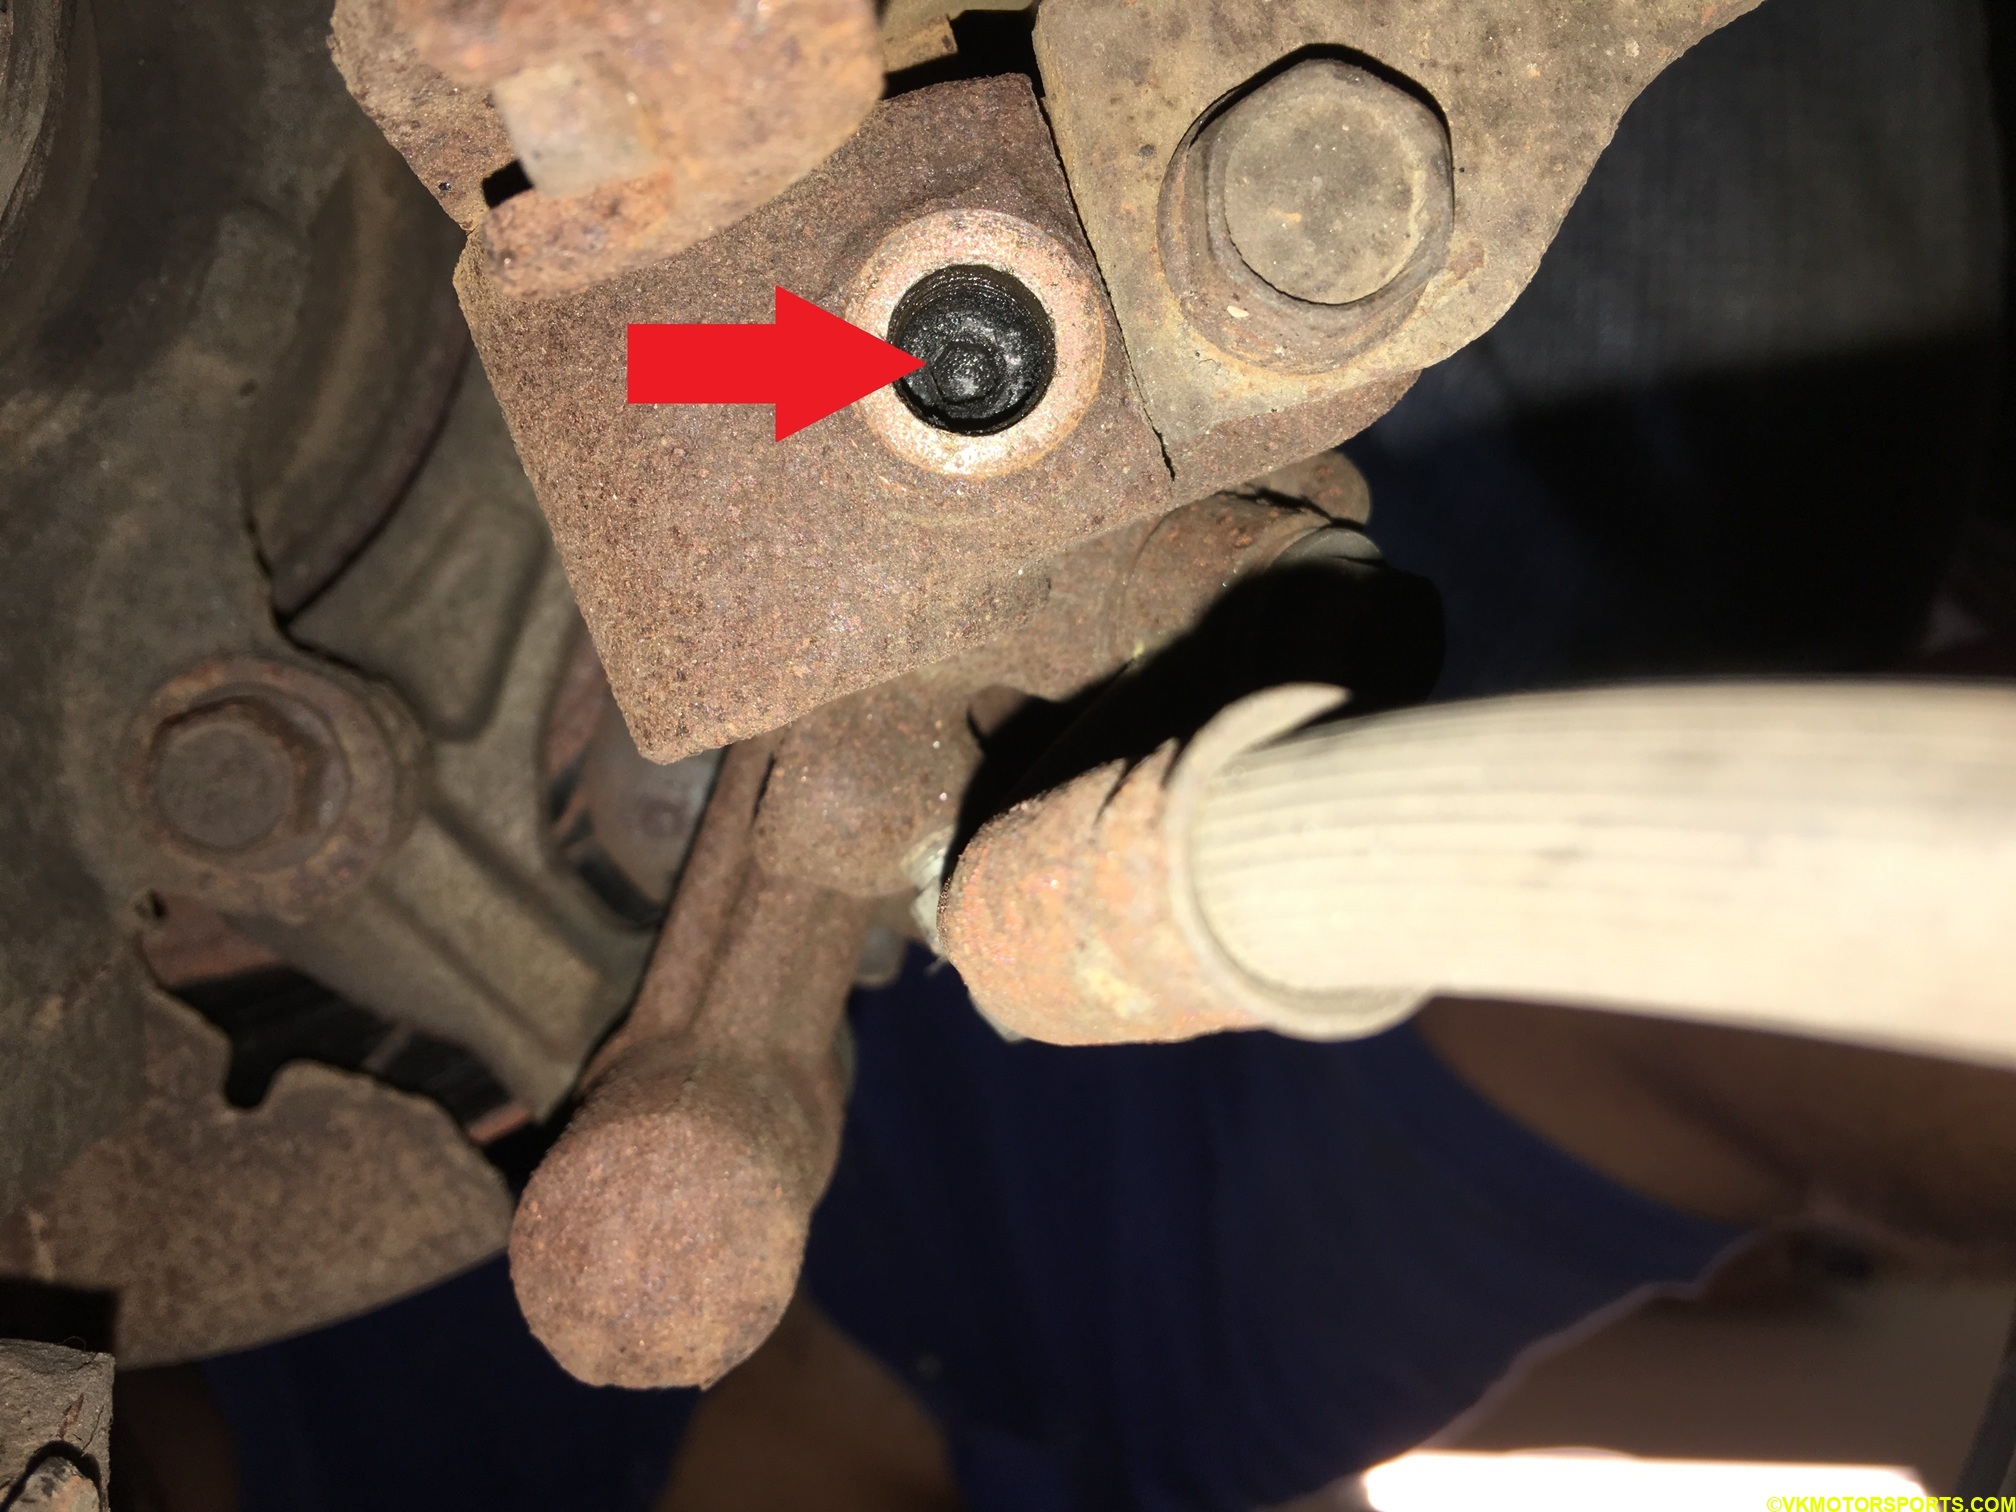 Figure 4. Hidden 4mm hex nut inside
Step 4: Now engage the parking brake and try to move the rotor. If the rotor does not move, try to hang the wheel back on and then try to move it. It should not move at all. Now disengage the parking brake and try to move the wheels. They should rotate freely.
Step 5: Now repeat this procedure for the driver side rear wheel too.
Step 6: Install the wheels back on, and remember to torque them to the appropriate specifications ~85 ft-lbs.
We now make sure that the parking brake engages in about 4-5 clicks.
Step 7: Open the screw on the hand brake handle housing (Figure 5) and take off the cover (Figure 6) carefully. It is a click-on cover, so you may use trim-removal tools to open it up.
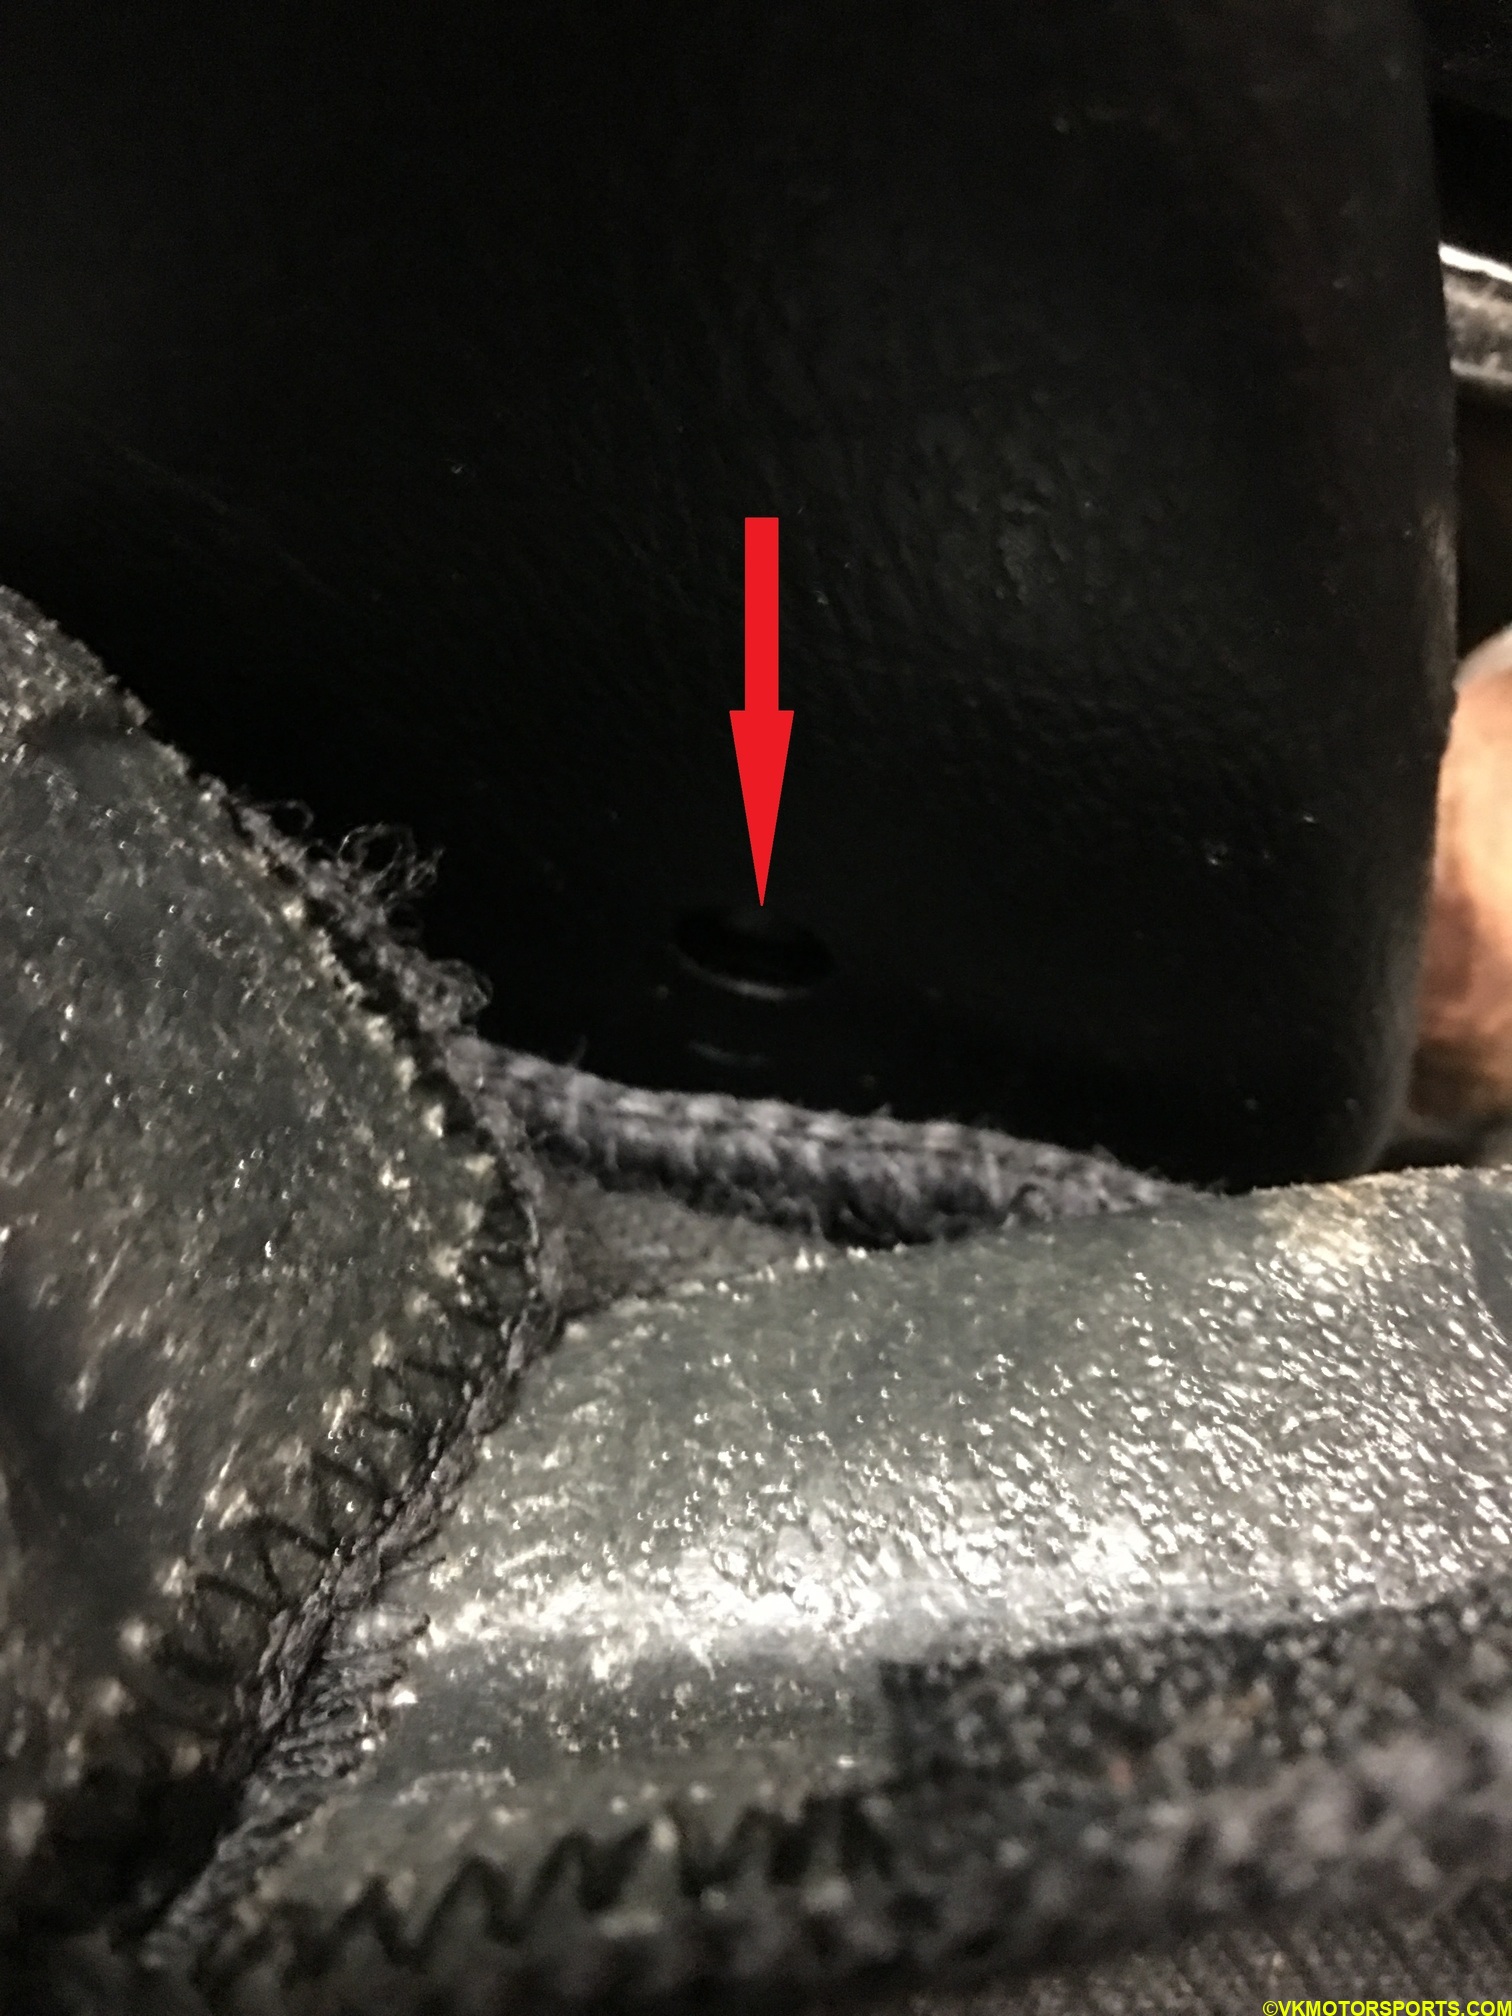 Figure 5. Hand brake cover screw
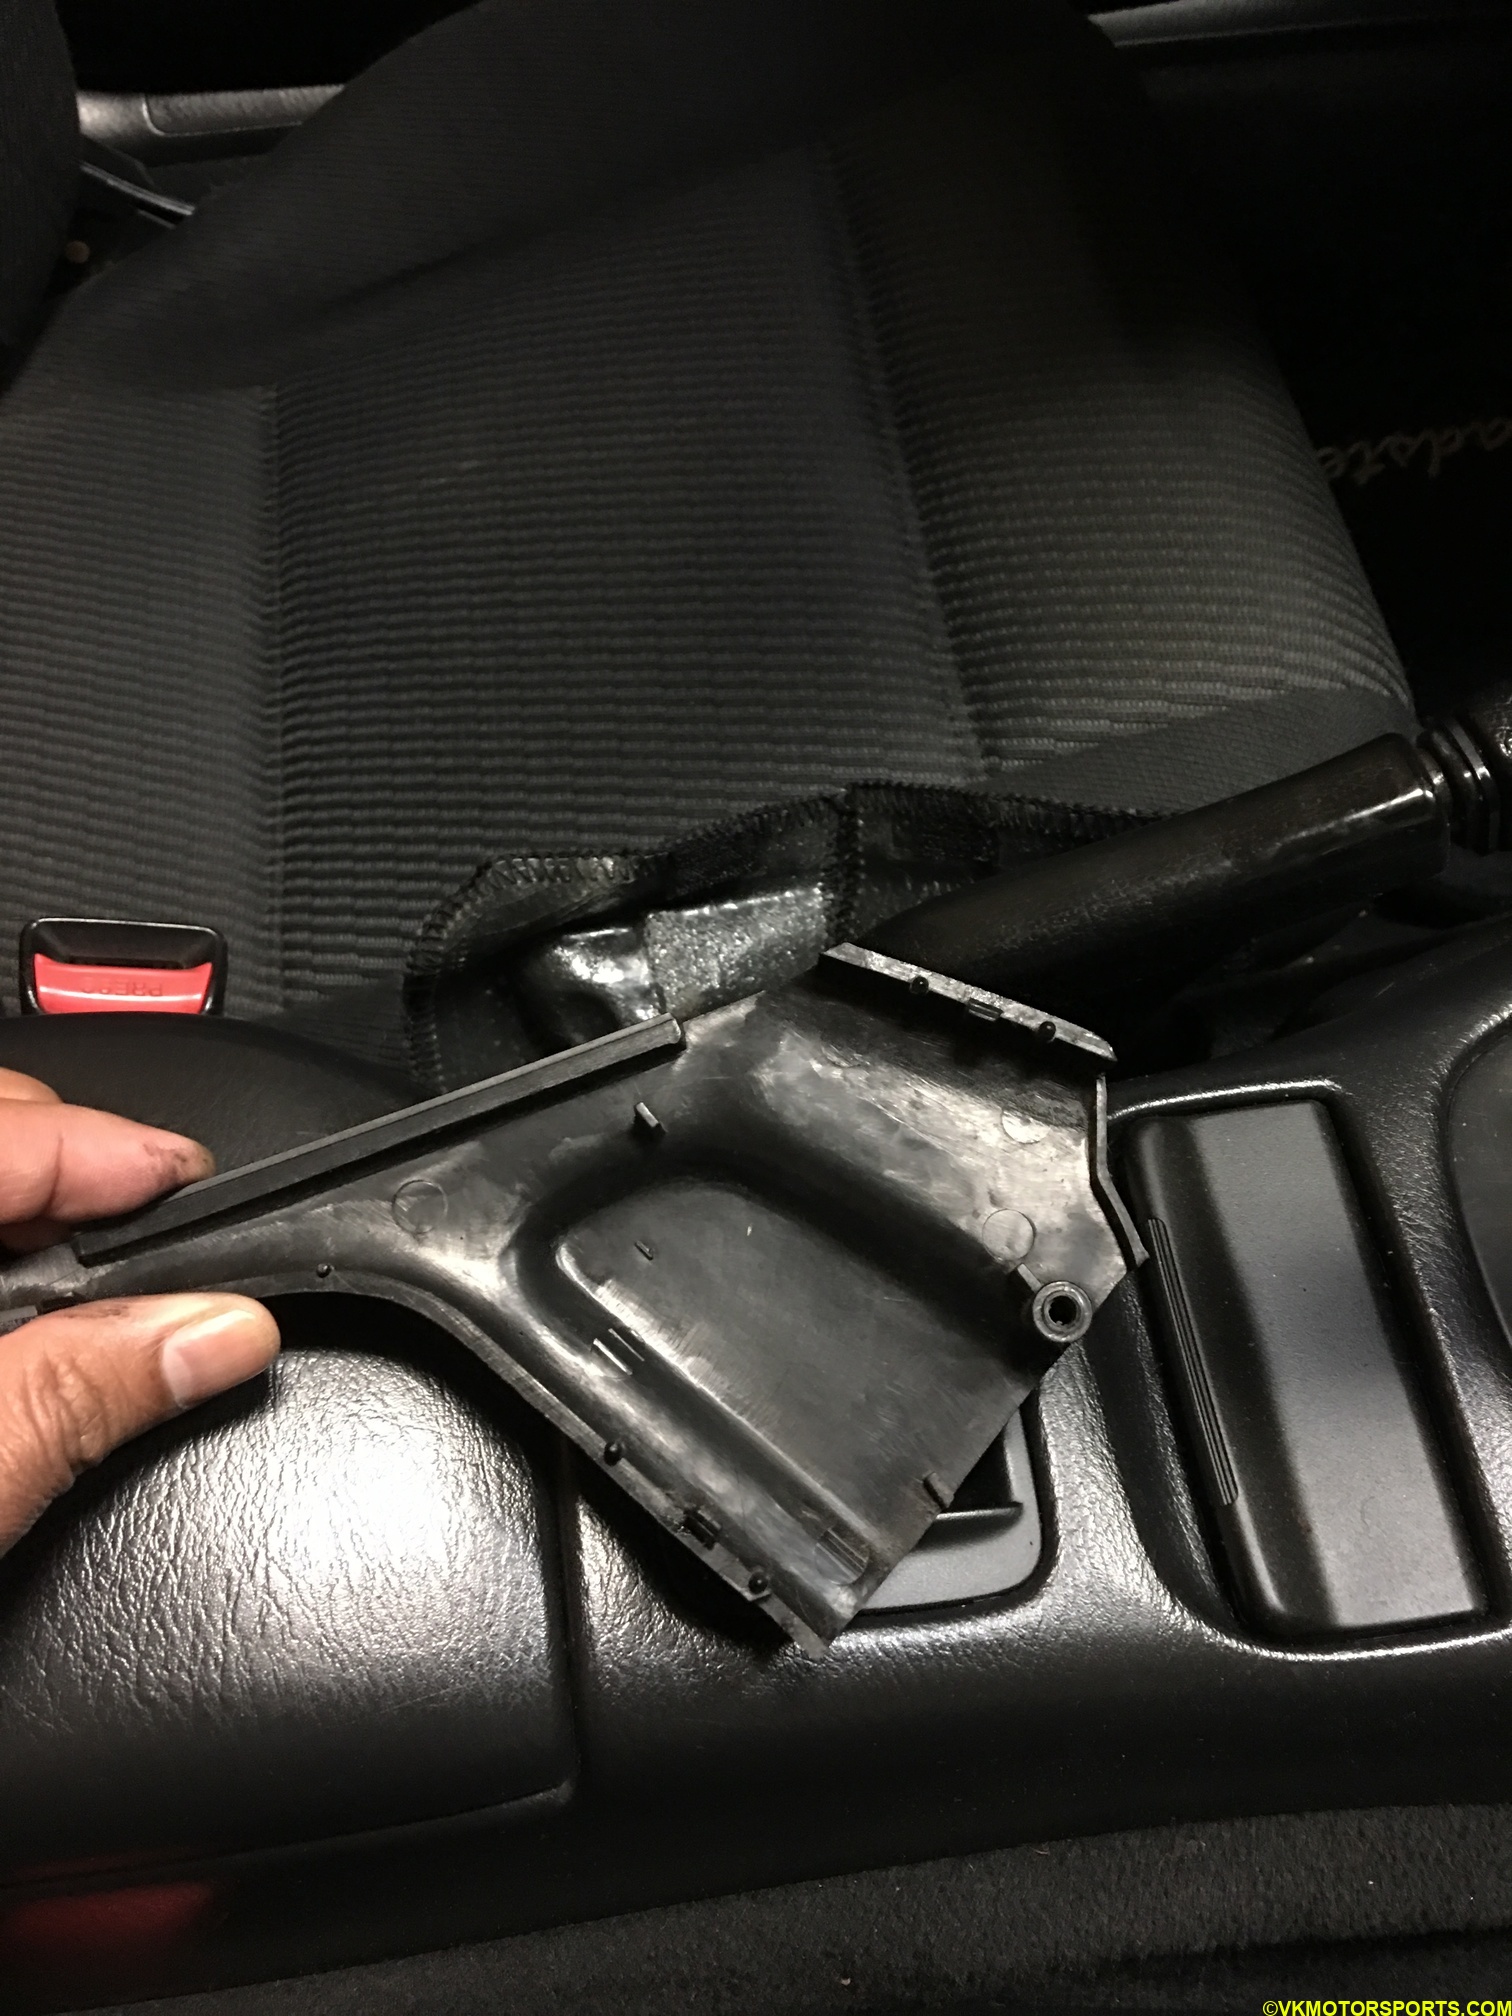 Figure 6. Hand brake cover removed
Step 8: Disengage the hand brake (it should be down).
Step 9: Using a flat-head screw driver rotate the nut (Figure 7) as needed. Then engage (or pull up) the hand brake and see if it engages in 4-5 clicks. If it does, then the task is complete. If it takes 7-8 clicks that may be fine too or you can reduce it by adjusting the nut.
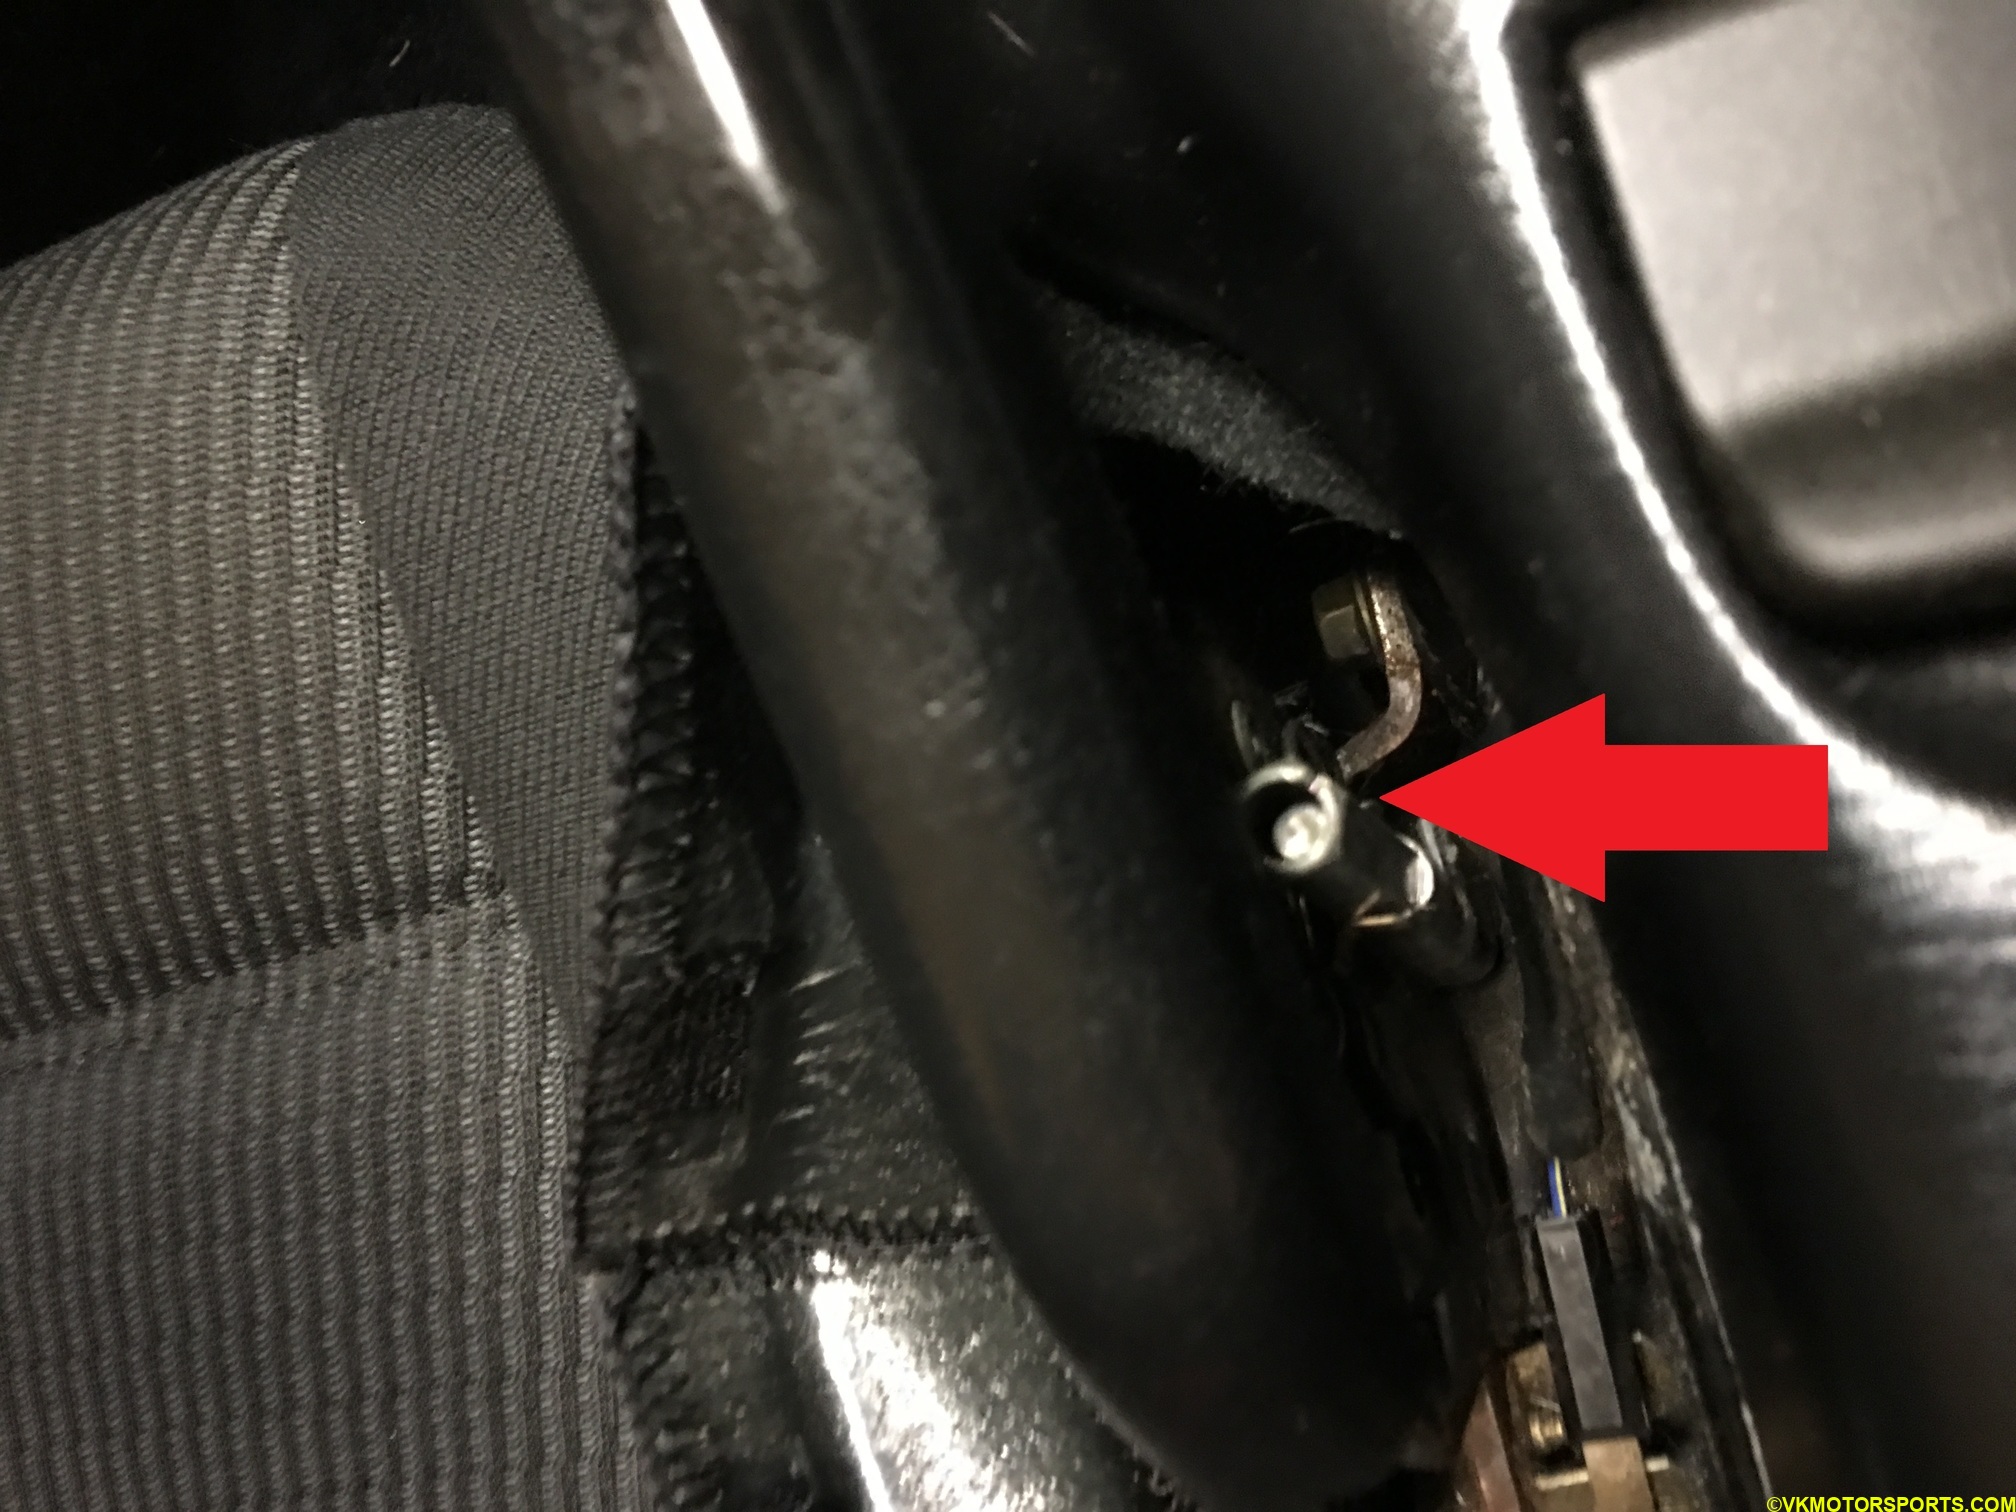 Figure 7. Hand brake click adjusting nut
Step 10: Now get the car off the jack stands or lift and try to engage/dis-engage the parking brake on a sloping surface, such as your driveway or street, and see if the adjustments worked.